When making an RPG, a minimum of one player character (actor) is necessary.
So let's begin by creating an actor.
In RPG Maker, members who can join the party in-game are known as "actors".
Additionally, the enemy characters and actors who participate in battles are sometimes collectively referred to as "battlers" as well.
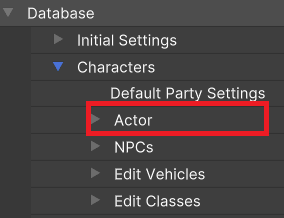
To create an actor, navigate to Character > Actor in the RPG Data Menu.
Here you can see a number of actors already registered to the default game, but for this example, let's create a new actor.
In this chapter, we will only deal with actor names and graphics. Other parameters will be explained later.
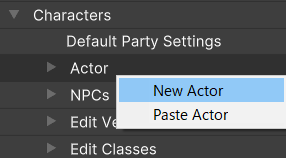
●Right click on actors
First, right click on Actor, then select "Create New Actor".
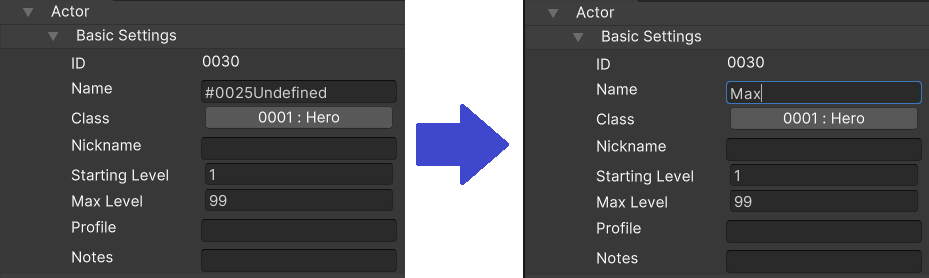
At the end of the list, an entry called "#0025_Unnamed" will be created.
Selecting the newly created actor will display that actor's detailed settings in the RPG Setting on the right.
Let's start by entering an actor name. Any name is fine, but we will use "Max" in this example.
In addition to the name, you will see a number of other available parameters.
The general principle of Unite works just like this: select an item in the RPG Data Menu, then adjust the settings for that item in the RPG Setting.
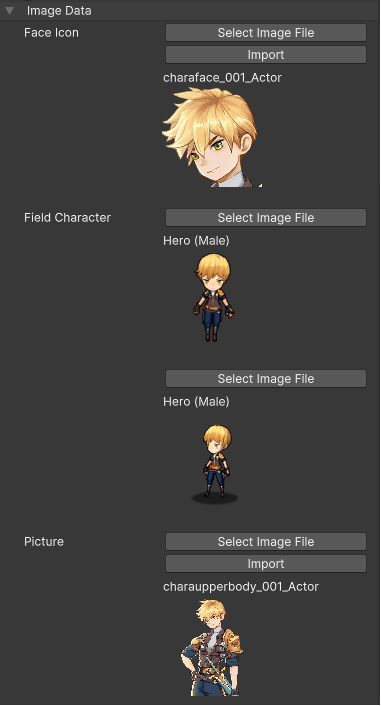
You can use the Import function to use new images, but for now we will select data prepared for the default game.
Click "Select Image File" and choose a file to use. Once you do, a window like this will appear.
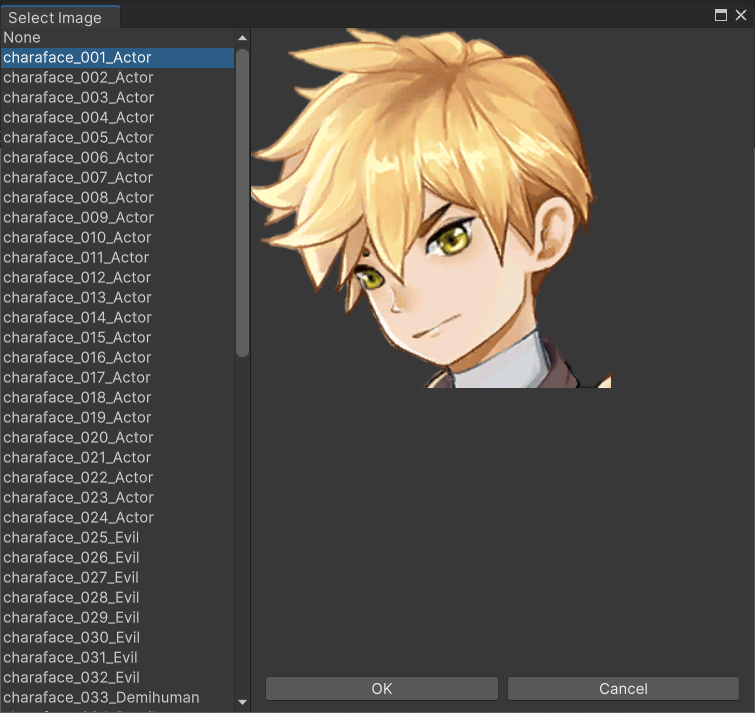
From here, select the image to use.
When making new Face Icons, use a size of 290 x 290. One pixel is removed from the top, bottom, left and right, so the actual size will be 288 x 288.
This is twice the height and width of RPG Maker MV/MZ.
There are two settings for field characters. First are settings for field characters when they are on the map, while the other is for during side-view battles. First, we will discuss the former.
When making a new field character, it will be necessary to set up the "Resource Manager" first. For this example, however, we will use resources already prepared for the default game.
In the RPG Setting, go to "Image Data > Field Character" and choose "Select Image File". This will display a list of field characters, just like when selecting Face Icons. Let's select a field character from this list.
Below is an introduction of how to create and set up new field characters not displayed in the list. This is for slightly advanced users, so feel free to skip over this section.
First, select Resource Manager > Characters > Field Characters.
Finish the above settings, and a new field character will be added to the list.
Let's set up the images to be used during Side-View Battles. No set up is required for Front-View Battles.
Once again, we'll be using resources already available. Under "Field Character", go to "Select Image File".
This will display a list of SV field characters already made for the Resource Manager's "For SV Battle". Let's use one of these.
You can select either Side-View or Front-View for battles in RPG Maker based on your preference.
If you navigate to Edit Battles > Fight Scene, you can choose which mode to use under the Basic Settings section in the RPG Setting.
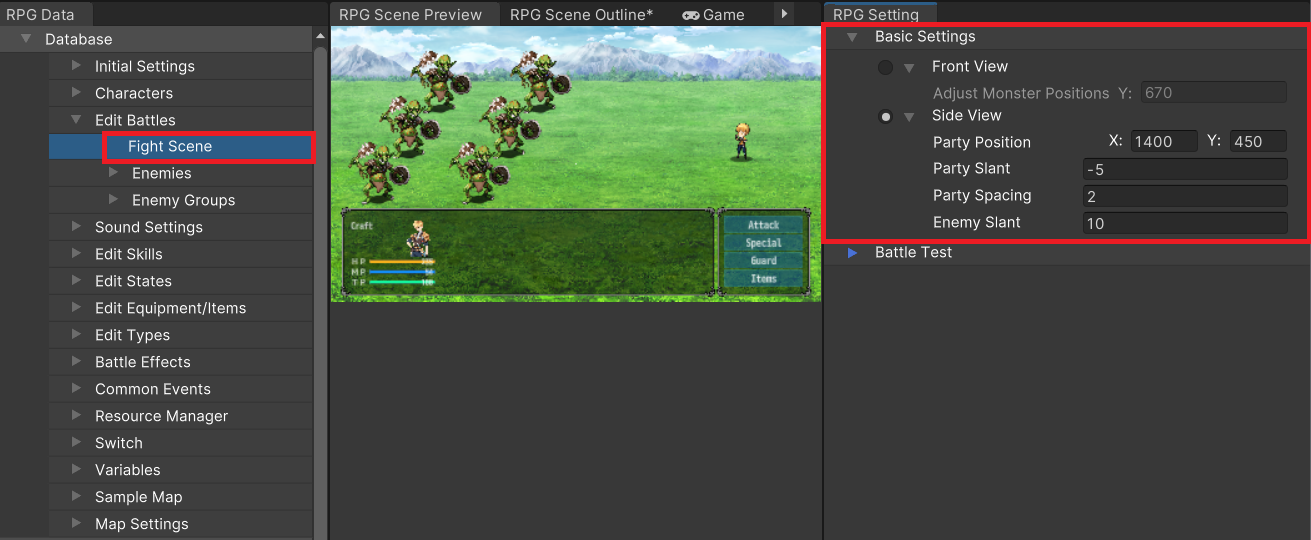
Furthermore, images for Side-View can be set via Resource Manager > For SV Battle > Actor.
There are 18 kinds of animations available, including "Normal Attack", "Casting", "Defending", etc.
In previous RPG Maker titles, each of these animations were contained in a single file,
but in Unite, image files are configured separately for each motion. This is why we have set up 18 files.
This allows the animation patterns for each motion to be made of a different number of poses.
Pictures refer to standing images. These are mainly displayed during conversations or on the menu screen.
Depending on the settings, it is not necessarily required to configure a picture for each actor.
You can use the Import function to use new images, but for now we will select existing data. Click Select Image File, then make a selection from the list.
Pictures are not required, but if you wish to set them up, they can be used in the following locations:
If you would like the display to be a picture, configure the following settings:
The above settings can be used to configure Face Icons, Field Characters, and Pictures.
They can also be configured through event commands.
We recommend configuring Face Icons, as they are necessary for the Battle Menu Screen, and can also be shown in Conversation Windows.
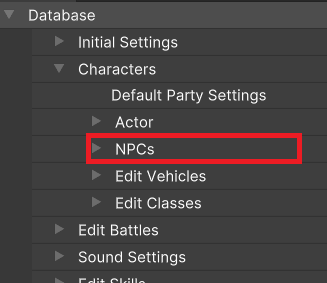
Characters who are important to the story, but who can not become party members, are registered as NPCs.
You can configure the name, face icon, walk character 1, and picture for NPCs.
When using the event command "Show Text" for characters registered as NPCs, you will be able to select "Character Designation", allowing for quick configuration of the NPC's name, face image, and standing image.
For this reason, we recommend registering characters who appear frequently as NPCs.
Once we have created actors, we can set up the starting party that is to be used when the game begins.
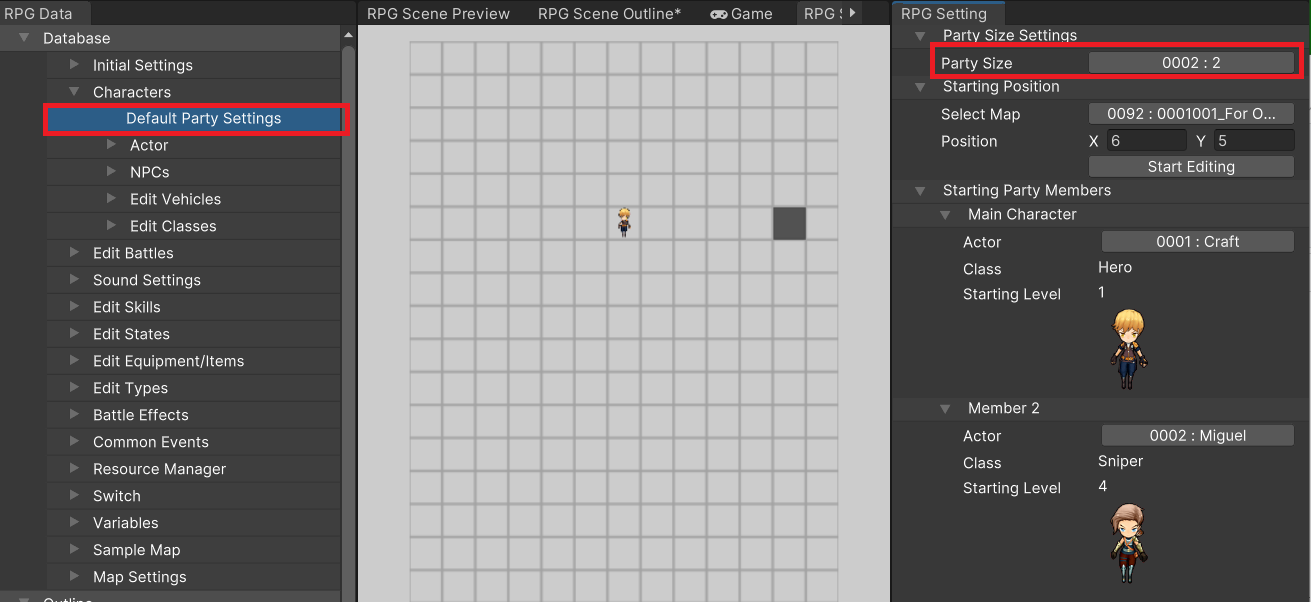
This can be confirmed by navigating to Character > Default Party Settings, then checking the RPG Setting.
First, let's set the number of starting party members. Under "Member Number Settings" in the RPG Setting, select between one and four members.
The selected number of actors will be displayed. Click the actor's name button to select them.
When a party consists of two or more actors, you can choose to either display only the lead actor or designate the other actors as player followers, causing them to follow behind the lead actor in a line.
To adjust this, navigate to Initial Settings > Options, then change the "Show Player Followers" setting in the RPG Setting.
In previous versions of RPG Maker, there was no limit to the maximum number of party members. In cases where there were five or more, only the first four members would participate during battles.
However, this led to a number of complications. Therefore, parties are limited to a maximum of four members in Unite. In other words, if a party already has four members, adding more actors will not result in them being added to the party.