Making actors isn't enough to play a game. We need to make a map for the player to walk around on, so let's begin by creating one.
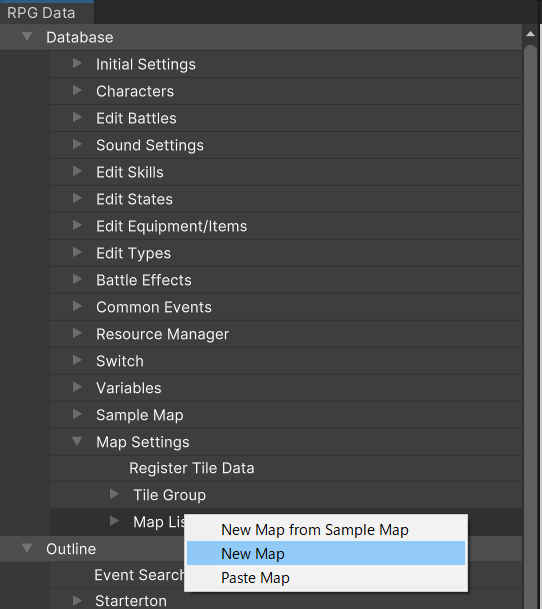
To make a new map, navigate to Map Settings > Map List. Right click on "Map List" and select "New Map".
You will see that a new map has been created. Select "Edit Map" in the RPG Data Menu to confirm the map's details.
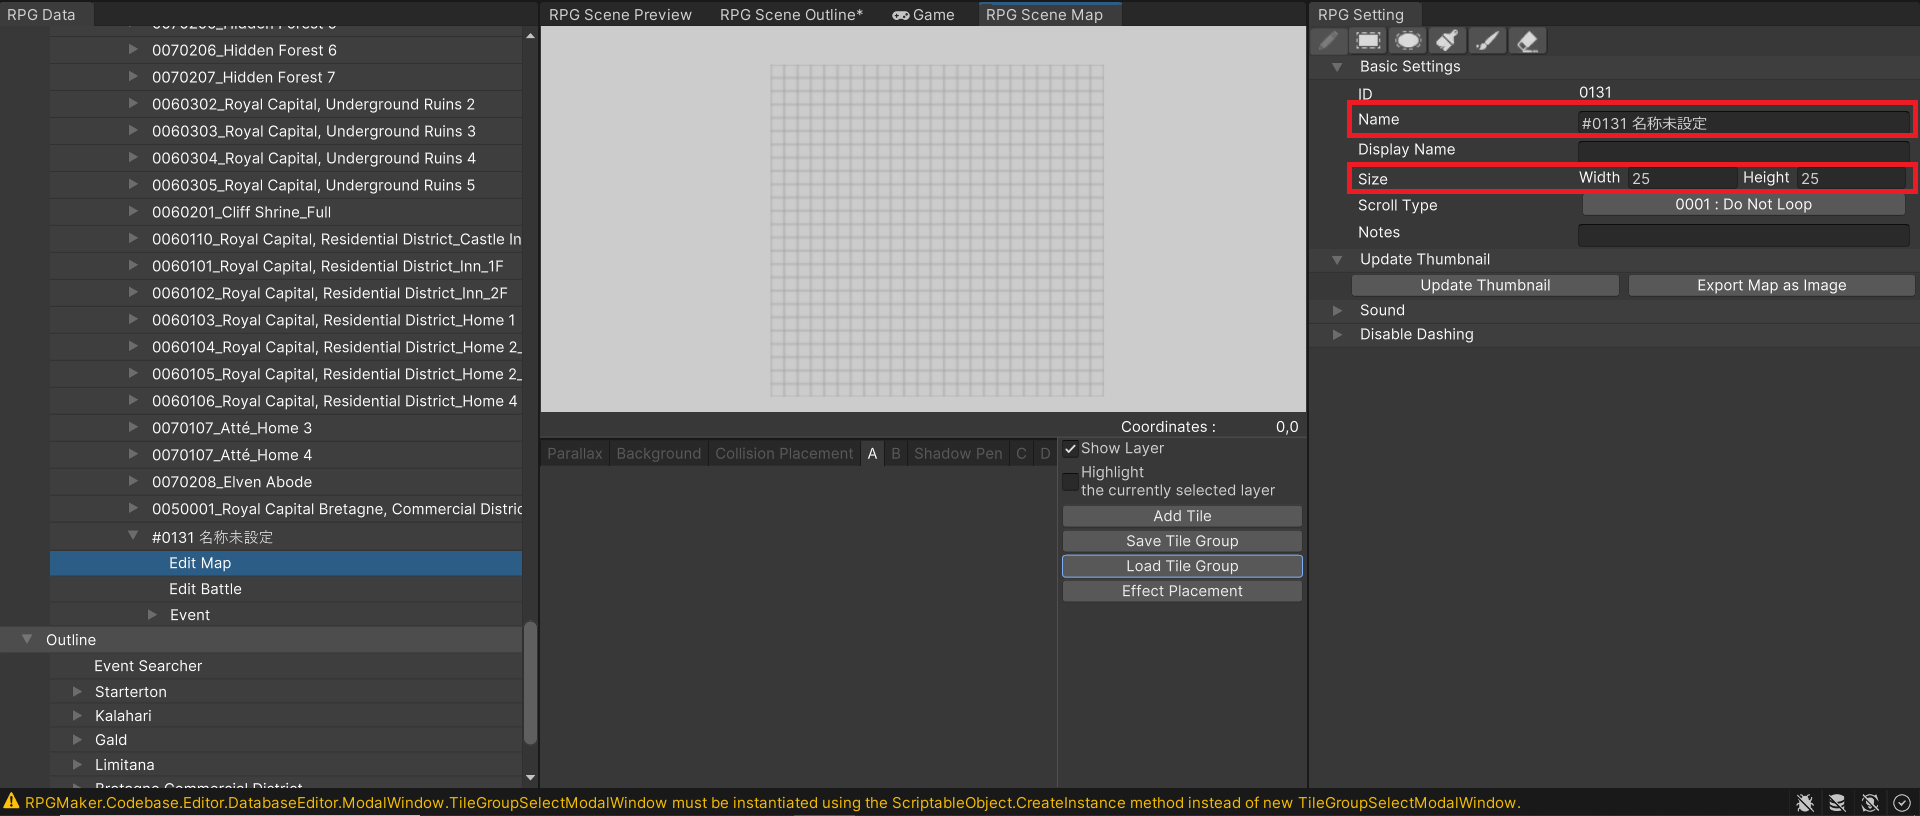
We've made only a few changes so far, but let's go over the other important settings and parameters found in the RPG Setting.
Some Field Maps are created as loops, meaning the top and bottom are connected, as well as the left and right sides. This category sets parameters for these kinds of traits.
As a general principle, we will set normal towns, buildings, and rooms to "Do Not Loop".
BGM selects the music to be played, whereas BGS generally refers to the natural sounds that play in the background.
Some examples would be the sounds of waterfalls or rivers, strong gusts of wind, or the clamor of a market where many people are gathered.
It isn't necessary to set BGSs, but using them can be helpful for building atmosphere.
Maps are built by placing "Tiles".
In previous RPG Maker titles, Tiles were called "map chips", so some people still use that terminology. However, for our purposes here, we will only be using the term "Tile".
Tiles in Unite are split between four layers: A, B, C, and D (with D being the topmost layer).
As a first example, let's create an ocean and some land. Let's place ocean tiles on Layer A, and land tiles on Layer B.
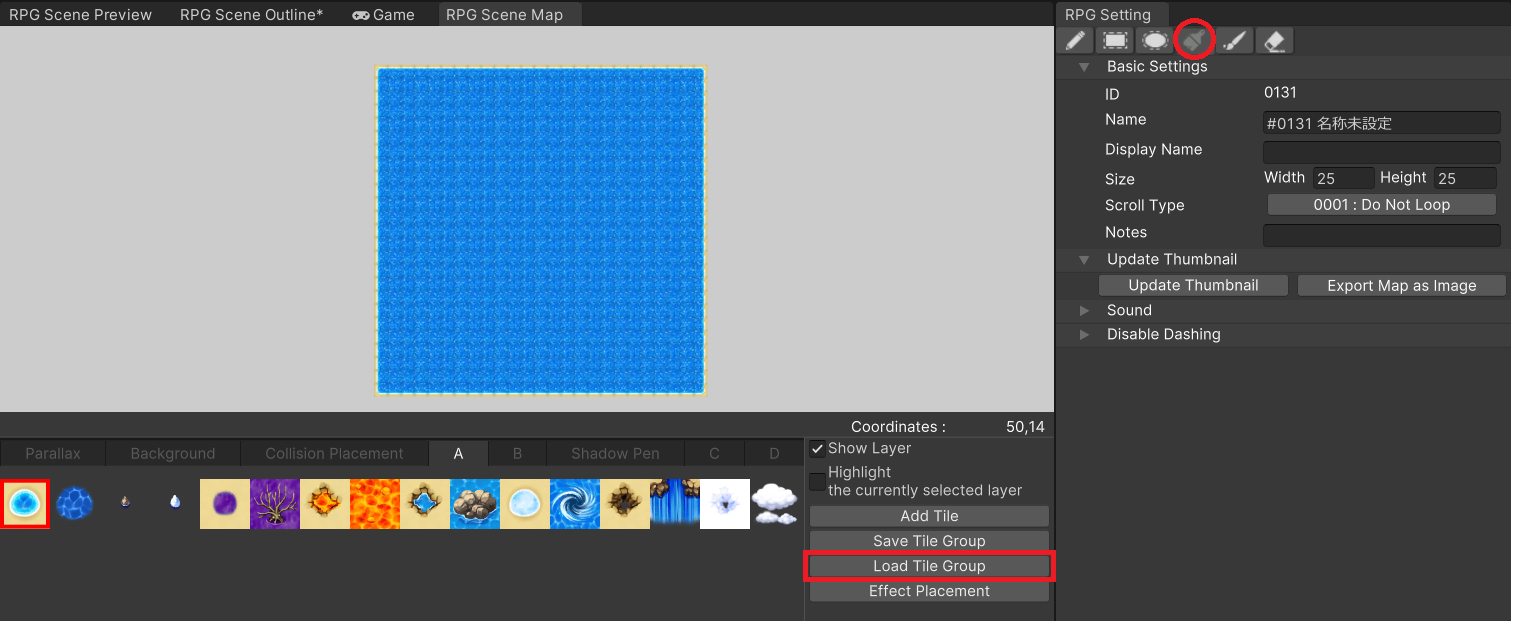
First, go to tab A, then select "Load Tile Group" and choose "World_A1".
Tile Groups are exactly that, sets of tiles that have been arranged into groups. They can be edited freely, but for this example, we will only be using an existing Tile Group to create a map.
You can find ocean tiles at the top left of the Tile Group you just loaded. Let's fill the entire map with this.
Select Flood Fill from the icons at the top of the RPG Setting, then click on the map to complete the process.
Go to tab B, then select "Load Tile Group" and load "World_A2".
Select the top left tile, then use the normal pen, rectangle, or ellipse tools to draw a mass of land in any shape you choose.
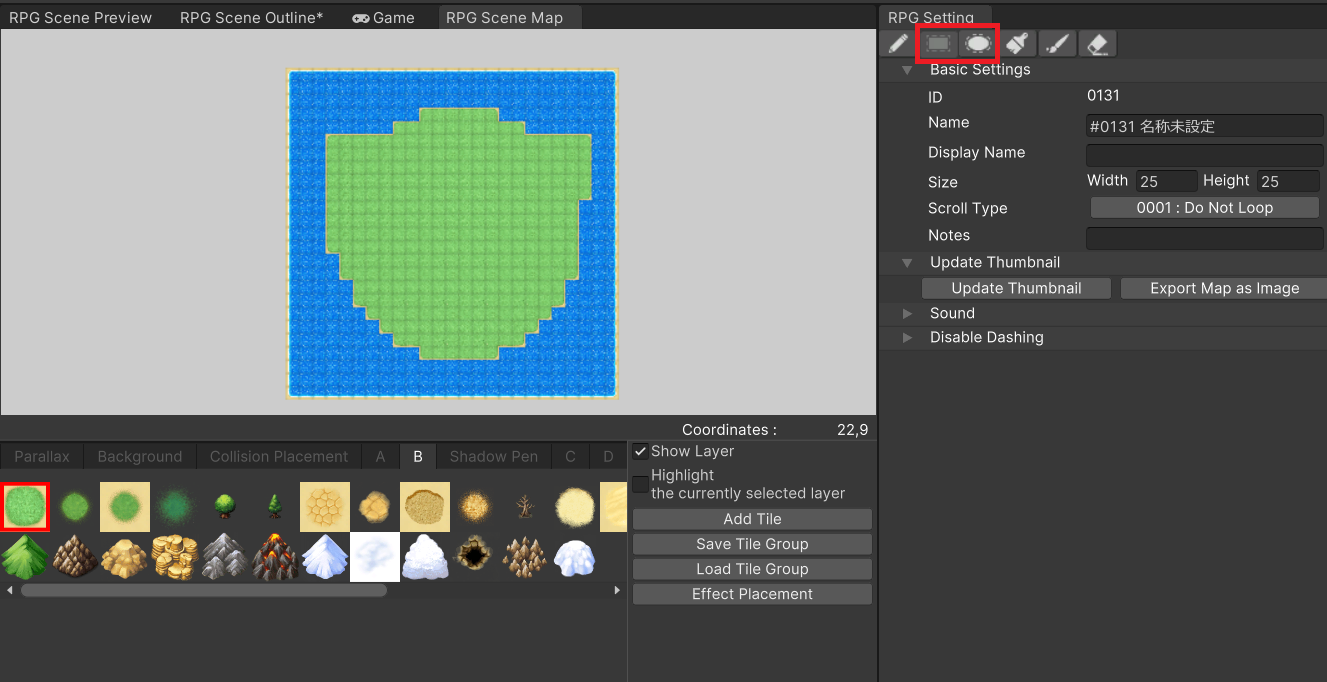
You should now have a mass of land similar to that in the above image. You may have noticed that shorelines are being displayed automatically.
That is because you used what is called an "Autotile".
Move the mouse wheel while holding the ALT key to zoom the map in or out.
It is also possible to move the display position by left clicking and dragging while holding the ALT key.
The border of certain Tiles will change automatically depending on how the tiles are placed.
All of the tiles in Tile Groups "World_A1" and "World_A2" are Autotiles.
Furthermore, all Tile Groups whose names end in "_A1", "_A2", "_A3", and "_A4" are comprised of Autotiles.
Groups with "A5", "B", "C", and "D" in their name are comprised of normal tiles.
Tiles in Unite follow the precedent set by RPG Maker MV and MZ.
Autotiles are arranged by general use purpose. "A1" are animation tiles, "A2" are ground/floor tiles, "A3" are building and room tiles, and "A4" are wall tiles.
Now let's go over the other tiles. "A5" tiles are generally made to supplement the visuals of "A1"-"A4" Tiles. "B" and "C" are generally for ornamentation, where "B" are mostly for large-scale designs and "C" are for finer details.
If you were designing an interior, for example, furniture would be found under "B", while plates or other items that go on a table would be found under "C".
Moving on, if we now try to place mountains or forests from tab B, it does not go well. You will see that ocean appears around the tiles.
There are several ways to solve this problem. Placing land tiles on tab A is one way, but this time we will take a simpler approach.
First, load the "World_A2" tile group into tab C. Now tabs B and C should display the same Tile Group.
Using the tiles in tab C, try decorating your map with some impassable terrain such as forests and mountains.
As stated before, the tiles in this group are all Autotiles.
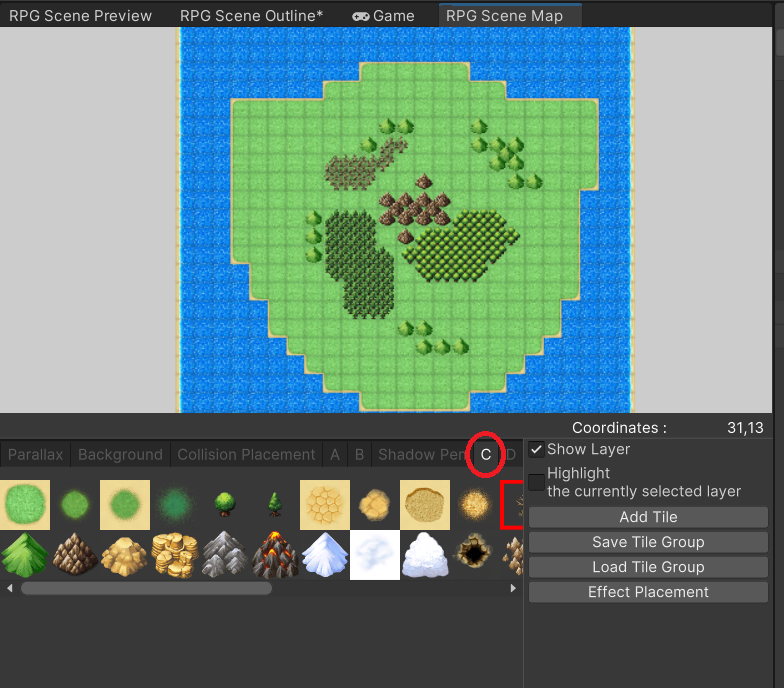
You should now have a small field map ready for use.
Next, we need to think about where to start the game. That is, we must decide the map and the coordinates at which the player is going to first appear.
This can also be set from the RPG Setting by navigating to Character > Default Party Settings in the RPG Data Menu. However, this time we will use a simpler method.
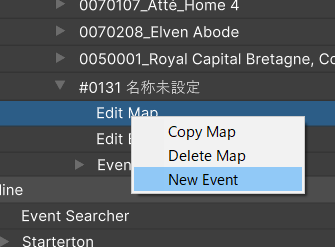
Right click "Edit Map", located under "Map" in the RPG Data Menu, then select "New Event".
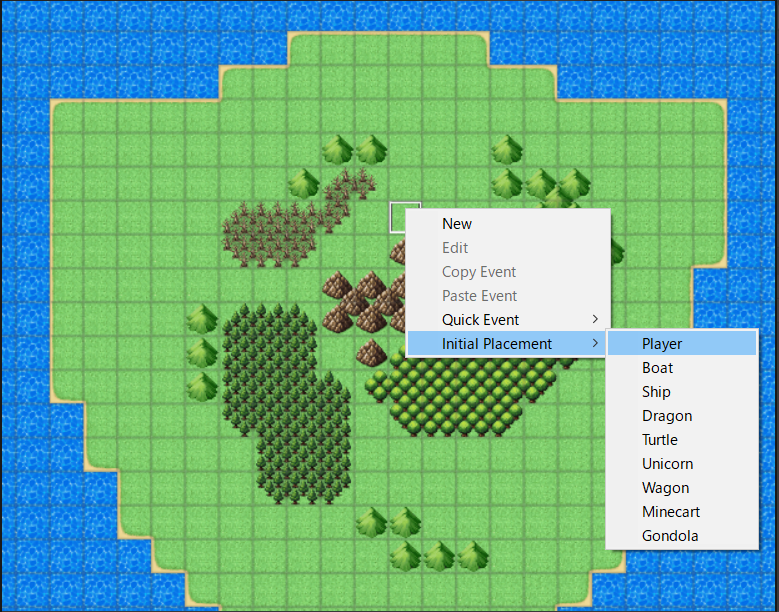
Right click on the space you would like to set as the starting position, then select Starting Positions > Player.
Now that we have a main character and map ready, we are ready to launch the game. Go ahead and try running the game.
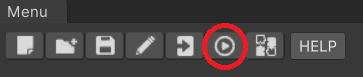
Click on the indicated icon located at the top left corner of the screen to run the game.
Try walking around the map with the starting members you configured.
You'll notice that mountains and forests cannot be crossed. We will cover passable and impassable properties later.