Now that we've created a field map, let's create our first town map.
Our goal here is to effectively utilize RPG Maker functions to create an even better map than before.
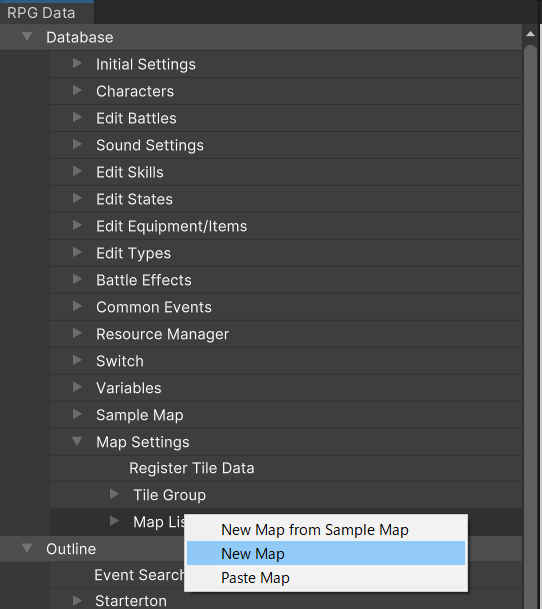
First, create a new map as explained in the previous "Creating a New Map" tutorial.
The map we're making this time will represent the interior of a town.
You're free to set the map size to whatever size you like, but we will use 15x15 for this example.
In Unite, the kinds of tiles placed in layers A through D (these are the tabs in the program) can be selected freely, just like a painter selects which paints they want available on their palette.
We will go into further detail about how to select these later, but a set of tiles created for this purpose is referred to as a "Tile Group".
Now, try to remember when you were creating the overworld map.
When you loaded the tile set to use, you clicked the "Load Tile Group" button.
In other words, last time we used a previously prepared Tile Group to create a map.
This time, we will create our own Tile Groups as well as edit already existing ones to deepen our understanding of how they work.
Select tab A from the Map Tile Window of the new map you created.
At the moment, nothing is registered to the tile palette. Let's add a new tile here.
There are two methods we can use to add a tile. First, you can right click inside the tile palette and select "Add Tile".
Alternatively, you can click the "Add Tile" button on the right side.

First, we'll make two tile groups, one for grass and another for footpaths.
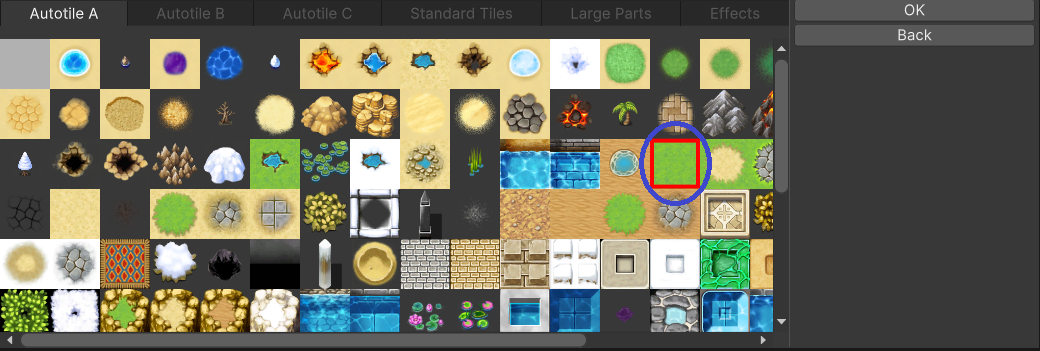
Click "Add Tile", select the tile indicated in the image below, then select "Confirm".
Once again, click "Add Tile", select the tile indicated in the image below, then select "Confirm".
With that, we have added two tiles.
Paint the map with grass, then try making a footpath.
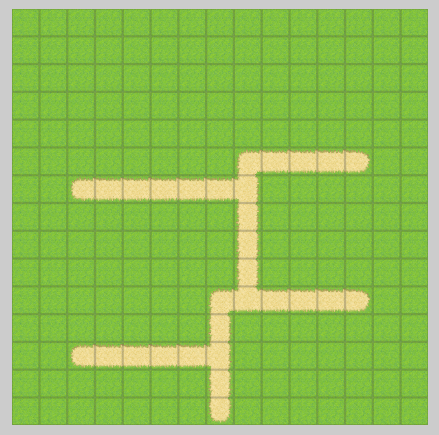
We're able to do all this with just two tiles.
It is possible to save any Tile Groups you make. To do so, click "Save Tile Group".
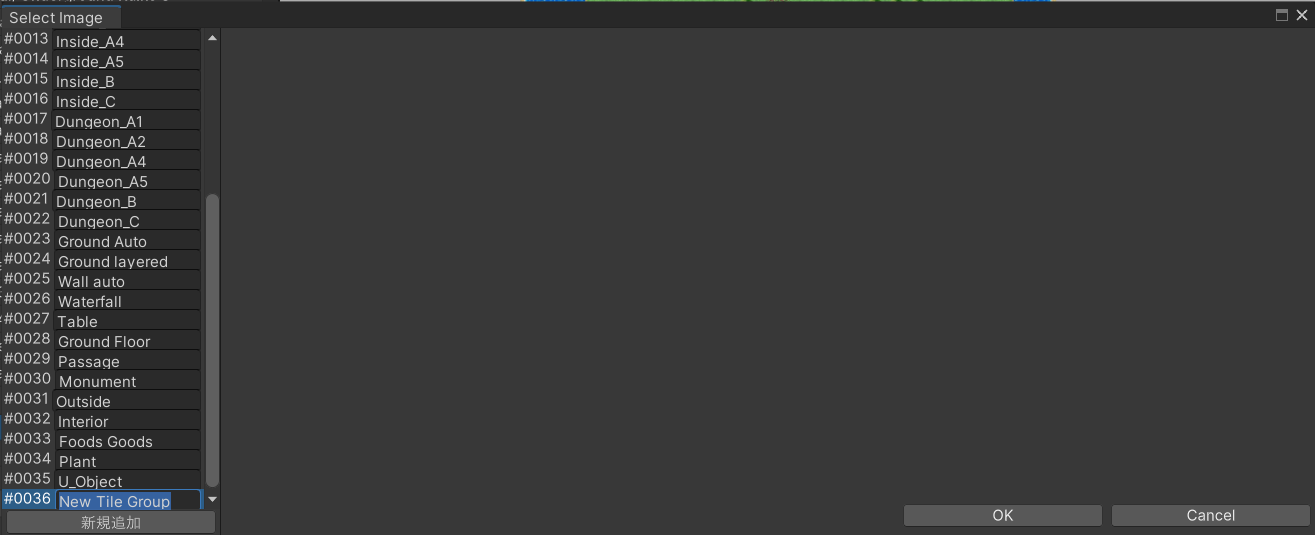
Click "New Tile Group" and create a new tile Group. You can set the name to whatever you like.
Click "OK" at the bottom right to complete the save. From now on, you will be able to recall this tile group whenever you like.
In most cases, creating a Tile Group from scratch takes a lot of time and effort.
It's also possible to edit an already existing Tile Group to create an original one.
This is what we'll go over now.
First, select "Load Tile Group" and load "Outside_A2". For now, stay on tab A.
(Tile groups that start with "Outside_" were made with creating towns and villages in mind.)
If you right click here, it becomes possible to select "Add Tile" or "Delete Tile".

By excluding tiles we don't think we'll need using "Delete Tile", we can make it easier to create the maps we have in mind. Of course, the tiles can always be added back later.
On the other hand, it is also possible to add tiles that are often used. Select "Add Tile" to display a list of registered tiles.
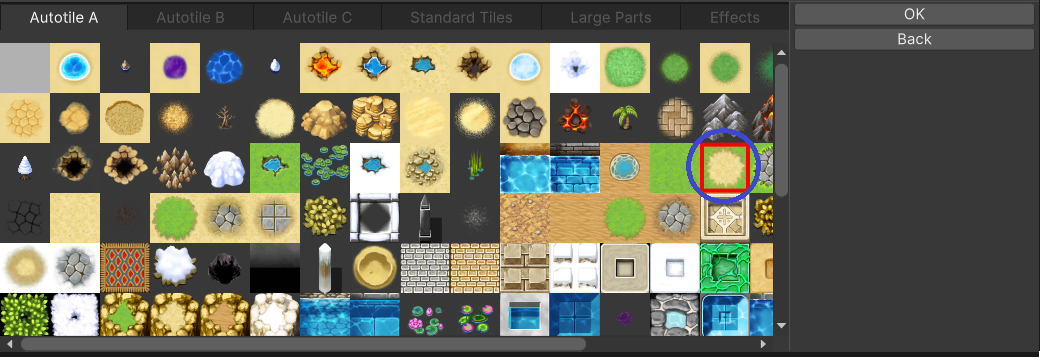
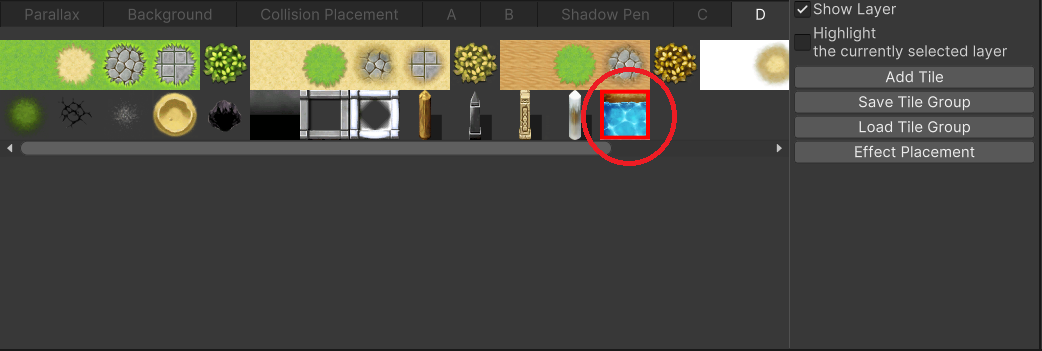
Here, we can add tiles we want to use on this map. Let's select the canal tile indicated in the image below from the Autotile A tab.

The tile we selected will be added to the tile palette.
Making effective use of this feature can make creating maps even more efficient.
Of course, don't forget to click "Save Tile Group" after making these kinds of changes.
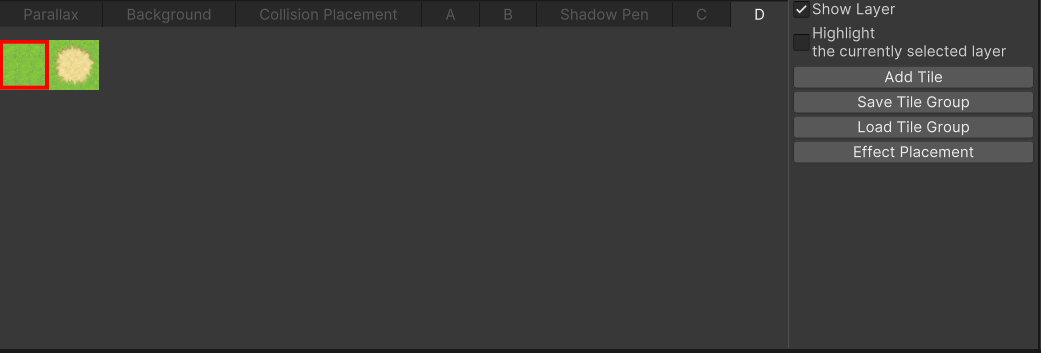
In the RPG Data Menu, you can find a list of registered tile groups under Map Settings > Tile Groups.
Here, it is possible to add tiles to, or delete tiles from, tile groups.
The section of the image outlined in blue is the list of tiles registered to this project. The section in green shows the tiles added to the currently selected Tile Group.
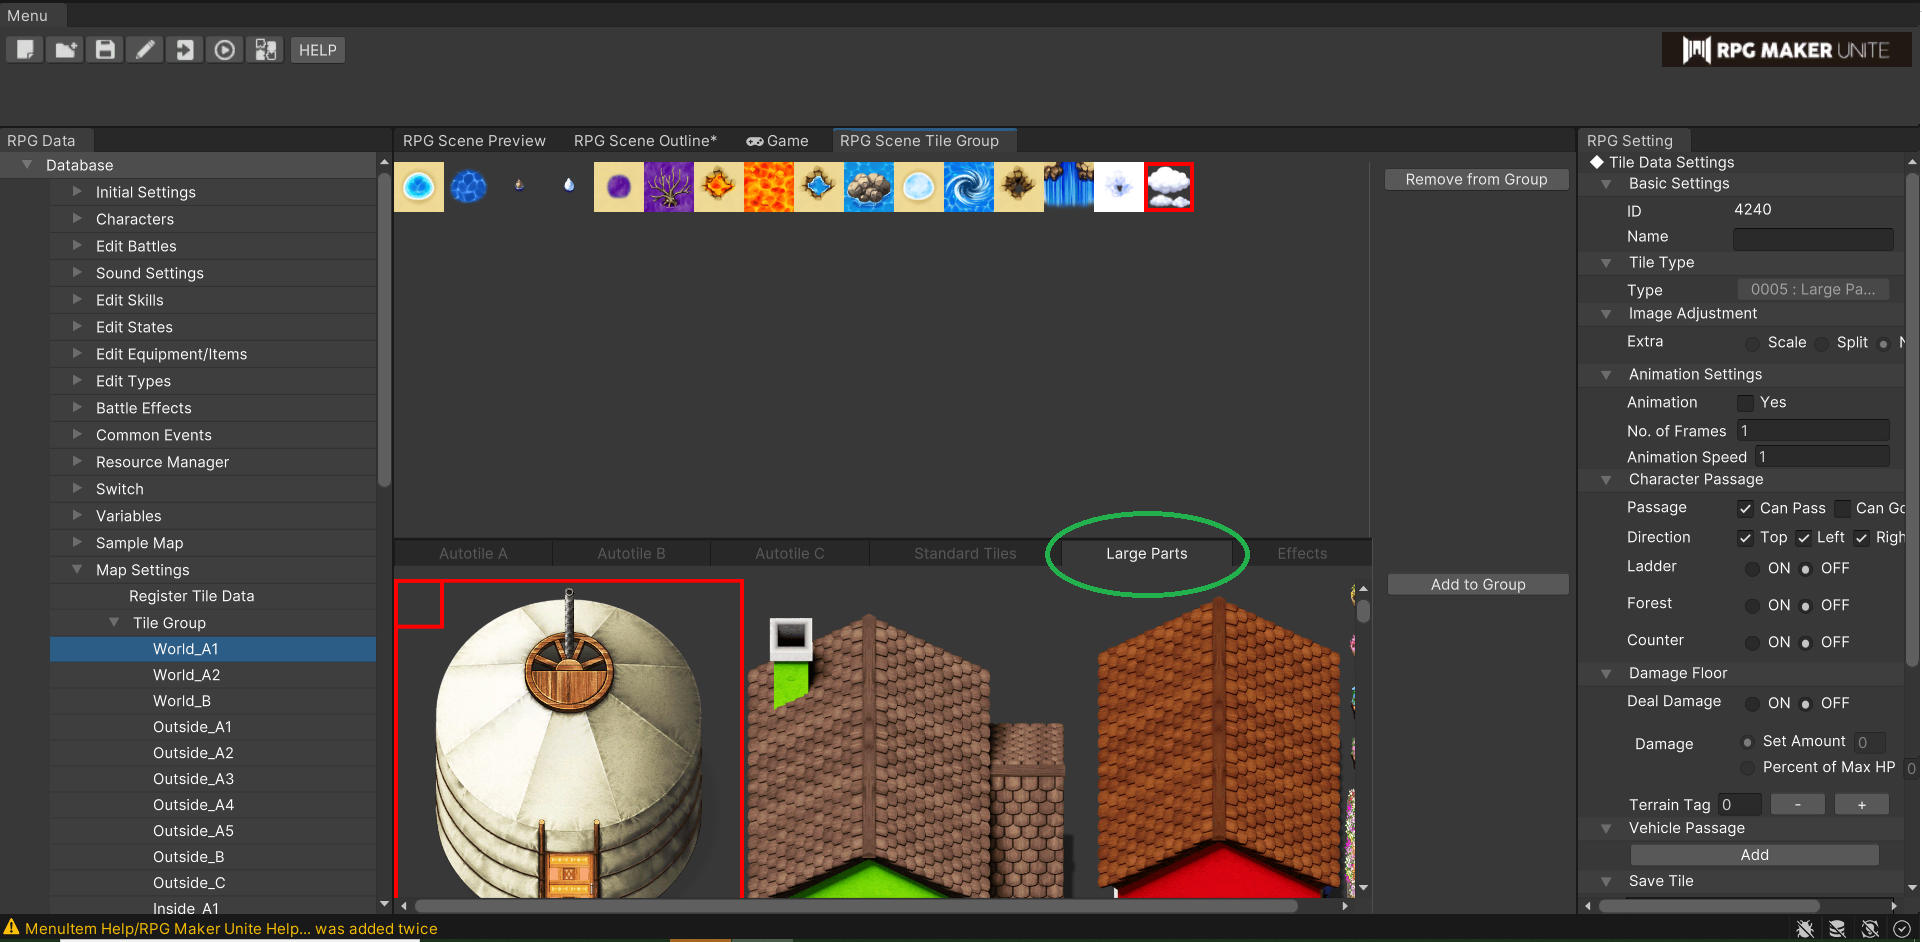
In Unite, there is no predetermined size for tiles. It's possible to register tiles that take up more than one tile horizontally or vertically.
These are called "Large Parts". Because they are different than autotiles and normal tiles, they are imported by selecting "Large Parts".
"Large Parts" that have been registered once can be registered to any tile group.
By registering often-used tiles like large trees or tents as Large Parts, you can reduce the time and effort needed to edit maps.
By default, there are some Large Parts already registered to existing Tile Groups.
Select any item under Map Settings > Tile Groups.
You will see that there are some large parts among the tiles registered to the project.
These can also be added to any Tile Group.
We have now completed the groundwork for a map.
For now, let's pause our work on creating a town map to look at some more details about tiles.
Recall the discussion about passable and impassable tiles we encountered while making a field map.
Here, we will explain these kinds of map tile settings and where to find them.
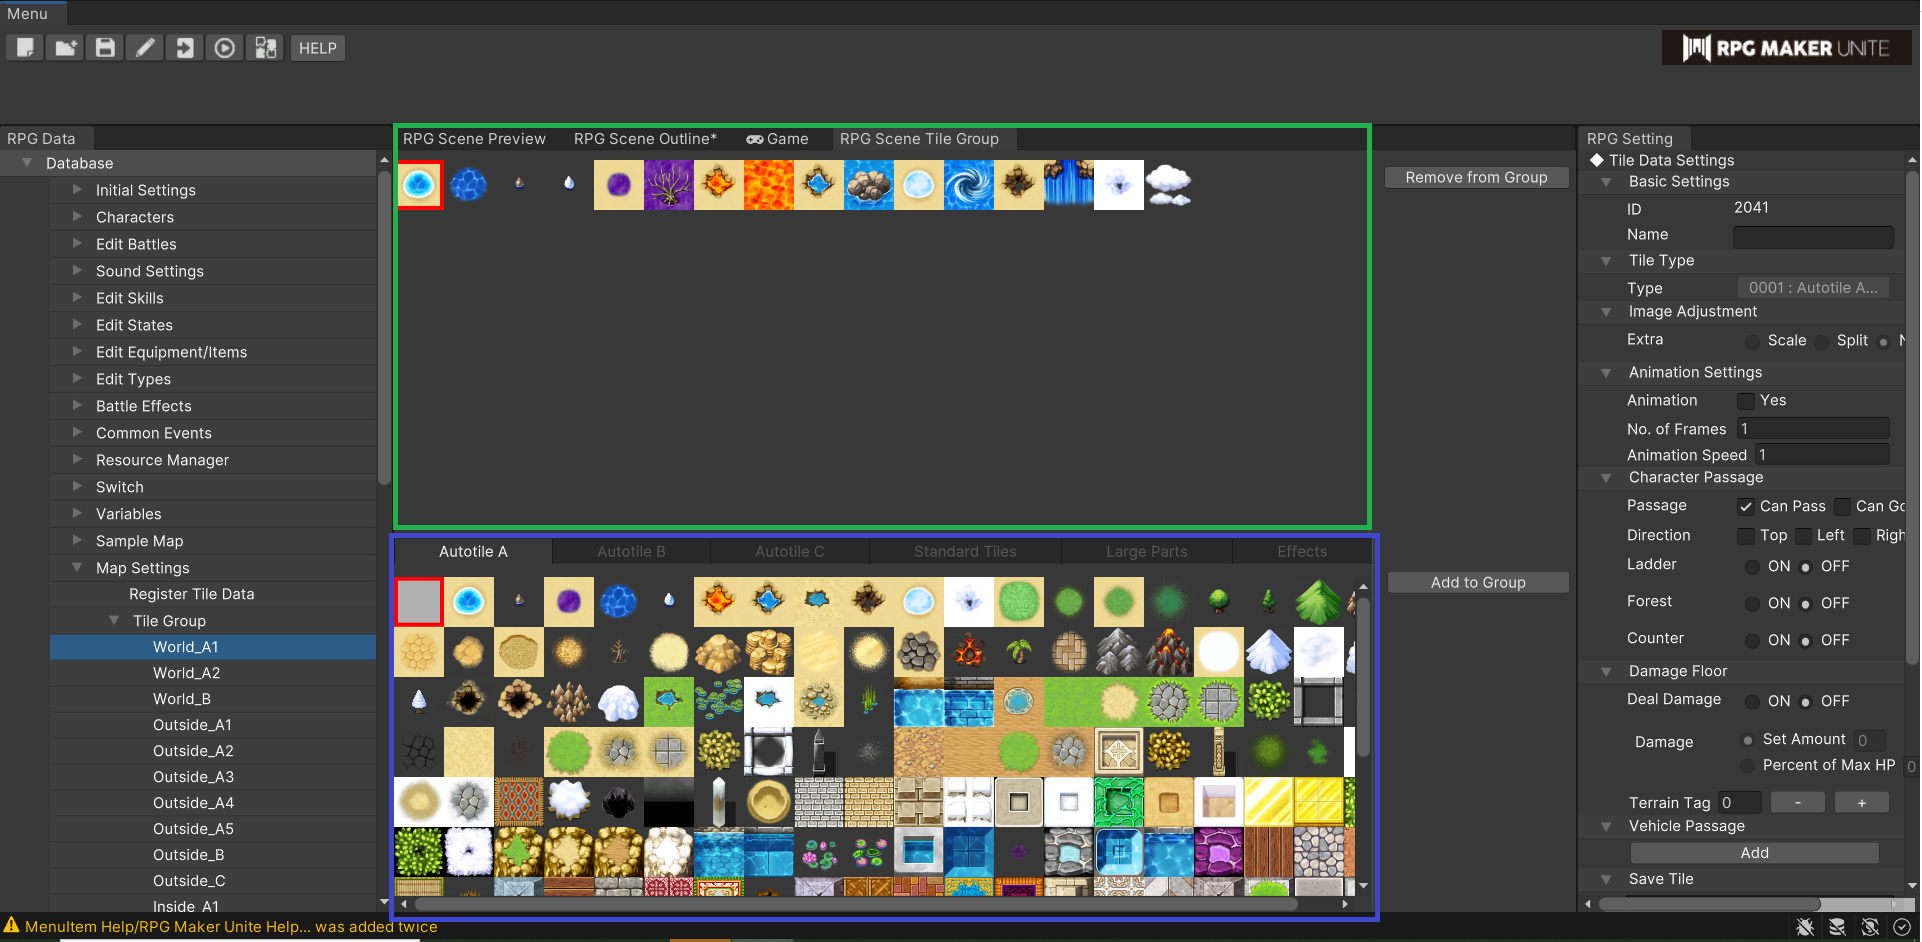
You can check the list of tiles registered to a project by navigating to Map Settings > Register Tile Data in the RPG Data Menu.
Select any tile and that tile's settings will appear in the RPG Setting.
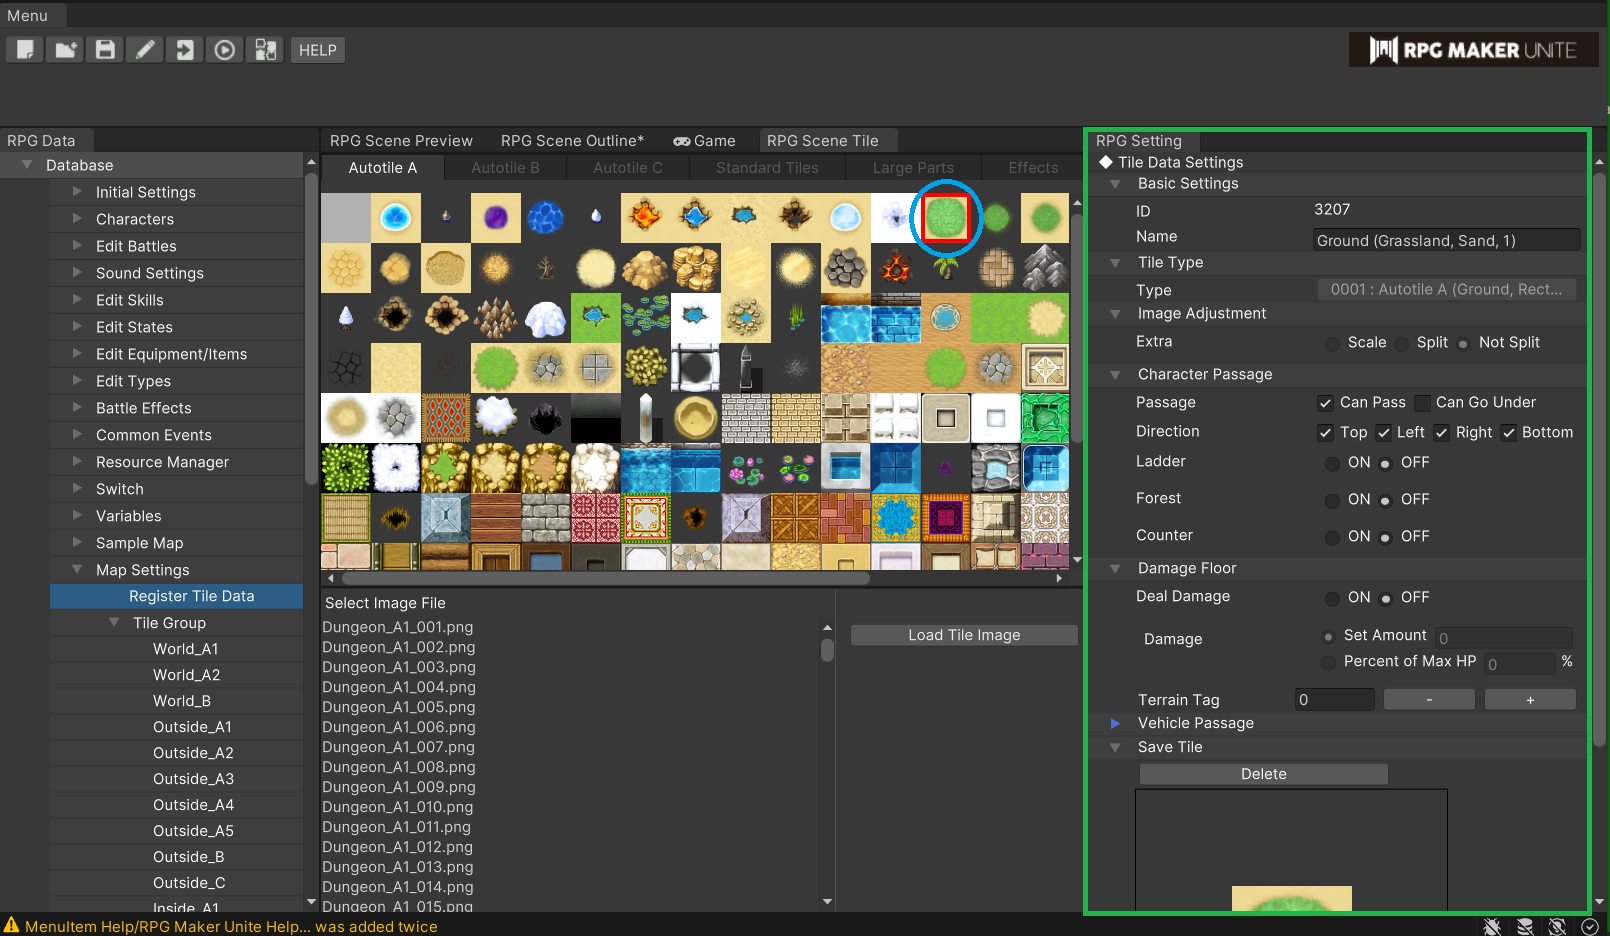
The tile circled in blue here is the currently selected tile, while the tile's settings are displayed in the section with the green border.
There are many settings in the RPG Setting, but for now let's focus on explaining the passage settings.
This can be checked under "Character Passage" section in the RPG Setting.
Next to the "Passage" setting, we can see options for "Passable" and "Passable Underneath". If neither option is selected, the tile will be impassable.
The "Passable Underneath" option is used for things such as the top of a gate or tall trees—in other words, objects which are displayed above the player character.
Since there are multiple layers, whether a tile is passable or not will be determined starting with the topmost layer.
It is possible to restrict which directions a tile can be passed through.
The "Direction" option has check boxes for up, down, left, and right. For example, let's say you have a narrow stairwell which you only want to be passable by going up or down.
In this case, we can remove the check marks next to left and right to restrict movement in those directions.
With this done, it will be impossible to progress in those directions in that location.
Now let's briefly go over some other commonly used settings.
Just like we discussed in the previous chapter, map tiles are comprised of layers A through D.
Let's use this to finish making our town map.
In layer B, select "Load Tile Group" and load "Outside_A2".
It is best to place fences, holes, and other tiles whose surroundings are transparent on this layer.
Let's start by placing a wooden fence to wall off the town.
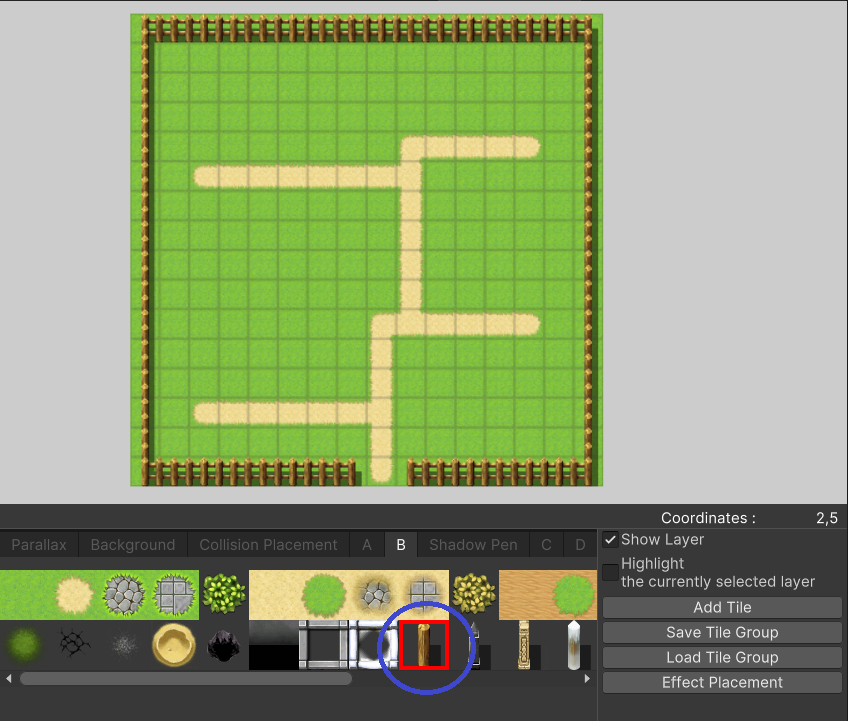
Wooden fences are autotiles, making it easy to build a wall.
Let's use autotiles to place a few houses around the map.
Load "Outside_A4" to layer B. Walls of buildings are autotiles.
At this stage, the "Outside_A2" tiles are no longer displayed in the Tile Group, but any tiles we have already placed on the map are left as-is.
In other words, it's possible to switch between Tile Groups as needed while placing tiles.
Don't worry about doors and windows for now. We will place these on another layer.
Next, load "Outside_A3" to layer B. These tiles to form the roofs of the buildings. Let's place them on top of the walls we built.
Here's an example of a map with some houses.
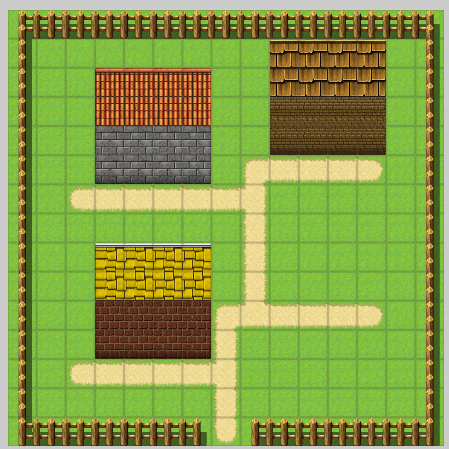
We have now loaded both roof and wall Tile Groups.
Once you start making a game in earnest, it may be necessary to switch between Tile Groups many times while working. This can be quite time consuming.
That's where original tile groups come into play. If you register the roof and wall tiles you use most often to a single Tile Group, it will be possible to edit roofs and walls simultaneously.
Try editing your tile palettes in Tile Groups to more effectively build your maps.
Switch to layer tab C and load "Outside_B".
"Outside_B" includes windows, chimneys, barrels, pots, and other small objects, as well as trees, shrubs and flowers—things that are generally used to decorate a map.
Here is an example of a town with such tiles in place.
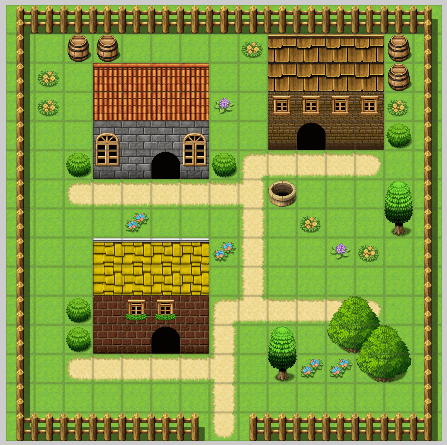
Now we've finally created something resembling a town.
Historically, RPG Maker has utilized the general idea of upper and lower layer tiles. Conventionally, lower layers consist of ground, buildings, walls, and other foundational parts,
whereas upper layers are all the things used to decorate those foundations.
In Unite, the pre-existing Tile Groups A1 through A5 are used as lower layer tiles, whereas B, C, and so on are used for upper layer tiles.
It is assumed that objects corresponding to lower layer tiles will be placed in layers A and B, while upper layer tiles are placed in layers C and D.
This time, we have placed tiles with names A1 through A5 in layers A and B, while tiles from "Outside_B" have been place in layer C, thus conforming to this convention.
However, this is only a convention. It is not strictly necessary to follow this rule, but it is worth mentioning that taking it into consideration may make creating maps easier.
Load "Outside_C" to layer B, C, or D.
Here, we'll find tiles prepared for making complex objects such as roofs, castles, towers, etc.
These are not autotiles, however, so some additional skill is necessary to use them effectively.
Once you're confident in your map making skills, go ahead and try them out.
Also, "Outside_C" has ornamentation such as stone statues perfect for decorating castles.
These would also best be placed on layers C or D.
Between tabs B and C, you will see a tab named "Shadow Pen".
As the name implies, it is used to add shadows. It is common to add shadows on the east side of walls.
In past RPG Maker titles, shadows were automatically created when placing walls.
Adding shadows helps make maps come alive. Give it a shot once you've gotten used to creating maps.
We have now completed our town map.
It might be useful to change our starting position to inside the town and try walking around.
However, we are still unable to come and go between our town map and overworld.
To do this, we need to use an "Event".
Events will be covered in the next chapter.