Let's review the basics of events for those new to RPG Maker.
Those who have previous experience with RPG Maker, please feel free to skip this portion.
Processes within RPG Maker which are used to advance the game in some way are referred to as Events.
These Events are activated by some sort of trigger, and can be used to do things such as progress through a scenario
or make a character respond when spoken to.
There are various types of events. For example, "Map Events" are those placed on the specific map,
"Command Events" are events which can be run from any map, and "Battle Events" are those which occur during battles.
Of these, Map Events are the type most frequently used, and so when we use the term "Event",
we are usually referring to Map Events. This chapter will be a general overview of this type of event.
Events are placed on the map, but only a single event can be placed at a single coordinate.
Things with actual substance, such as events relating to characters (aka. mob characters), are typically placed at a specific location on the map.
However, there is no rule about placing events without substance, such as those that describe the flow of an event scene or have no visible object to display, and so can be placed anywhere.
As a general rule, events are made up of one or more pages.
Each page of an event is called an "Event Page".
The maximum number of pages a single event can use differs in each version of RPG Maker, but in Unite, the limit is 20 pages.
Each event page is set up with its own conditions. (Ex: Switch 1 ON).
Pages used in events are judged in order starting with the page with the highest number. If a page's conditions are met, that is the page which will be displayed.
Therefore, if the conditions of a switch, etc. change, the active event page may also change.
For example, if the "After Event" switch is set to ON, pages set to After Event will be displayed after that event occurs, while in all other cases, pages set to Before Event will be displayed.
A page with no conditions set will always be considered to have it's conditions met, meaning that page will be displayed.
If none of an event's pages' conditions have been satisfied, the event will not display or run.
Switches have ON and OFF values. They're used to determine if certain conditions have been met or not.
It is possible to create more than 1,000 switches, and event commands (which we will go over later) can be used to turn them ON/OFF.
Each switch is given an ID starting with 0001, and can be given names for your convenience.
Whereas switches have a value of either ON or OFF, variables are functions for storing integers. Like switches, you are able to create more than 1,000 of these.
Just like the case with switches, event commands can be used to assign or reference a variable's numerical values.
Variables are used to store various data in the game.
For example, the amount of gold a party has, the specific number of items you are carrying, an actor's attack power or HP,
or the current party's coordinates on the map. In other words, they can store a wide range of game data.
These are images set to an event. Conditions 1 and 2 mentioned above will generally make use of this.
For type 3 (Autorun) events as mentioned above, and those configured with event content that has no actual object, it is common to use no image—having it instead be transparent.
This can be set to Above, Below, or Same, and indicates priority in relation to the player.
It is common in RPGs for townspeople to wander around. Under "Type", we have a few available options such as: 1. Fixed (no movement), 2. Random, or 3. Approach.
These are the actually steps which are to occur when an event is executed, and are compiled of one or more event commands.
There are many kinds of event commands. They are mainly used for displaying text or choices, on-screen character movement, or controlling switches or variables.
Event commands are also used to increase or decrease actor HP, change the weather, produce screen effects, and almost all other kinds of operations.
This concludes a brief explanation of events commands. It is likely that some things are still confusing after reading this.
Try using this guide as a reference to create your own events and test them out.
Many of the smaller details have been left out, so experimenting on your own will help you build a better understanding of how they work.
We've learned a bit about events, but as a first step, let's try actually making one.
Previously, we created maps on the Map Screen.
To place events here, we need to switch to Edit Event Mode.
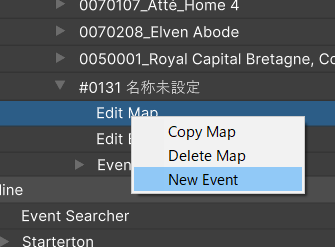
Navigate to Map in the RPG Data Menu, then right click "Edit Map" and select "New Event".
This will switch from Edit Map Mode, which we have been using up until now, to Edit Event Mode.
Now, let's try actually making an event. Right click the location on the map where you would like to place your event.
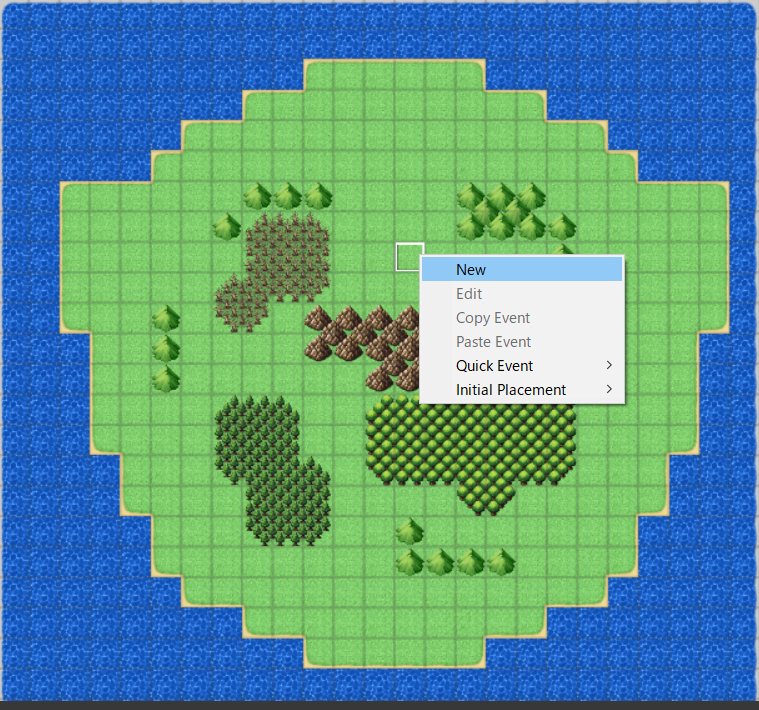
Select "Create New" to place an event there.
Once this is done, you can confirm that an event has been added by navigating to Map Settings > Map List > (Map Name) > Events > (Event Name) in the RPG Data Menu.
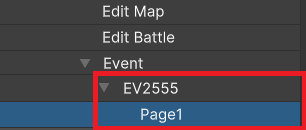
Select the added event in the RPG Data Menu, then select Page 1 to see that event's information displayed in the RPG Setting.
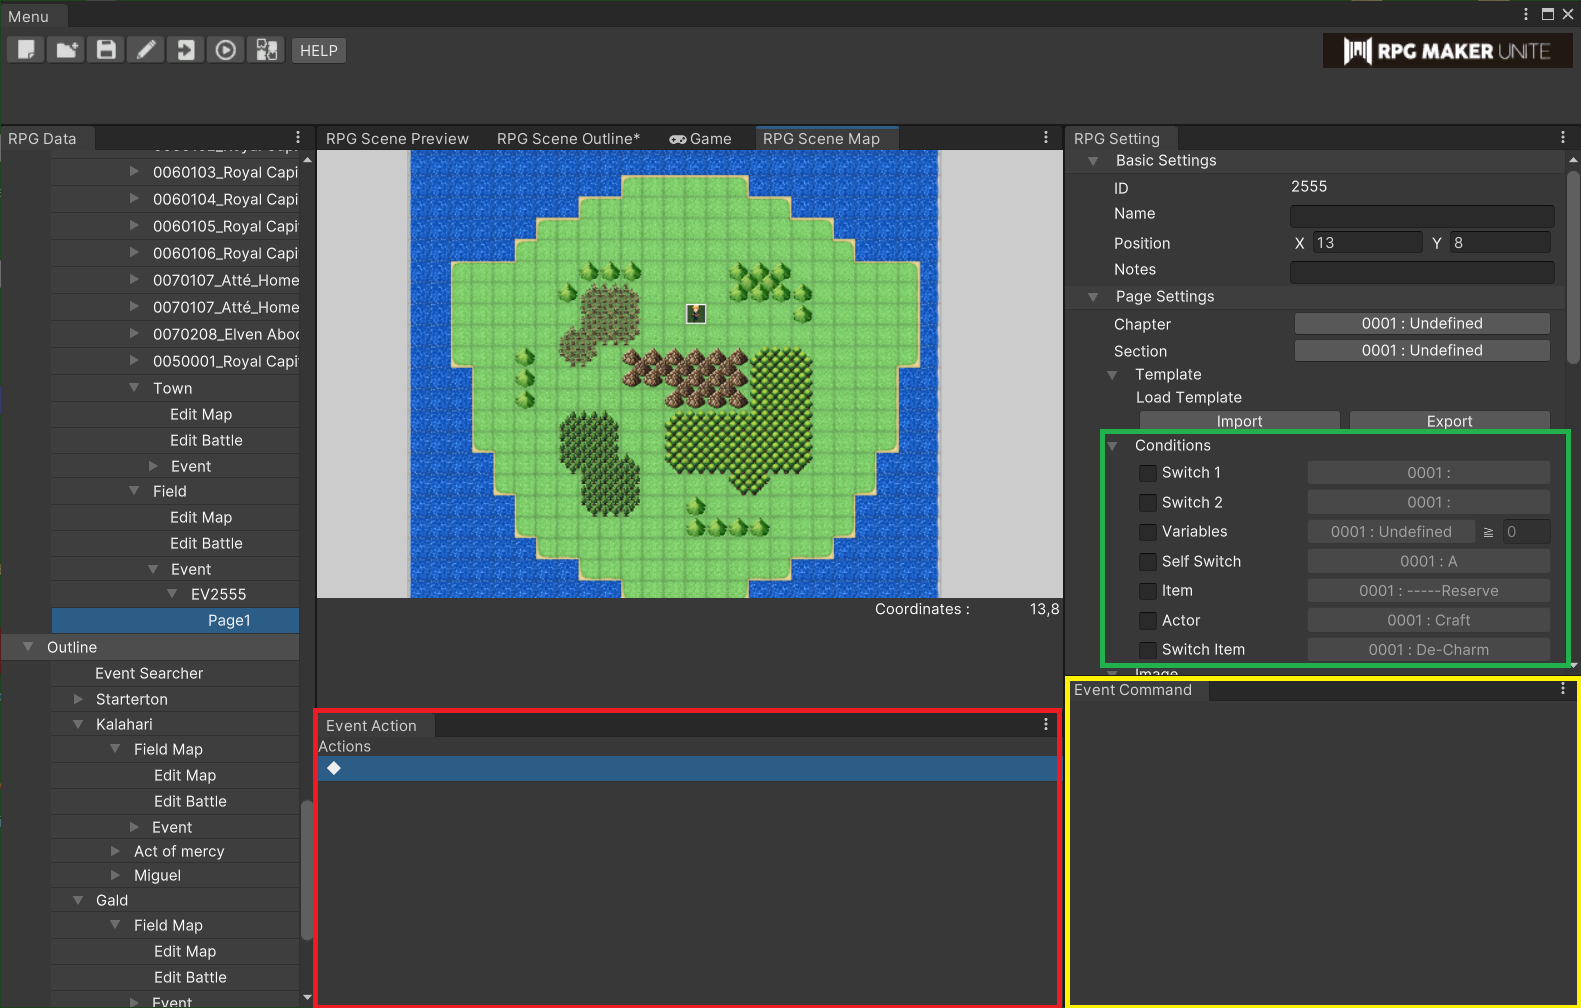
You will now see two new windows displayed: Event Contents (outlined in red above) and Event Commands (outlined in yellow above).
Also, if you look in the RPG Setting at Page Settings > Conditions (outlined in green above), you can see that no parameters have been set.
As mentioned earlier, a page with no conditions set will always be considered to have it's conditions met. Based on this rule, Page 1 will always be selected by default.
Right click the selected line in "Event Contents", and "New Event" will be displayed.
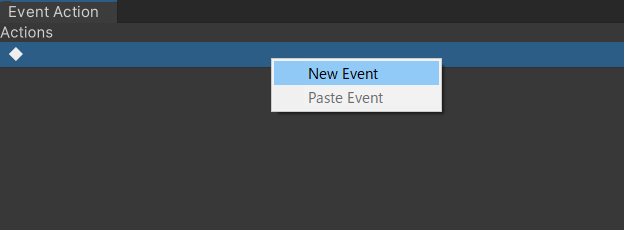
Select this to display the event command selection window.
Events are divided into categories. You can expand your choices by opening the tabs.
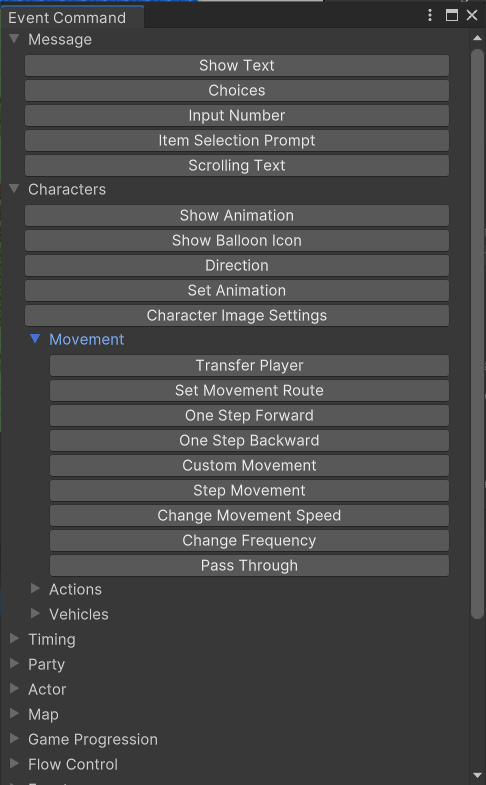
By selecting an event command here, then configuring its parameters, you can create an event.
We will go over the main details for each of the event commands in a later segment covering practical use examples.
A newly created event will have a single page. However, you can add more pages by following the steps below.
Navigate to Map List > (Map Name) > Events in the RPG Data Menu, right click on Events, then select "Create New EV Page".
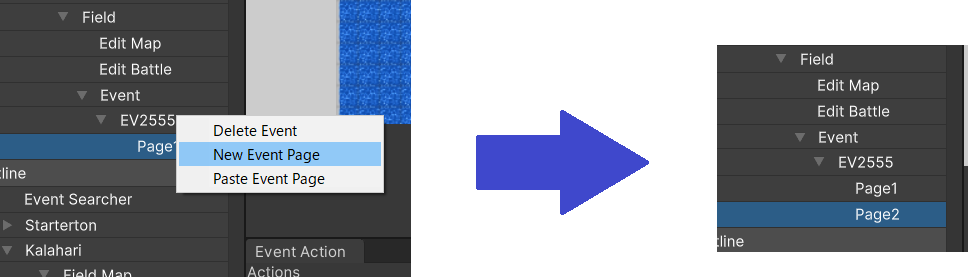
You will see that a second Page has been added.
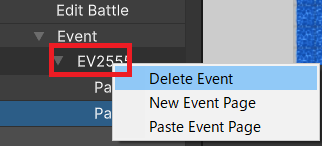
The event we just created isn't going to be used for anything, so let's take a look at how to delete it.
Navigate to Map List > (Map Name) > Events in the RPG Data Menu, then right click the event we made. It should be the one at the very bottom of the list.
In the menu that appears, select "Delete Event".
To return to Edit Map Mode from Edit Event Mode, you will need to click "Edit Map" in the RPG Data Menu again.
This is how to easily switch between the two modes when creating a game.
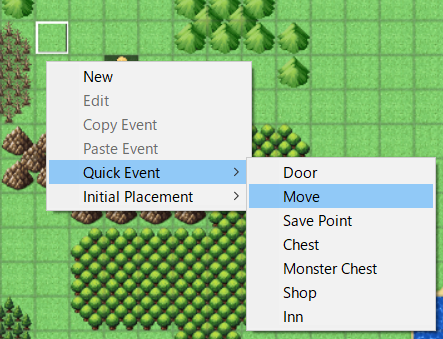
When right clicking a map in Edit Event Mode, "Create New" was not the only option available. Let's take a look at the others now.
There are templates available for events which are used most often. For example, events for moving to other maps, opening treasure chests, or sleeping at inns.
You can right click a map tile and select one from the Quick Event list to edit one of the templates.
It is assumed that of these, "Movement" will be used the most, so we will cover that in the next section.
Right click the event on the map you wish to copy and select "Copy Event".
Afterwards, right click the location you want to paste the event to and select "Paste Event" to make a copy.
Events can be copied to the same map, or to other maps as well.
We have gone over this before, but it is also possible to select the party's starting position from this menu.
Previously, we created both an overworld and a town map. Now let's connect the two so we can enter and leave the town.
We never placed a town on the overworld map we created before, so let's do that now.
Switch to tab C and import tile group "World_B".
There are a few different town tiles to choose from, so select one you like and place it.
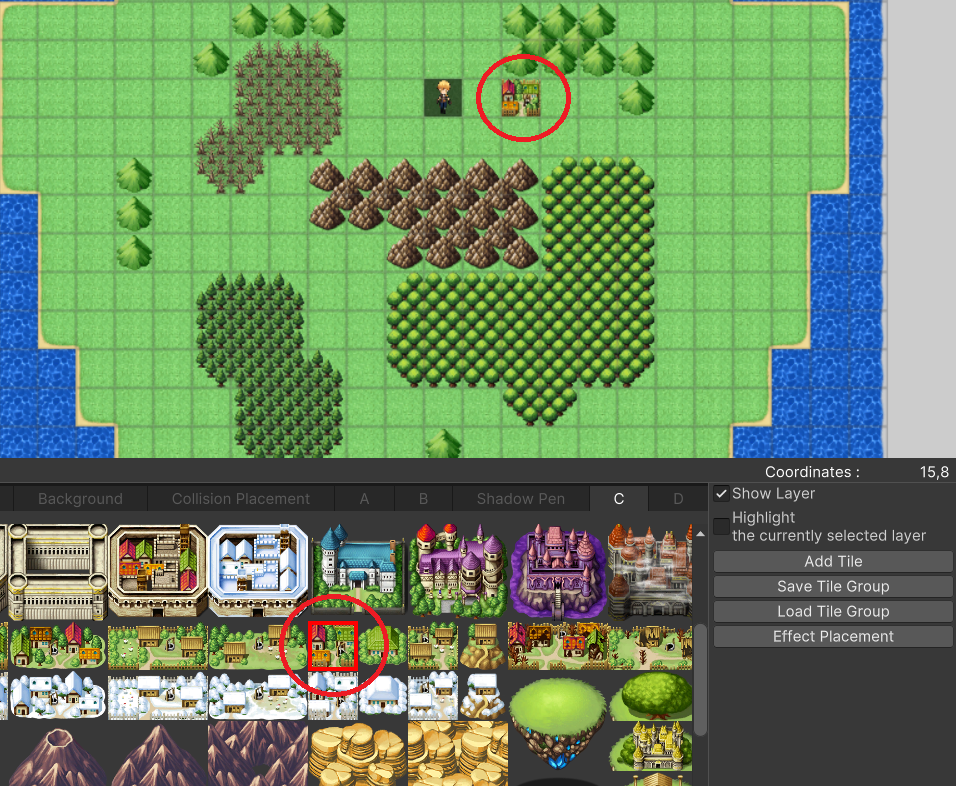
Next, we will use the "Movement" event explained above to connect the two maps.
Right click the town icon on the overworld and select Quick Event > Movement. You should see the following window appear.
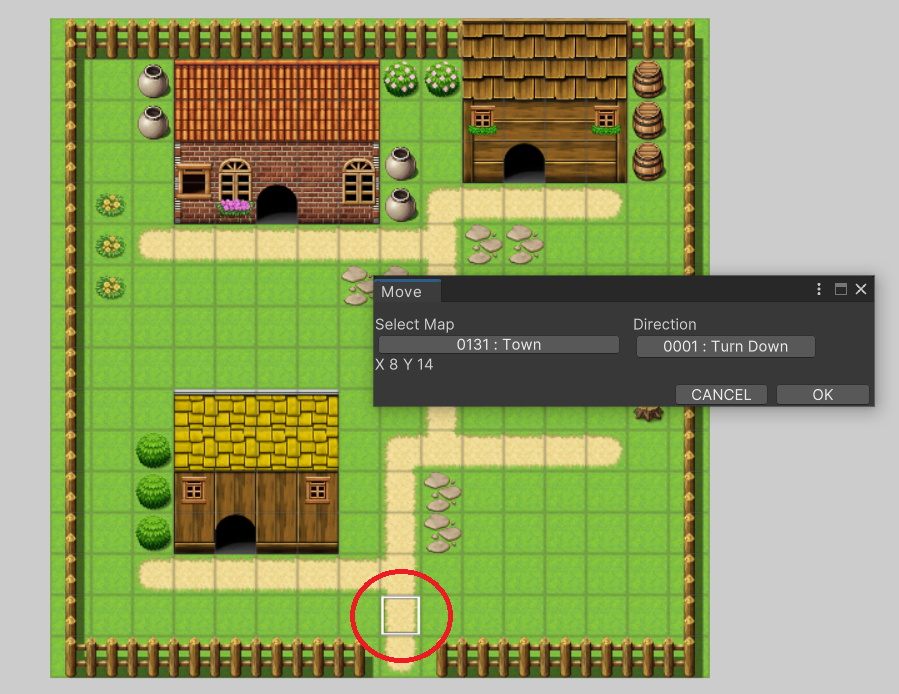
Configure the following settings:
Now we've created an event for entering the town. We can see there's been an event command added to the event contents.
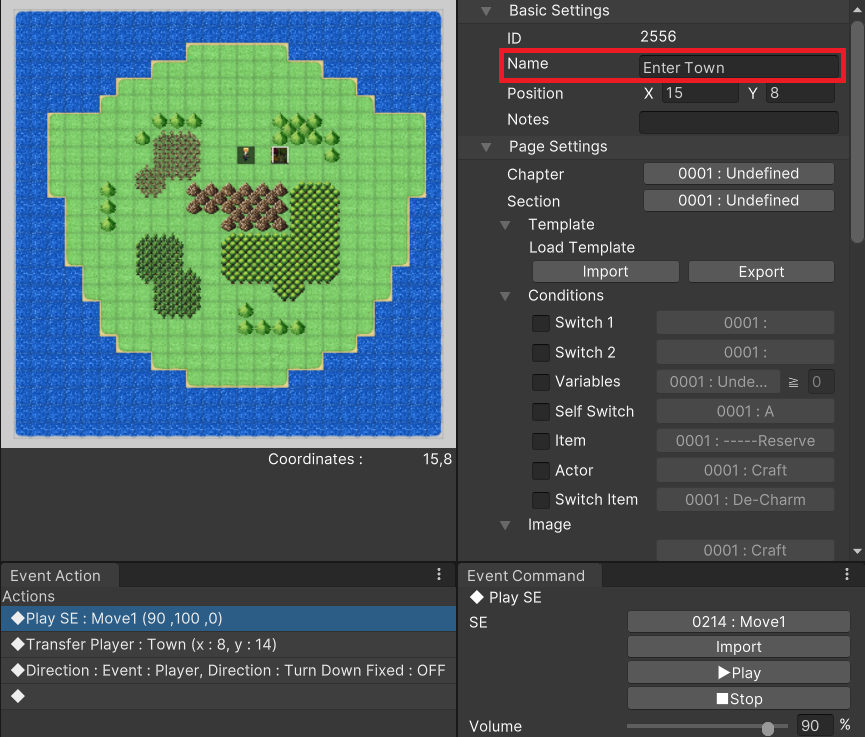
As a final touch, let's give this event a name (the option outlined in red above). In our example, we chose the name "Enter Town".
It's always best to add names to your events like this. Since you will be placing many events when actually making a game,
this will make locating any event you're looking for in the event list much easier.
This is done in exactly the same way. Place a simple movement event at the coordinates you would like to be the town's entrance.
Set the map it leads to as the overworld. The direction is optional (in our example, down is recommended), then click the town icon on the overworld and set the movement destination.
We have now connected the two maps.
For your playtest this time around, try going back and forth between the overworld and the town to make sure everything is working properly.