As the first thing that welcomes the player into the game world, the opening of your game plays a very important role in attracting their attention.
In fact, many people tend to judge the story of a game or any form of entertainment, be they novels or movies, by the first few minutes of its development.
We're now going to share some tips on how to make a good opening using Unite's default game as reference.
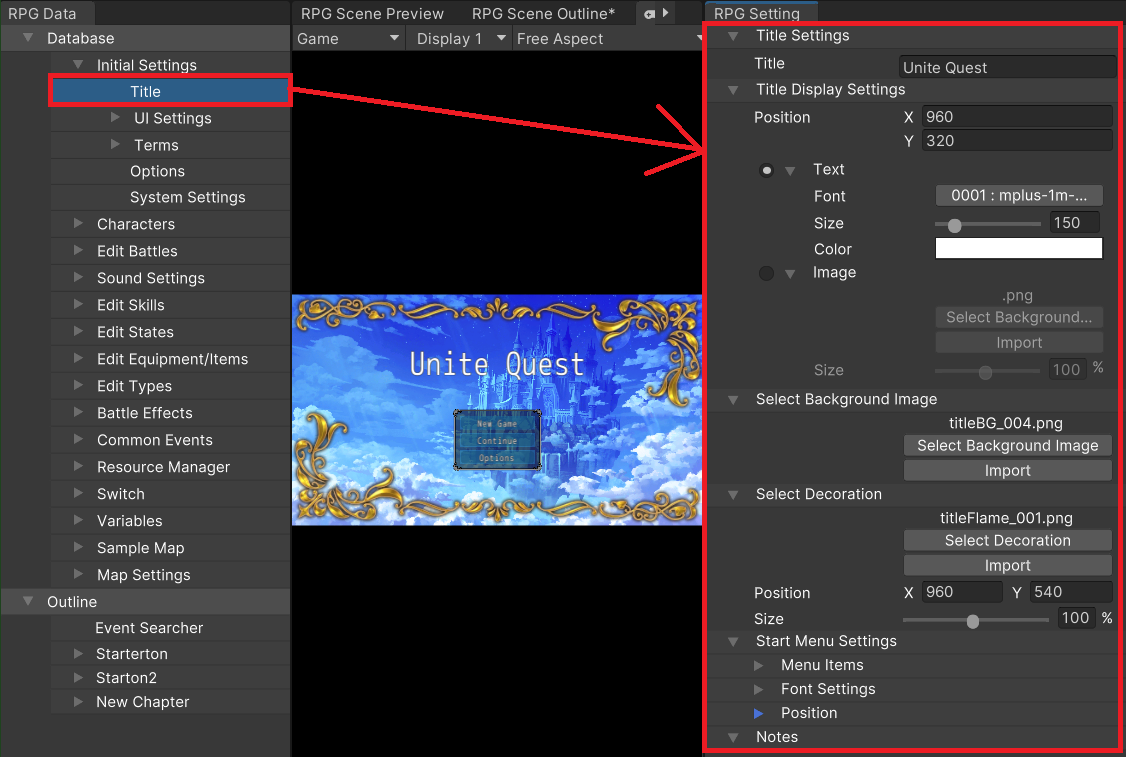
Let's start by editing the title screen. The title name should be changed first. We'll also explain some other items of note and what they do.
You can configure the display coordinates of the title along with whether to use text or an image for it.
If text is not exciting enough for your game, make a title logo and use that image as your title instead!
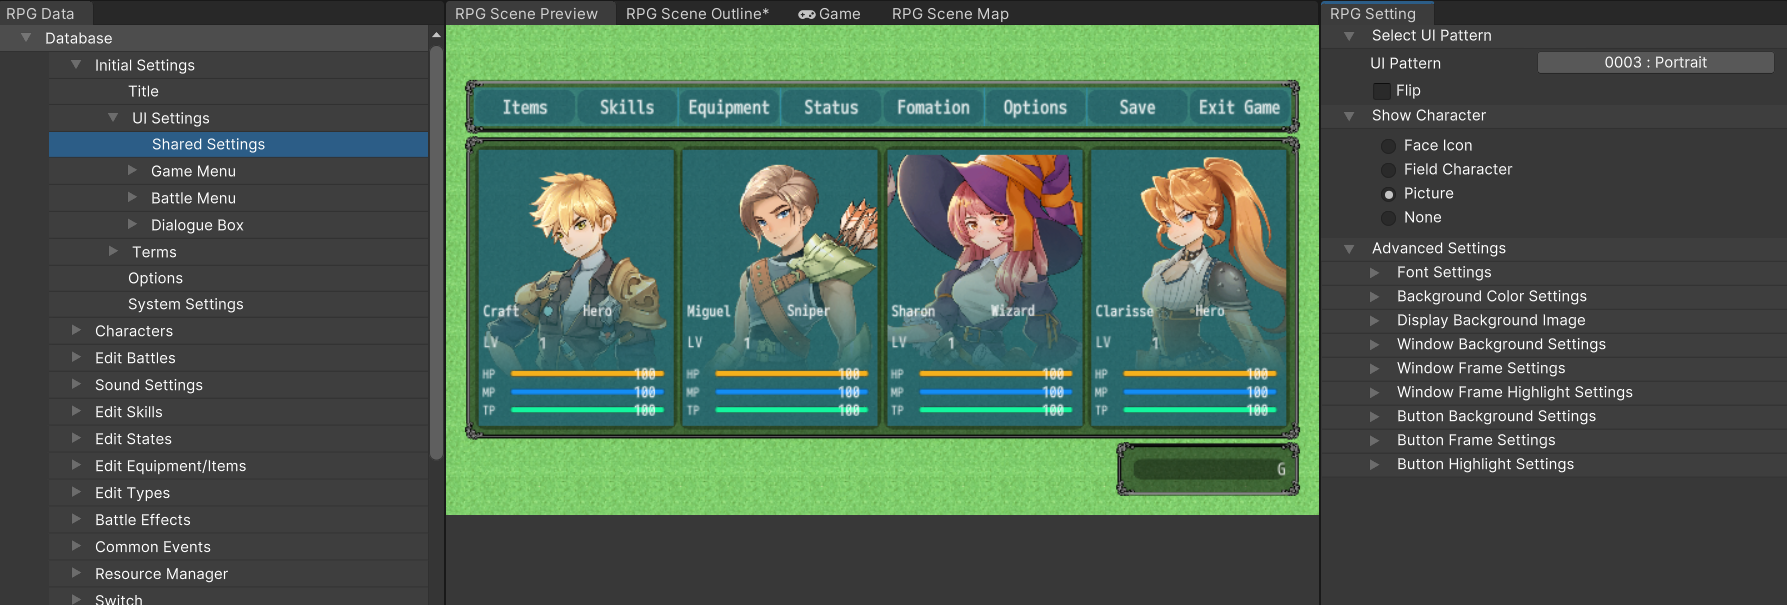
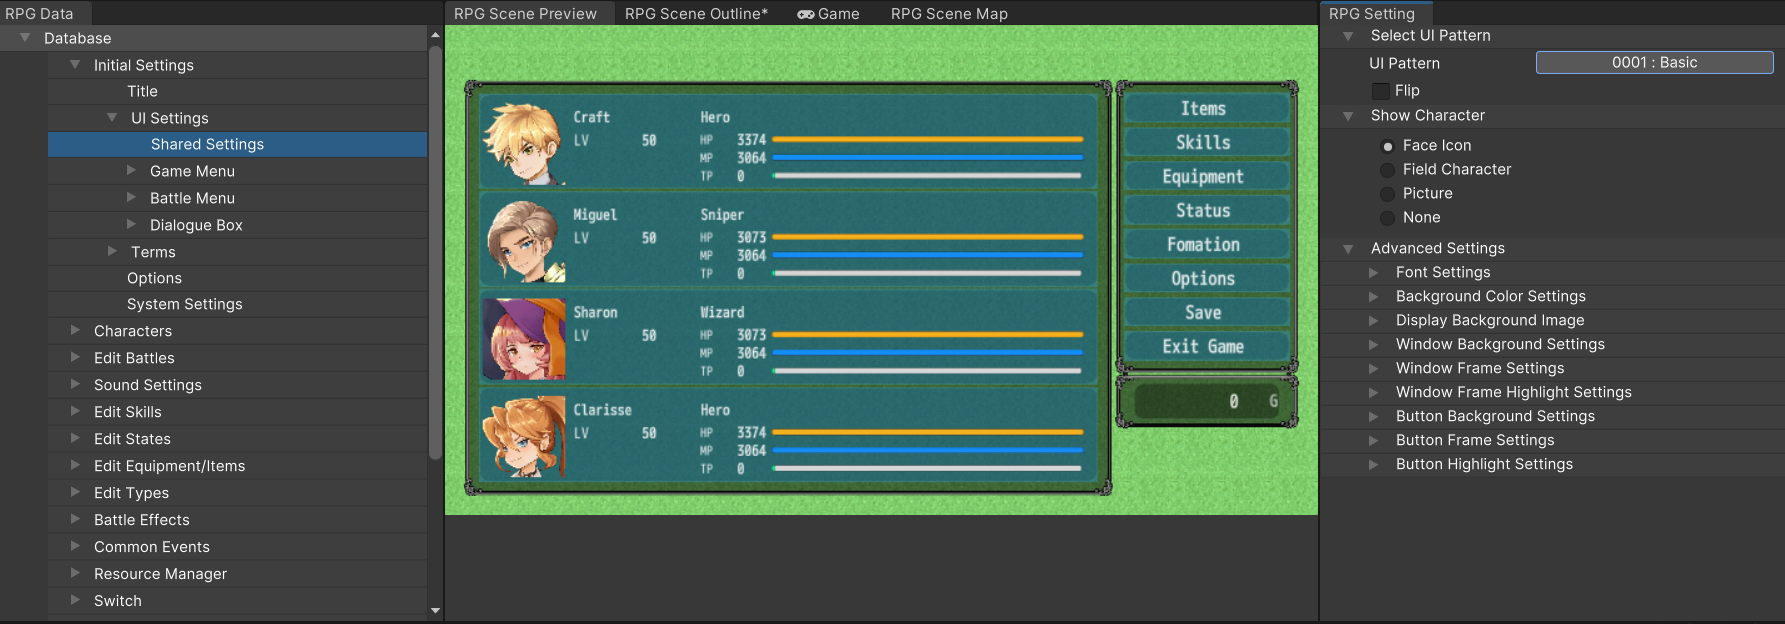
Before creating the opening, go to the RPG Setting under the RPG Data Menu's Initial Settings > UI Settings > Shared Settings to edit the format of the menu window that shows up while playing the game.
Here is an example.
● Menu displaying standing images of the actors in a horizontal row.
● Menu displaying face icons of actors vertically.
That's all for the basic settings. Now let's dive into actually making an opening scene.
Many games start with a black screen before showing something like a message. You'll notice the default game starts this way as well.
Let's learn how to start the game from a fade out and go over some things to take note of when doing this.
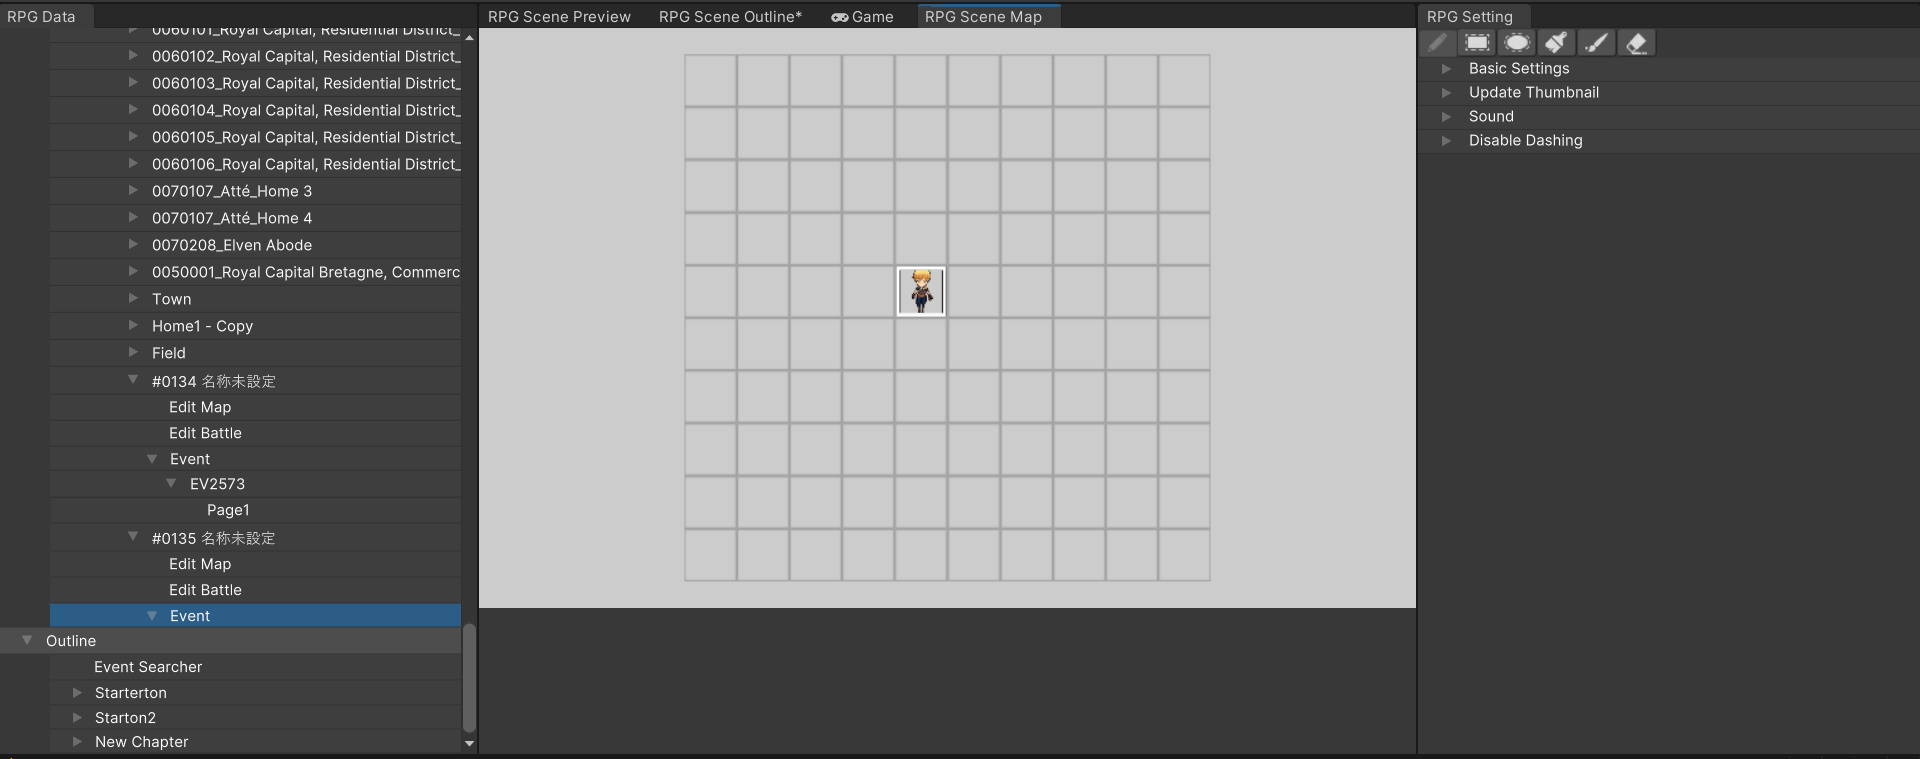
First of all, create a black map and set it as the player character's starting position. Any maps without tiles or backgrounds will be completely black.
You may also wish to start the game with the main character hidden from sight, which differs from the default game.
In the RPG Data Menu, go to Initial Settings > Options, then in the RPG Setting, check "Enable" for "Start in Transparent".
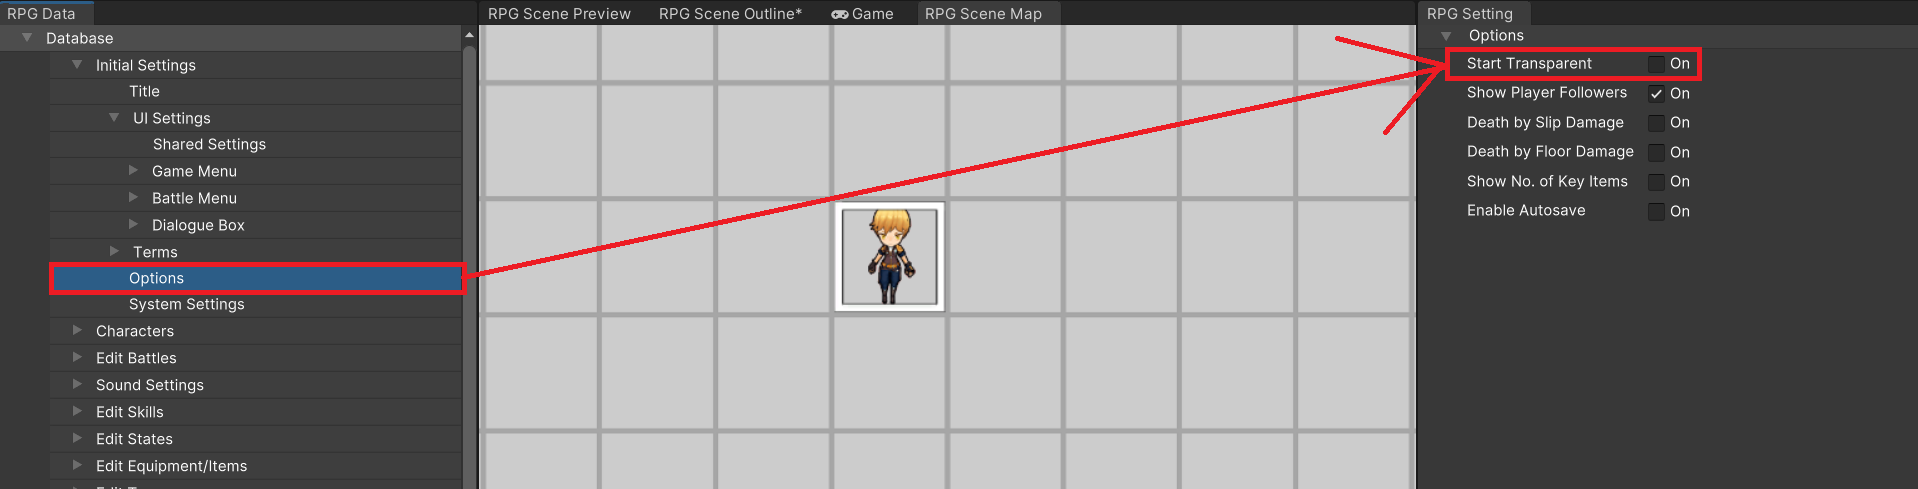
Use the Party > Change Transparency event command to disable or reconfigure transparency after the game starts.
If you recall, there are a couple methods you can use to accomplish this.
Fundamentally speaking, the OP is started by an autorun event. Furthermore, even if the OP begins with a conversation or combat,
these are executed via autorun events as well, as highlighted in the red frame below.
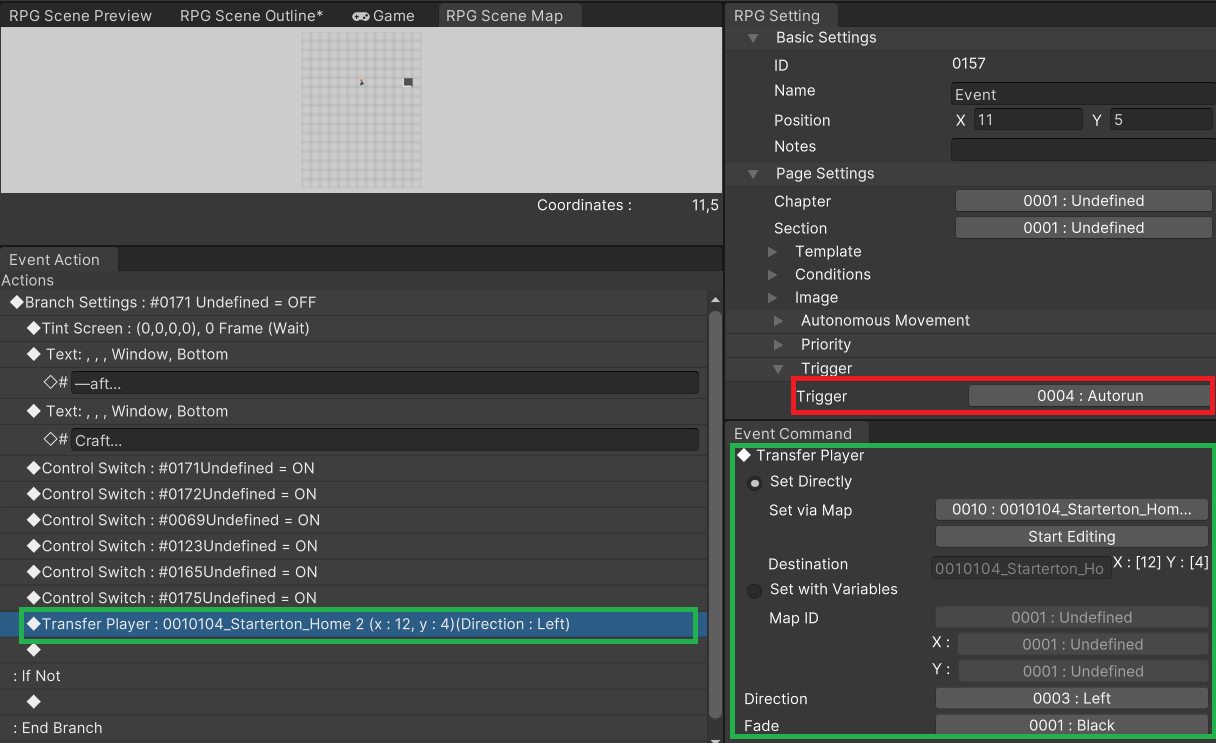
In the default game, the main character is moved to the first scene, his bedroom, after hearing his name being called.
To do something similar after your game starts from a fade out, use the "Transfer Player" event command to move the player character to their starting position in the game, as highlighted by the section in green.
The default game launches directly into the story, but what if you want to describe the world's background briefly when the game starts?
You can do that by using the Message > Scrolling Text event command.
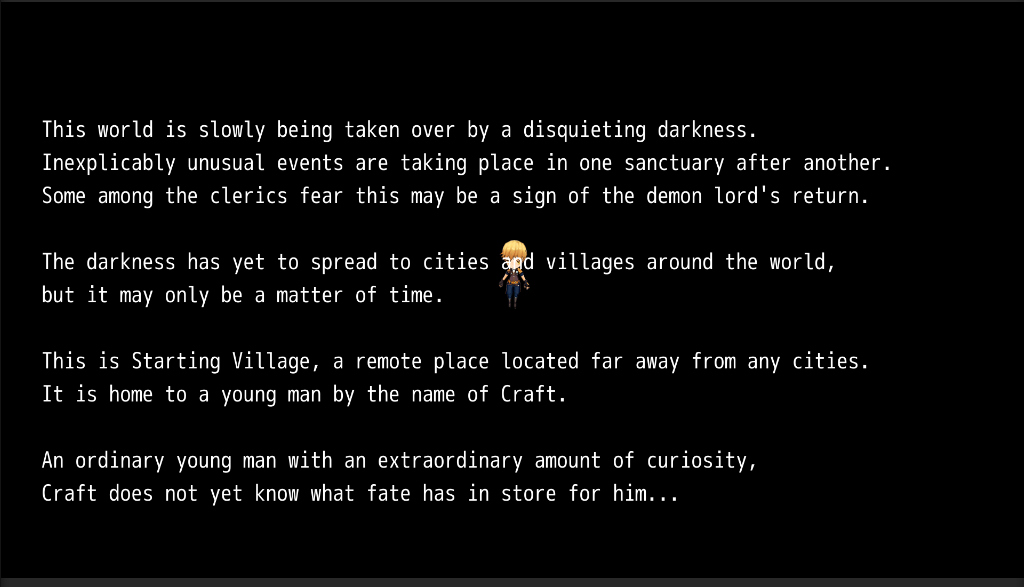
This world is slowly being taken over by a disquieting darkness.
Inexplicably unusual events are taking place in one sanctuary after another.
Some among the clerics fear this may be a sign of the demon lord's return.
The darkness has yet to spread to cities and villages around the world,
but it may only be a matter of time.
This is Starting Village, a remote place located far away from any cities.
It is home to a young man by the name of Craft.
An ordinary young man with an extraordinary amount of curiosity,
Craft does not yet know what fate has in store for him...
● Add "Scrolling Text" right at the start of the event
Now let's conduct a playtest.
● The text scrolls from bottom to top
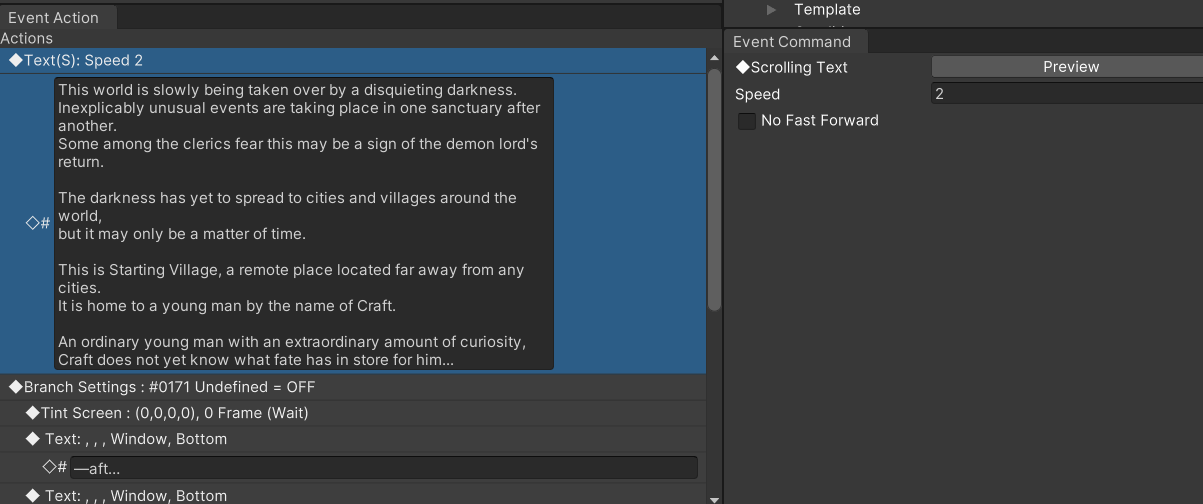
Type a few lines of text and make them scroll from the bottom of the screen to the top. This is used for staff rolls and descriptive text that are slightly longer than usual.
The default speed is 2. Feel free to adjust it if you think it's a little slow for your liking.
Most players play games to enjoy the gameplay and not to see story cutscenes, so let the player
assume control of their character as soon as possible after the game has started.
The default game keeps to this principle by allowing the player to control their character less than a minute after the game has begun.
Briefly talk about the worldview in the opening if possible and save the details for cutscenes or when the player interacts with townsfolk.
The default game doesn't even mention anything about the worldview at this point. If you wish to do that, keep it short and sweet like the sample text above.
Once the player has control, give them clear instructions on what their current objective is. Making players puzzle over what their next step should be is a big no-no.
The default game clearly points out what the player's next objective should be.
He is first called by his father, so there's an indication that he needs to speak to his father. Once he does that, he is given an errand to run.
Try to design the game like this so the player can find it easier to follow along.
The first task the player has in the default game is to run an errand.
This is a basic scenario for games and may perhaps seem a little cliche.
Nevertheless, the first errand is a good way to help players understand the basics of the game.
The default game proceeds with the next event immediately after the errand is over, but it is not necessary to always do this.
You can also consider making the player walk around for a bit before the next event is triggered or branch out into another plot line by making them encounter a problem during the errand.
Whatever you decide, don't forget to create your opening in such a way that makes it easy for the player to get into the game you've carefully crafted!