

RPG Maker 3D Character Converter User Manual V1.00
Overview
The main purpose of this app is to output images for use in the Actor Images screen on RPG Maker Unite.
*Also suitable for use in other tools such as RPG Maker MZ, etc.
One of its features is the ability to render or generate images from VRMs, a 3D data file format.
Workflow
There are three main screens on this application. Users are likely to switch between screens often during the course of creating assets.
- New Project Select a VRM.
- Editor View
Adjust animation and camera angles.
- Export Preview
Final scene check before export.
Switch between screens using the navigation bar at the bottom.
*Disabled when the application is processing data.
Navigation Drawer
Click on the top left icon to open the menu for File, Undo, and other options.
- Open
Open a previously saved preferences file.
- Save
Overwrite and save over file currently being edited.
- Save As
Save file currently being edited under a different name.
- Export All
Export all motions of current VRM (walking, damage, side-view, face, picture) as image files.
- Undo
Cancel last action.
- Redo
Reapply last undone action.
- Close
Close and exit application.
*VRM data is not saved into the preferences file. This means it can be used to load other VRMs.
*The redo function only works in Editor View, up to 10 steps. This resets each time you switch tabs.
Information Menu
The top right icon opens the information menu.
- Help
Link to help page with user manual.
- About This Application
For checking application version data.
New Project
This screen contains a list of models and model information. Select a VRM to prepare for export.
Click on a VRM from the list to display model information and enable the option to move to the Editor View. Refer to the following for more details about model information.
https://vrm.dev/univrm/meta/univrm_meta.html
*To create a cache for the VRMs, this screen may take a while to load on startup
List View
The list view contains Tabs and the Reconstruct Cache button.
The 3D Character Converter tab contains default VRMs included with this application. This list is fixed.
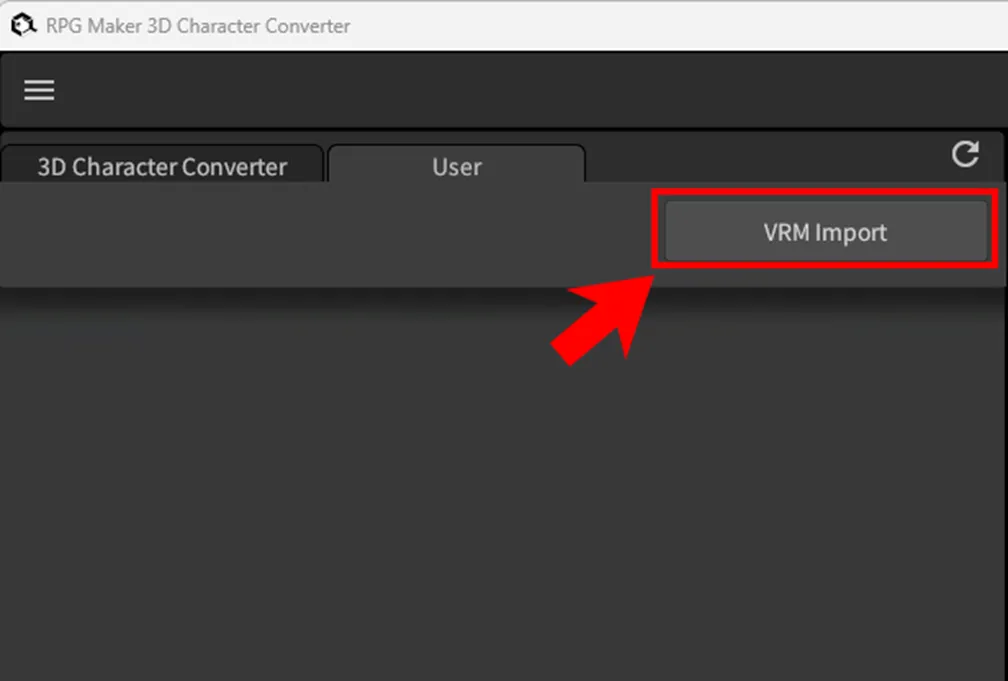
User List
Switch to the user tab to display VRMs in the user's folder.
Click on the VRM Import button to copy any VRM files to the user's folder.

By default, the following directory is set as the user's folder. Windows:
|
Mac:
|
Reconstruct Cache
The list may sometimes stop working correctly when a VRM file is being manually controlled. If that happens, click on the Reconstruct Cache button to refresh the screen.
Editor View
In this screen, a model's walking, damage, side-view, face, and picture images are displayed in four panels for editing.
- 3D View Displays the VRM in 3D. Camera angles can be adjusted.
- 2D View
Displays the rendered result. Specify an animation frame to render for walking, damage, and side-view.
- Timeline
Shows 60 frames of the selected motion. Not available on the face or picture tabs as they have no animation.
- Motion Settings
Select motion orientation or side view and adjust springbone (swingable parts) settings. Adjust facial expressions for face or picture images.
*Some processing time is needed when moving into Editor View after selecting a VRM as the camera will be automatically placed at an angle facing the model.
3D View
This is where you can check the model and adjust camera angles.

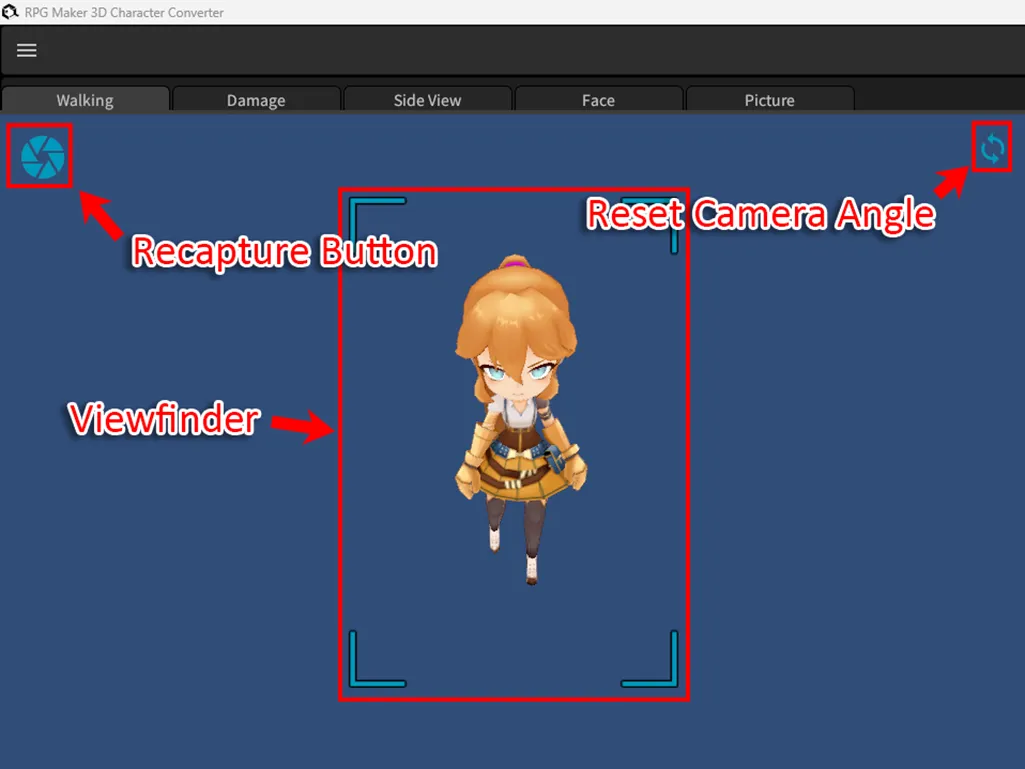
Click anywhere inside the view pane and drag the mouse to change camera angles.
- Right-drag Rotate
- Middle-drag Pan
- Scroll wheel Zoom
To reset camera angle to previous configuration, click on the Reset Camera Angle button. Click on the Recapture button to retake a picture of the model within the viewfinder.
2D View
Displays the rendered image.

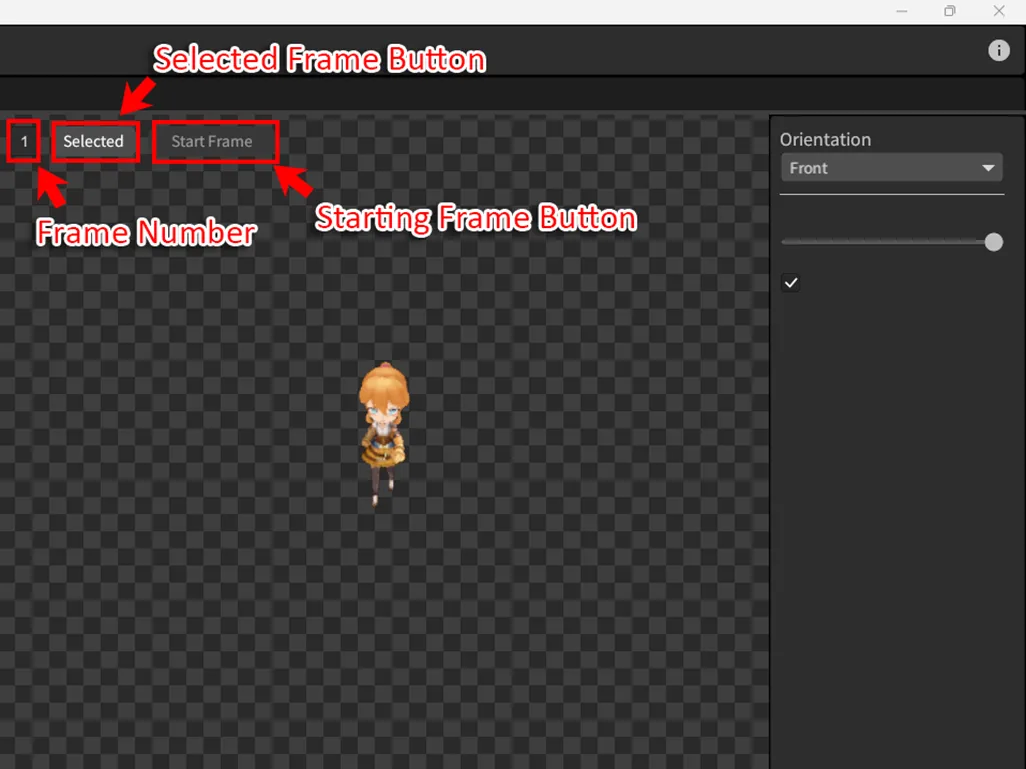
Frame number indicates which frame from the animation timeline below is currently being selected.
Click on the Selected button to use current frame.
*Multiple frames can be selected, up to the maximum allowed number.
Click on the Starting Frame button to set this frame as the starting frame of the animation.
*If the Starting Frame is unselected, the frame with the smallest number among all selected frames will be assigned as the Starting Frame.
*These buttons are not shown in the face or picture tabs as they have no animations.
Timeline
The timeline shows 60 frames of each available motion.


The frame settings information section displays the frame size, number of selectable frames, and how many are currently selected.
Click on the Frame Settings button to open a dialog to edit frame settings.

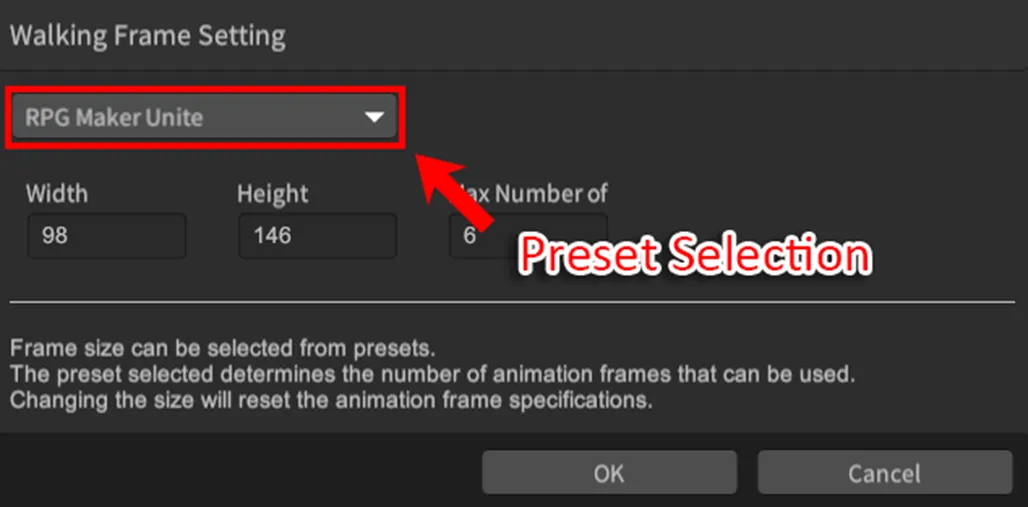
Select an appropriate size/frame count using the preset selection combo box.
*Changing the preset deletes the current frame selection and resets everything to default.
Click on the Reset Frame Selection button to reset frame selection. Click on the Play 2D button to play an animation of the currently selected frame.
Click on a frame to display it in 2D. Double-click to select/deselect the frame.
Right-double-click to select/deselect the frame while letting the animation keep playing in 2D.
Motion Settings
Adjust VRM springbones (swingable parts) and blendshapes (facial expressions).

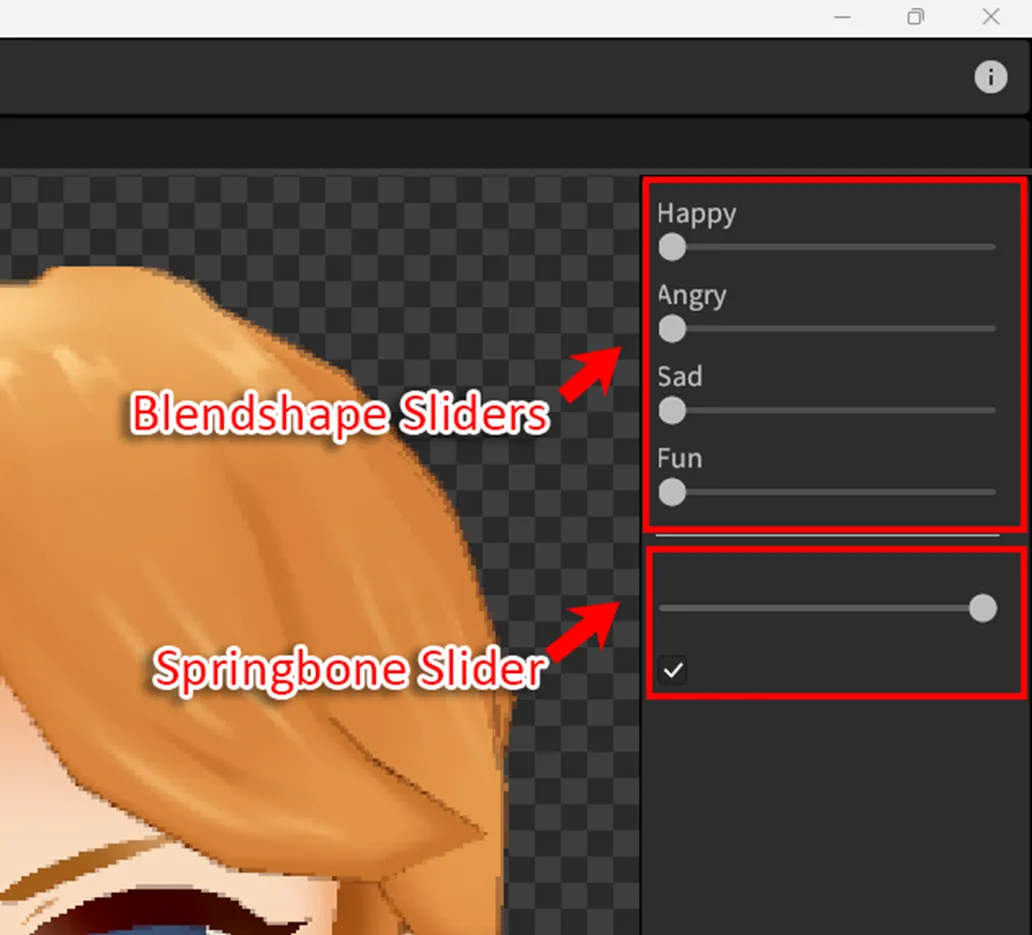
The blendshapes are adjusted using sliders for the parameters of joy, anger, sorrow, and fun.
*Not available for walking/damage/side-view.
The Wait Time slider for springbone controls the amount of time that will elapse before the springbone stabilizes. The options are between 0 to 1 second.
Uncheck the Enable Springbone checkbox to stop the springbone from moving after stabilizing.
*The Damage motion has this off by default.
*The Knockout side-view motion has this off by default.
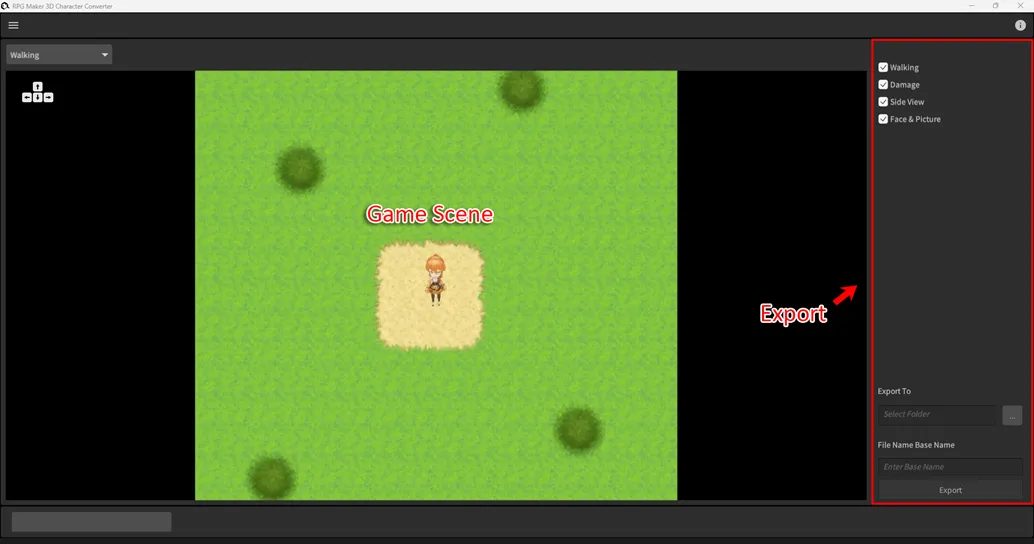
Export Preview
This screen allows users to check how the walking, damage, side-view, face, and picture images will look like against the backdrop of a mock game screen.
Users can also select images individually for export.

Game Scene
Select either walking, damage, side view, face & picture from the scene selection combo box.

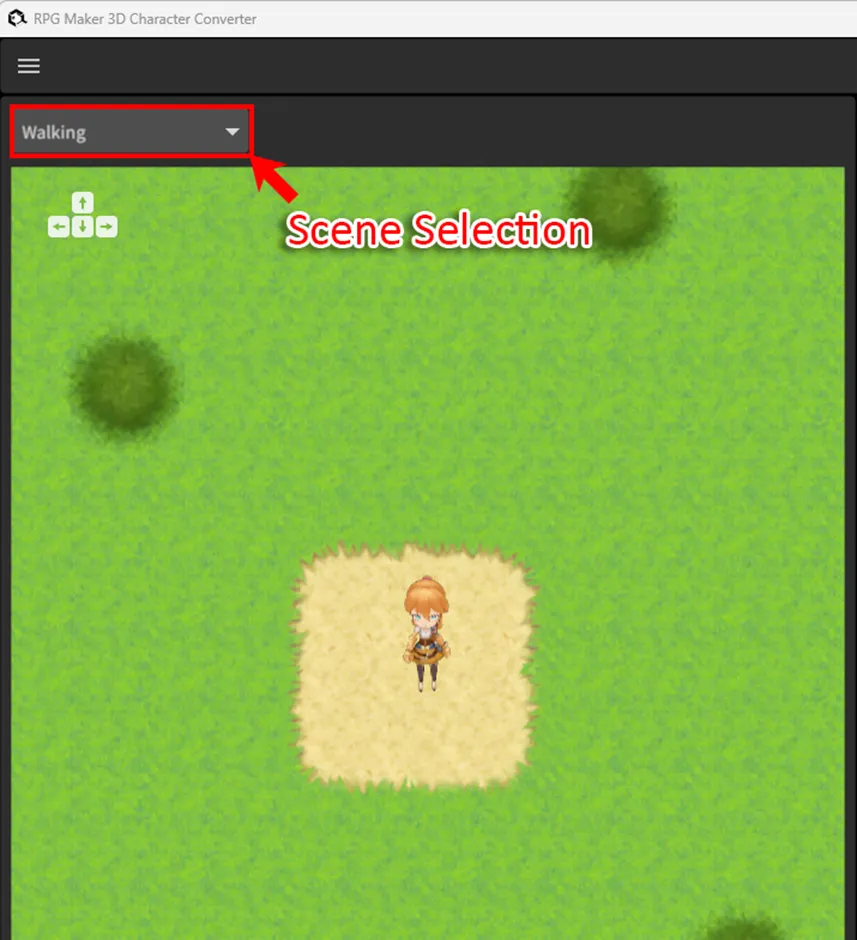
Walking: Use the cursor key to move the model up, down, left, or right. Damage/Side-View: Use the space key to play the animation.
Face & Picture: The background changes into a mock event screen.
Export
Specify which images to export, an output folder, and a file base name.

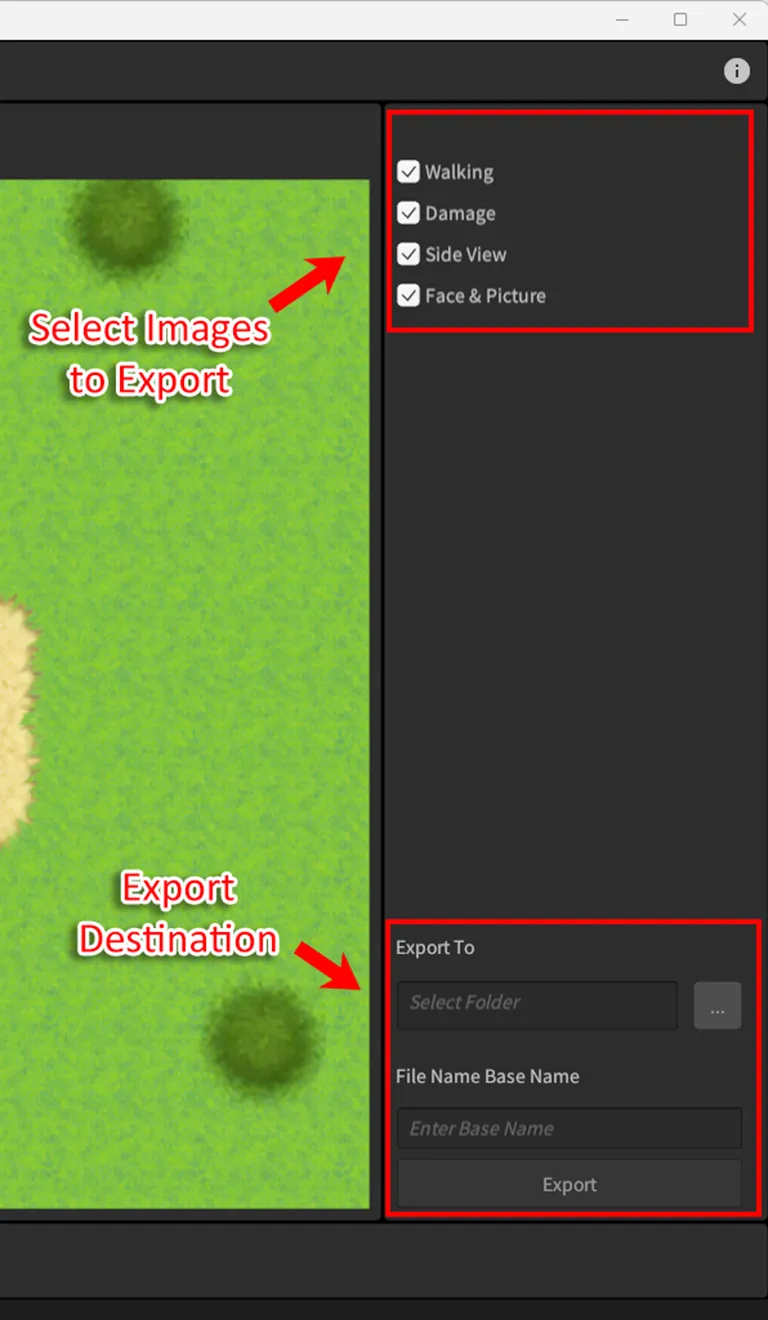
Only checked items will be exported.
Specify a folder and base name, then click on the export button to export the model into RPG Maker Unite compatible files.