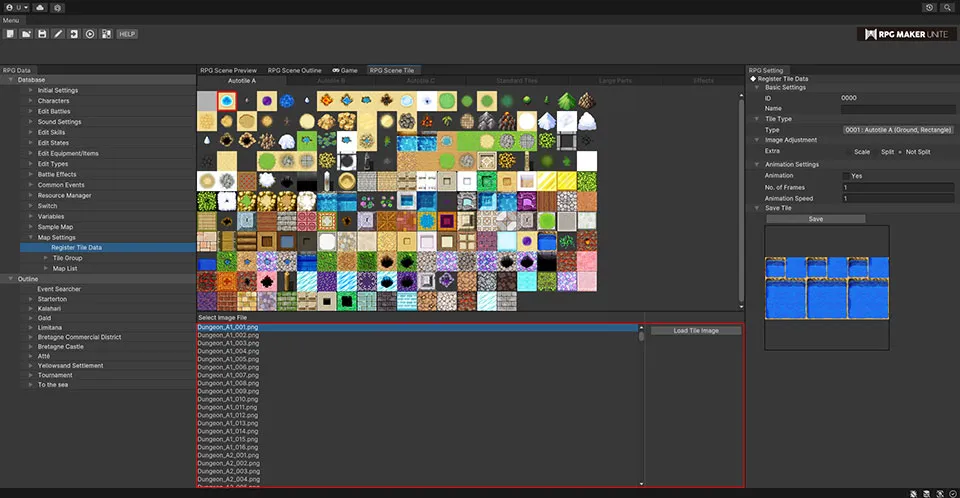
[Register Tile Data]
Tiles in Unite are registered and edited individually, which is different from past entries in the RPG Maker series. There are 6 types of tiles that can be registered: standard tiles, autotiles A (ground), autotiles B (walls), autotiles C (tables), large parts, and effects. See "Creating Tile Data" for info on how to create each type of tile.

Settings When Registering Tiles
Select Image File
Select an image file from the "File Selection Window" below the scene preview to use one that has already been imported into Unite.
Load Tile Image
To use a new image, import image data from [Import Tile Image].
Basic Settings
Name
Enter the name of the tile.
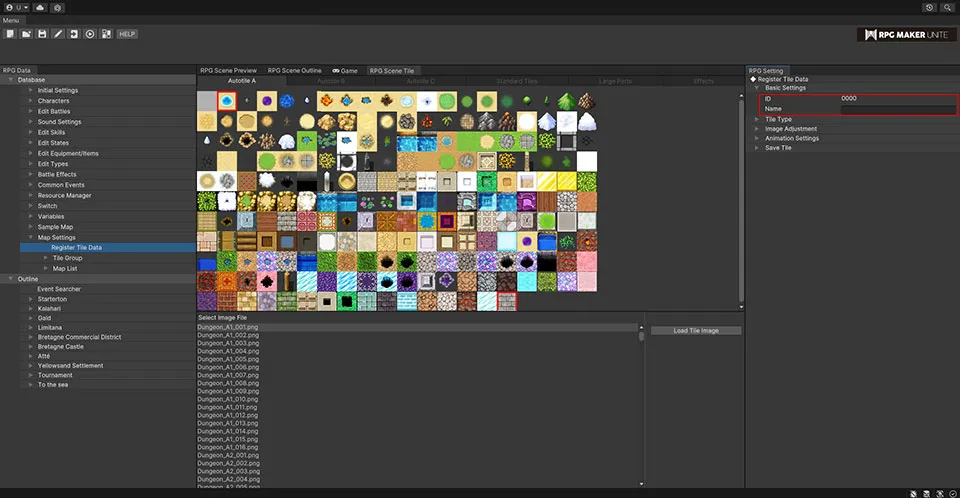
Tile Type
Set the type of tile that's being registered.

| Autotile A | Autotiles that are used for terrain, floors, etc. |
| Autotile B | Autotiles that are used for walls and other similar barriers. |
| Autotile C | Autotiles that are used for tables, counters, and similar objects. Selecting this type will turn the "Counter" setting under "Character Passage" to ON. When this tile is painted, the bottom one square is erased. If this tile is already painted, the square of Auto Tile C and one square below it cannot be overwritten by another tile. |
| Standard Tiles | Standard 98 x 98-pixel tiles. |
| Large Parts | Larger parts that aren't restricted to being 98 x 98 pixels. The maximum size that can be registered is 2048 x 2048. |
| Effects | Effect parts for bodies of water, lava, etc. |
Image Adjustment

| Scale | Checking this option when using an image file with a resolution greater than 98 x 98 will display it as scaled down to that size. |
| Split | Checking this option when using an image file with a resolution greater than 98 x 98 will split it into separate tiles of that size and register them all in the tile data. |
Animation Settings
Edit the animation of the tile.
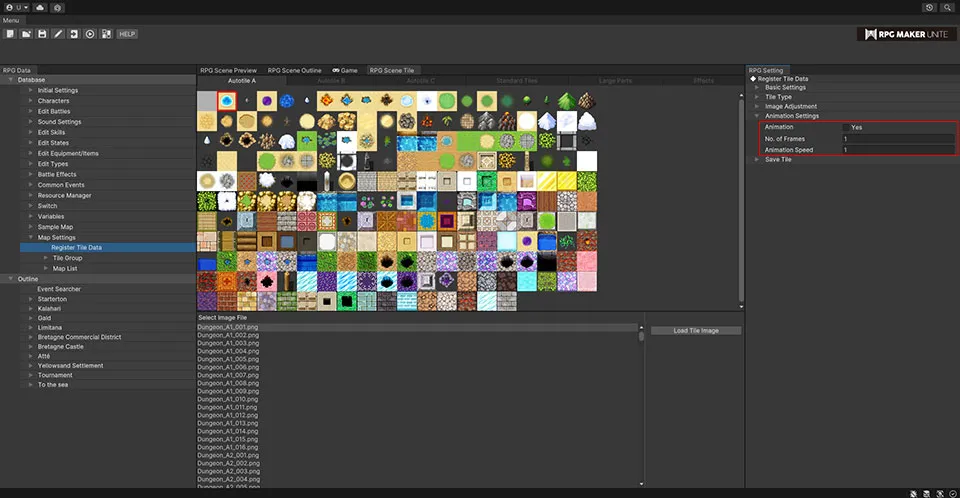
| Animation | Checking "Yes" will register it as an animating tile. |
| No. of Frames | Enter the number of frames for the animation. |
| Animation Speed | Set the playback speed of the animation. |
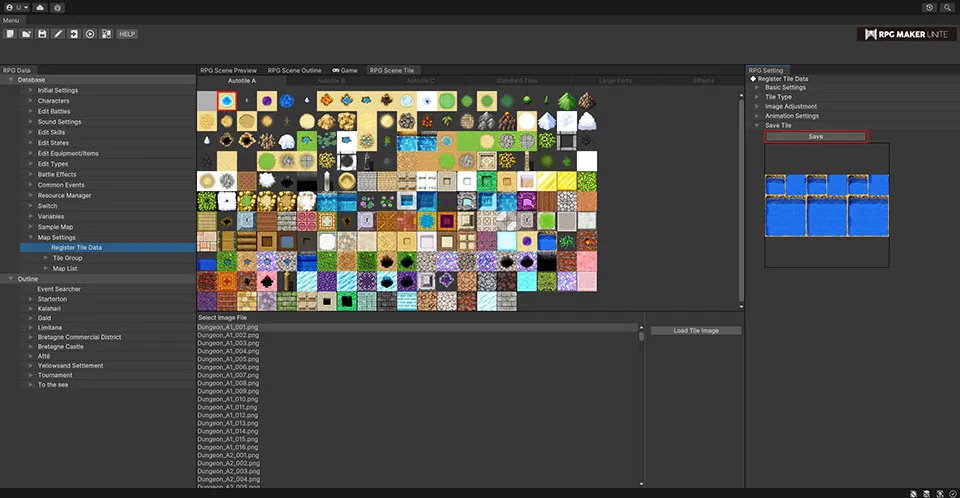
Save Tiles
Save Button
Clicking "Save" will register the tile so that it can be used when editing maps.
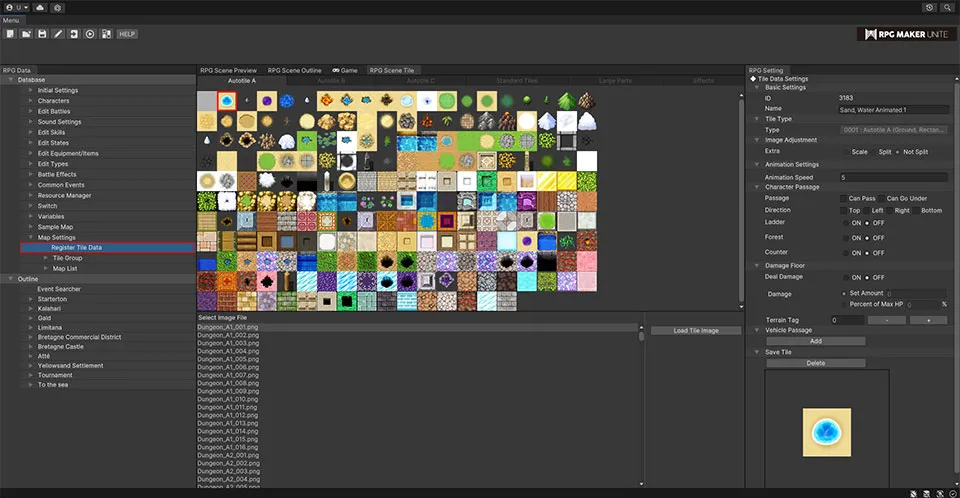
Settings After Registering Tiles
Character Passage
Edit settings for whether characters can pass through the tile.

| Passage | Checking "Can Pass" will allow passage over the tile, while checking "Can Go Under" will allow passage underneath it, which lets characters hide behind the tile itself. If neither option is checked, passage through the tile will not be possible. |
| Direction | Set the directions for which passage is possible. Most tiles allow all four directions but you can also restrict passage for certain ones. For example, from just the top and bottom, or from the left and right. |
| Ladder | Allows passage but adjusts the character's animation so they appear to be climbing a ladder. The animation will be the same as for moving up the screen, regardless of whether the character is going up or down. |
| Forest | The area on the character around their feet will be covered by the tile. |
| Counter | If you wish to allow a character to speak to another character across a table, register the tile as one by checking this box. |
Damage Floor
Set whether the tile will deal damage to a character when they pass over it.
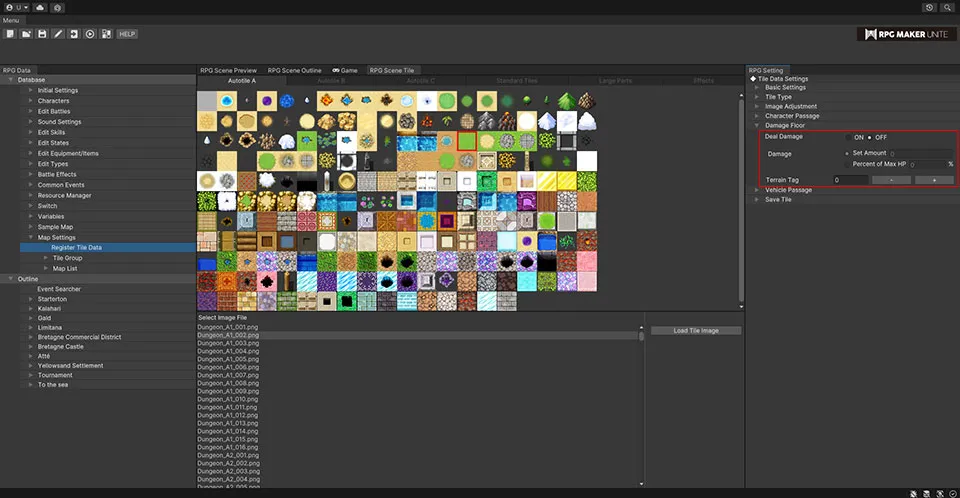
Deal Damage
Setting this to "ON" will cause the tile to deal damage.
Damage
Set the amount of damage that's dealt.
| Set Amount | Set a fixed amount. |
| Percent of Max HP | Set a proportion of the character's Max HP, represented as a percentage. |
Vehicle Passage
Edit settings for whether vehicles can pass over the tile. For example, it's possible to create sea/ocean tiles that characters can't pass through but boats can.

Add Button
Add a vehicle to edit the settings for.
| Vehicle | Select a vehicle you wish to edit the settings for. Choose from the vehicles listed in "Characters → Master Character List → Edit Vehicles". |
| Passage | Checking "Can Pass" will allow passage over the tile, while checking "Can Go Under" will allow passage underneath it, which lets the vehicle hide behind the tile itself. If neither option is checked, passage through the tile will not be possible. |
| Delete Button | Delete the current settings. |
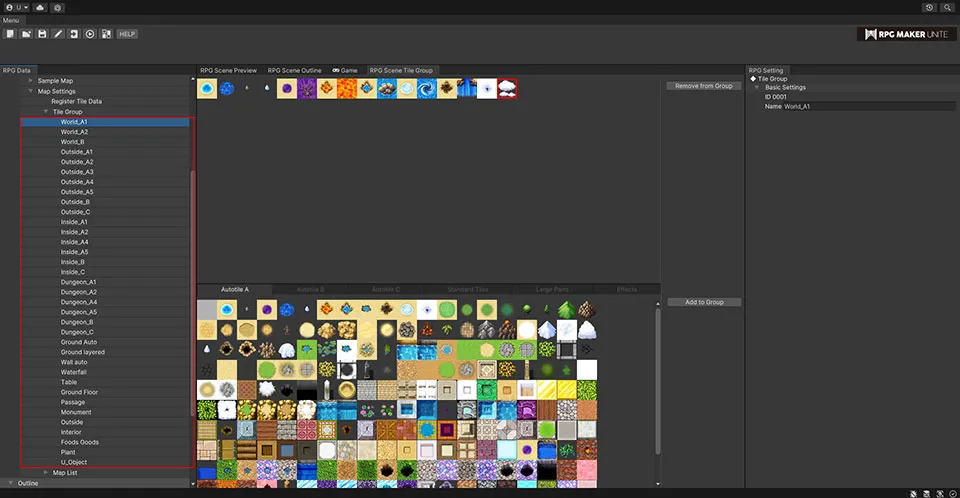
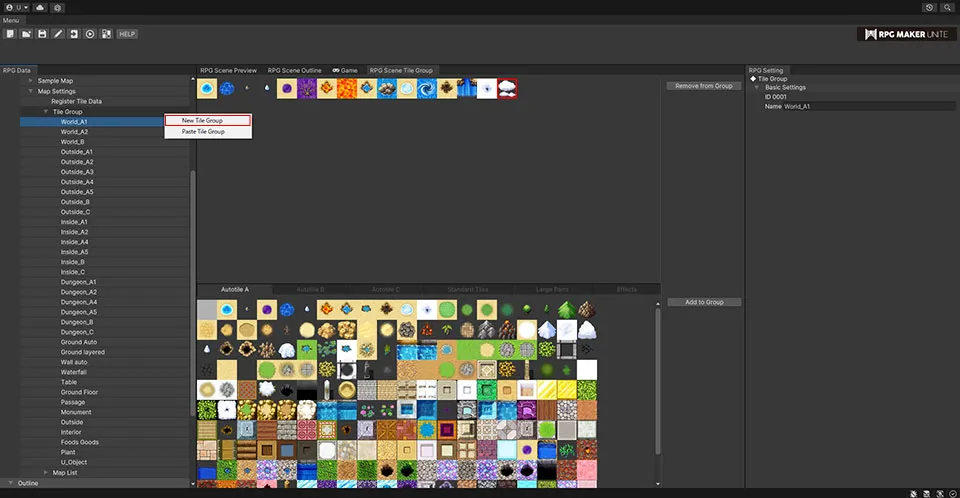
[Tile Groups]
Take the tiles that have been registered and create groups that contain only those needed to make the game being worked on. Tile groups can even be made from the "Edit Map" screen, which allows you to make your workflow more efficient by organizing the necessary tiles before editing a map. Right-click "Tile Group" in the "RPG Maker Window" and select "New Tile Group" to create a new one. It's also possible to give this tile group a name. Select the tiles you need from the "Tile Data Selection Window" and click "Add to Group".
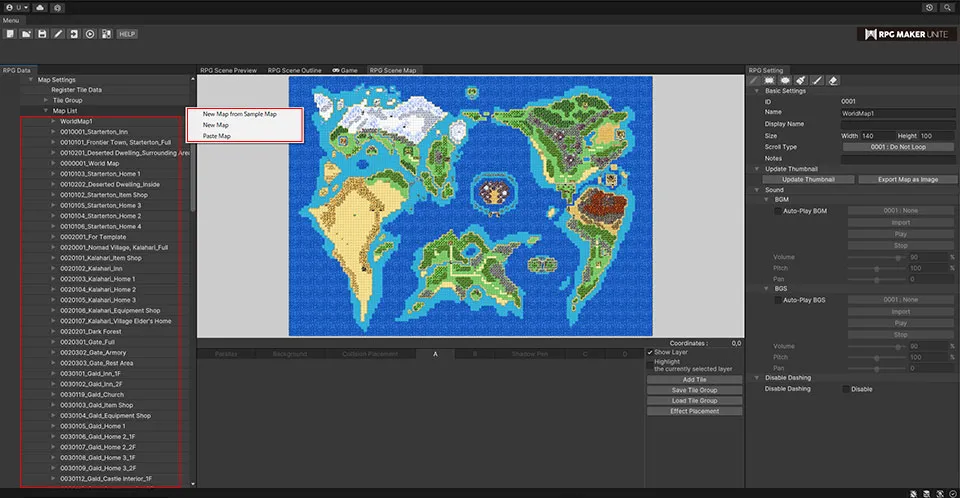
[Map List]
Create new maps and edit existing ones. Right-click "Map List" in the "RPG Maker Window" and select "New Map" to create a new one.
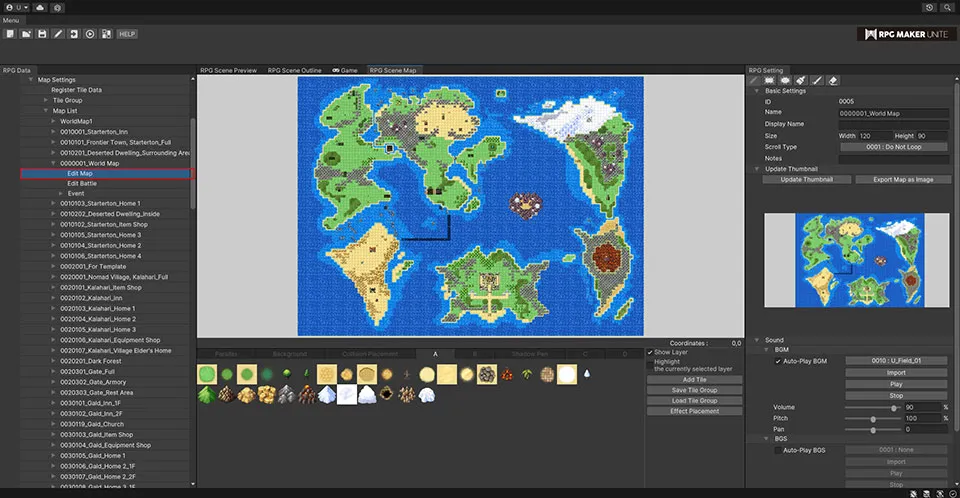
Edit Map
Edit the map.
About copying a range of tiles For more information
Basic Settings
Edit the basic settings for the map.

| Name | Enter the name of the map. It's recommended to use names that are easy to understand and meaningful to the creation of the game. |
| Display Name | The map name that is shown in-game. When the name of a map is displayed by an event command, etc., the name entered here will be used. |
| Size | Set the size of the map. Both the vertical and horizontal values are scaled up by a factor of 96 pixels. |
| Scroll Type | Choose a scroll type between "Do Not Loop", "Loop Vertically", "Loop Horizontally", and "Loop Both". |
| Notes | A place for the creator of a game to leave notes. They will not be displayed in-game, so feel free to use it as you see fit. |
Update Thumbnail
Update the thumbnail used by the Outline editor to be the current state of the map.
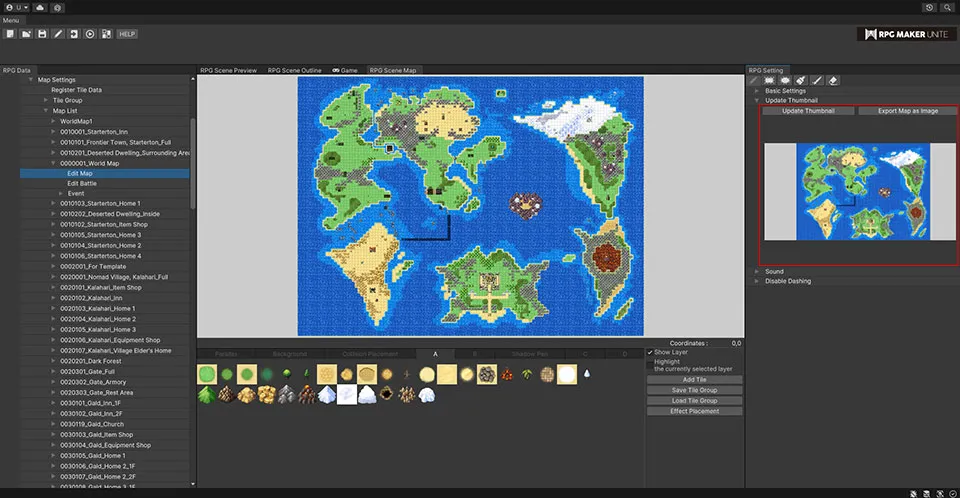
| Thumbnail Update Button | Update the thumbnail. |
| Export Map as Image | Export the map shown in the RPG Scene Preview as an image. |
Sound
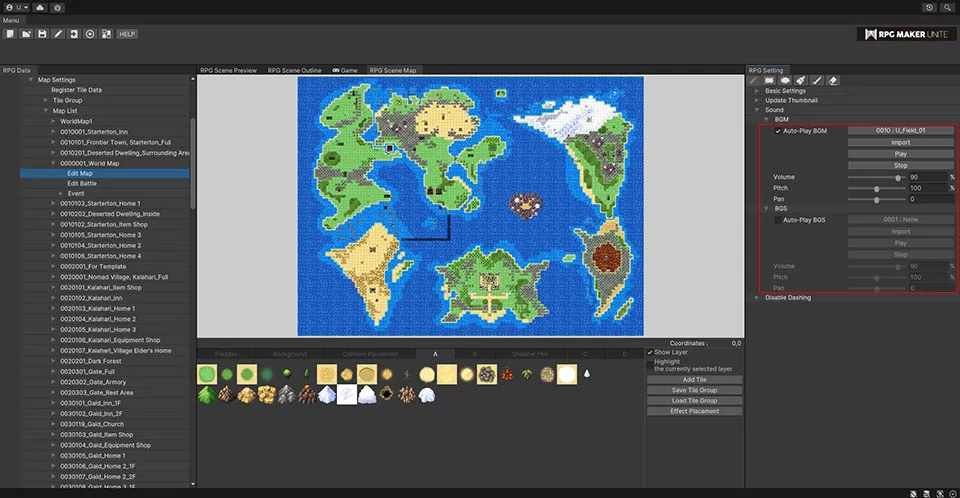
BGM
| Auto-Play BGM | Checking this box will cause the designated BGM to automatically play when the map is displayed. |
| Select BGM | Choose from sound files that have already been imported. |
| Import | If you wish to use a sound file from outside RPG Maker Unite, you can select a file and import it. |
| Play Button | Play back the BGM to confirm what it sounds like. |
| Stop Button | Stop playback of the BGM. |
| Volume | Set the volume. This value can range from 0 to 100%. |
| Pitch | Set how high or low the pitch is. This value can range from 50 to 150%. |
| Pan | Set the left/right stereo balance. This value can range from -100 to 100. |
BGS
| Auto-Play BGS | Checking this box will cause the designated BGS to automatically play when the map is displayed. |
Dashing
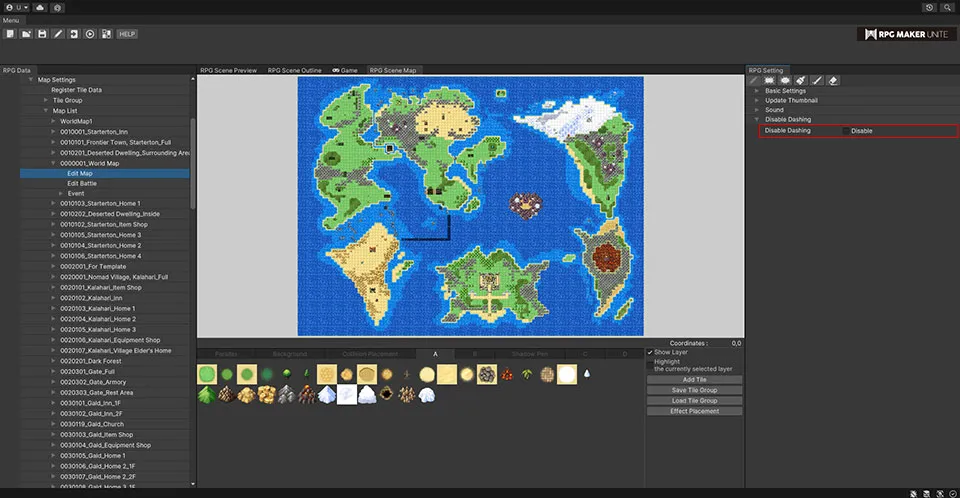
Disable Dashing
Disable the actors' ability to dash while on the map.
[Placing Map Tiles]
Tile Window

Selecting Layers
Select the layer that you want to edit from the layer tabs in the tile window. Place tiles as you see fit to suit the game being made.
| Parallax | Select an image to use as a parallax background. |
| Background | Select a single image to use as a background. Use this layer when you want to have a single large image as a background instead of tiles. |
| Layer A | This is a standard layer. Anything here will be placed behind the other standard layers, so it's suitable for placing tiles for terrain, etc. |
| Layer B | This is a standard layer. It's suitable for placing tiles for mountains, trees, walls, etc., that are aboveground. |
| Shadow Pen | Use the shadow pen to draw shadows on this layer. |
| Layer C | This is a standard layer. |
| Layer D | This is a standard layer. |
*Notes for editing C layers
If you want to place a tile such as a floor under a tile such as a desk on "C Layer," place it on "A Layer" or "B Layer," the layer below it.
Show Layer Checking this box will show the tiles on the selected layer in the RPG Map Scene.
Highlight Layer Checking this box will highlight the tiles on the selected layer in the RPG Map Scene, making them easier to see.
Add Tile After selecting layer A, B, C, or D, add a tile that you want to use by right-clicking inside the tile window and selecting "Add Tile". Choose the tile you want to add from those registered in the RPG Maker Unite tile library and click the OK button. This will add that tile so that it can be used when editing the map.
Delete Tile Right-click on a tile you want to delete and select "Delete Tile".
Load Tile Group Button Load a tile group and add all the tiles in it at once.
Save Tile Group Button Save the current collection of tiles in the tile window as a new tile group.
Effect Placement Button Click "Effect Placement" when you wish to add effects to the single background image or layers A, B, C, or D. Much like with adding regular tiles, effects can also be added from the tile library.
[Placing a Parallax Background]
Set an image to be used as a parallax background and edit various settings for it.
Tile Window


| Load Image Button | Load an image from outside RPG Maker Unite. The maximum size for a parallax background is 2048 x 2048. |
| Delete Image Button | Click "Delete Image" to delete the parallax background that's currently set. |
RPG Settings Window
Parallax Background

| Set Image | Choose a parallax background from images that have already been imported into RPG Maker Unite. |
| Loop Horizontally | Set whether the parallax background will loop horizontally and adjust the speed. This value can range from -32 to 32. |
| Loop Vertically | Set whether the parallax background will loop vertically and adjust the speed. This value can range from -32 to 32. |
| Show in Editor | Set whether the parallax background will be shown in the RPG Map Scene's map editor. Unchecking the box will set it to not be displayed. |
Parallax Background Enlargement
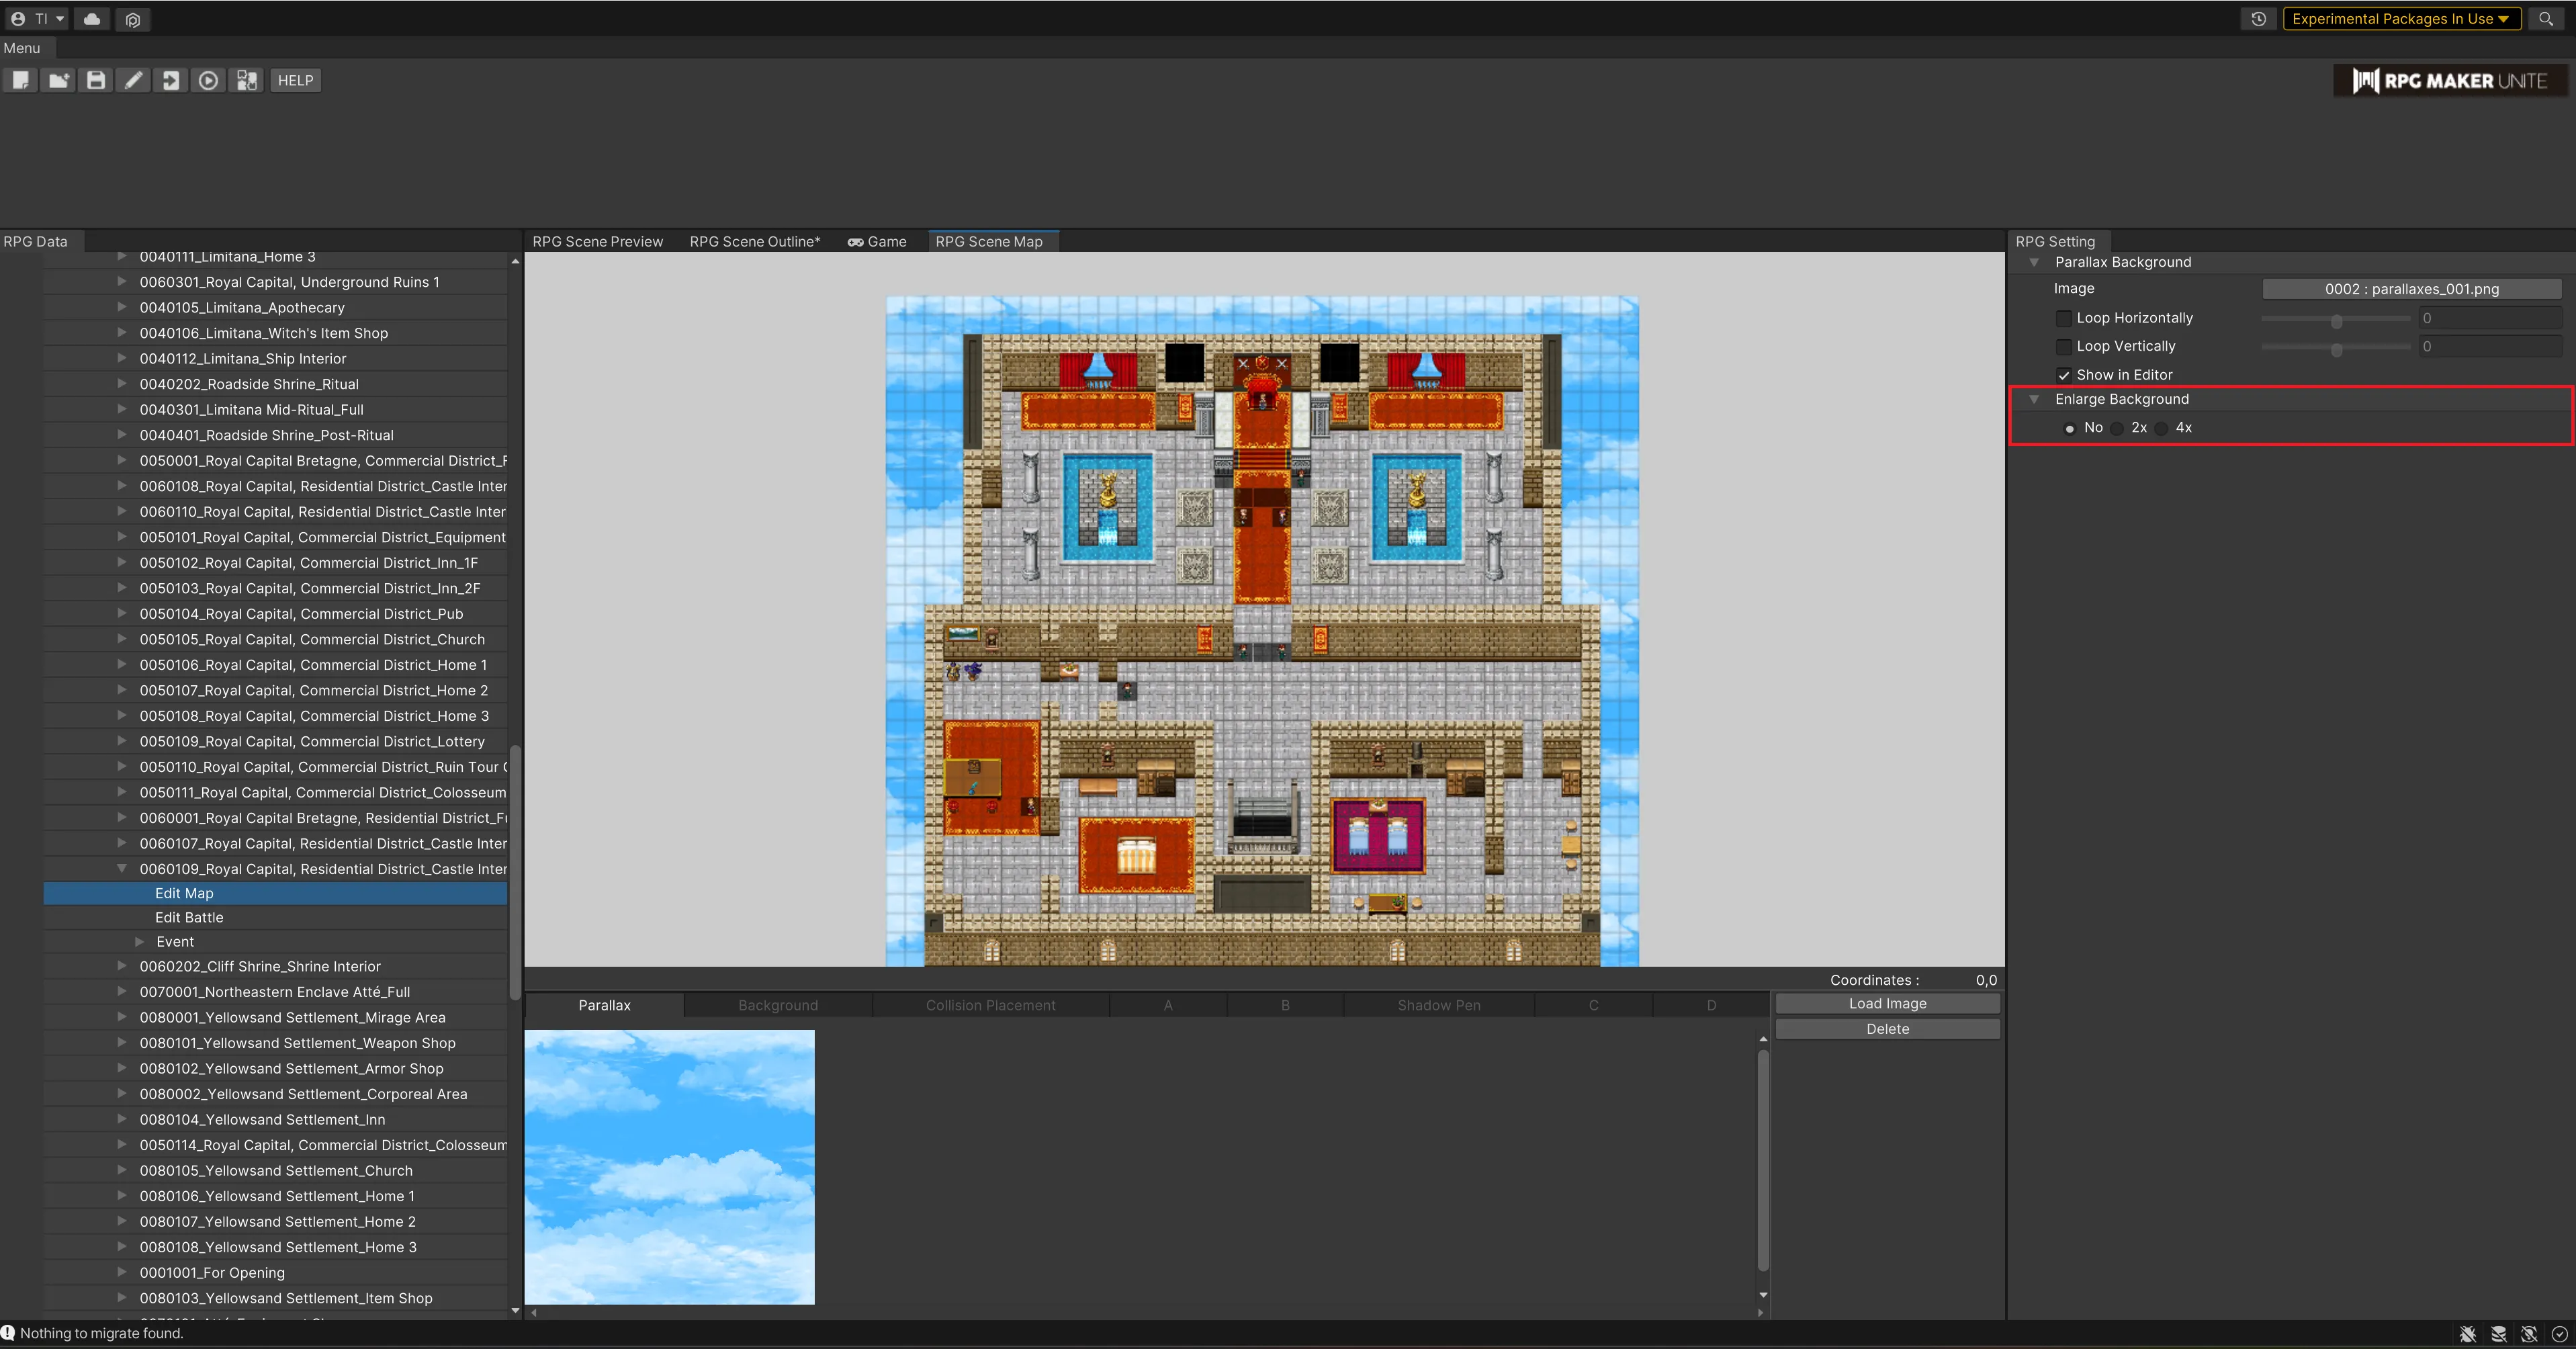
| Scale | Set whether the image for the parallax background should be scaled up. Choose between "No", "Double", and "Four Times". |
[Placing a Background]
Tile Window

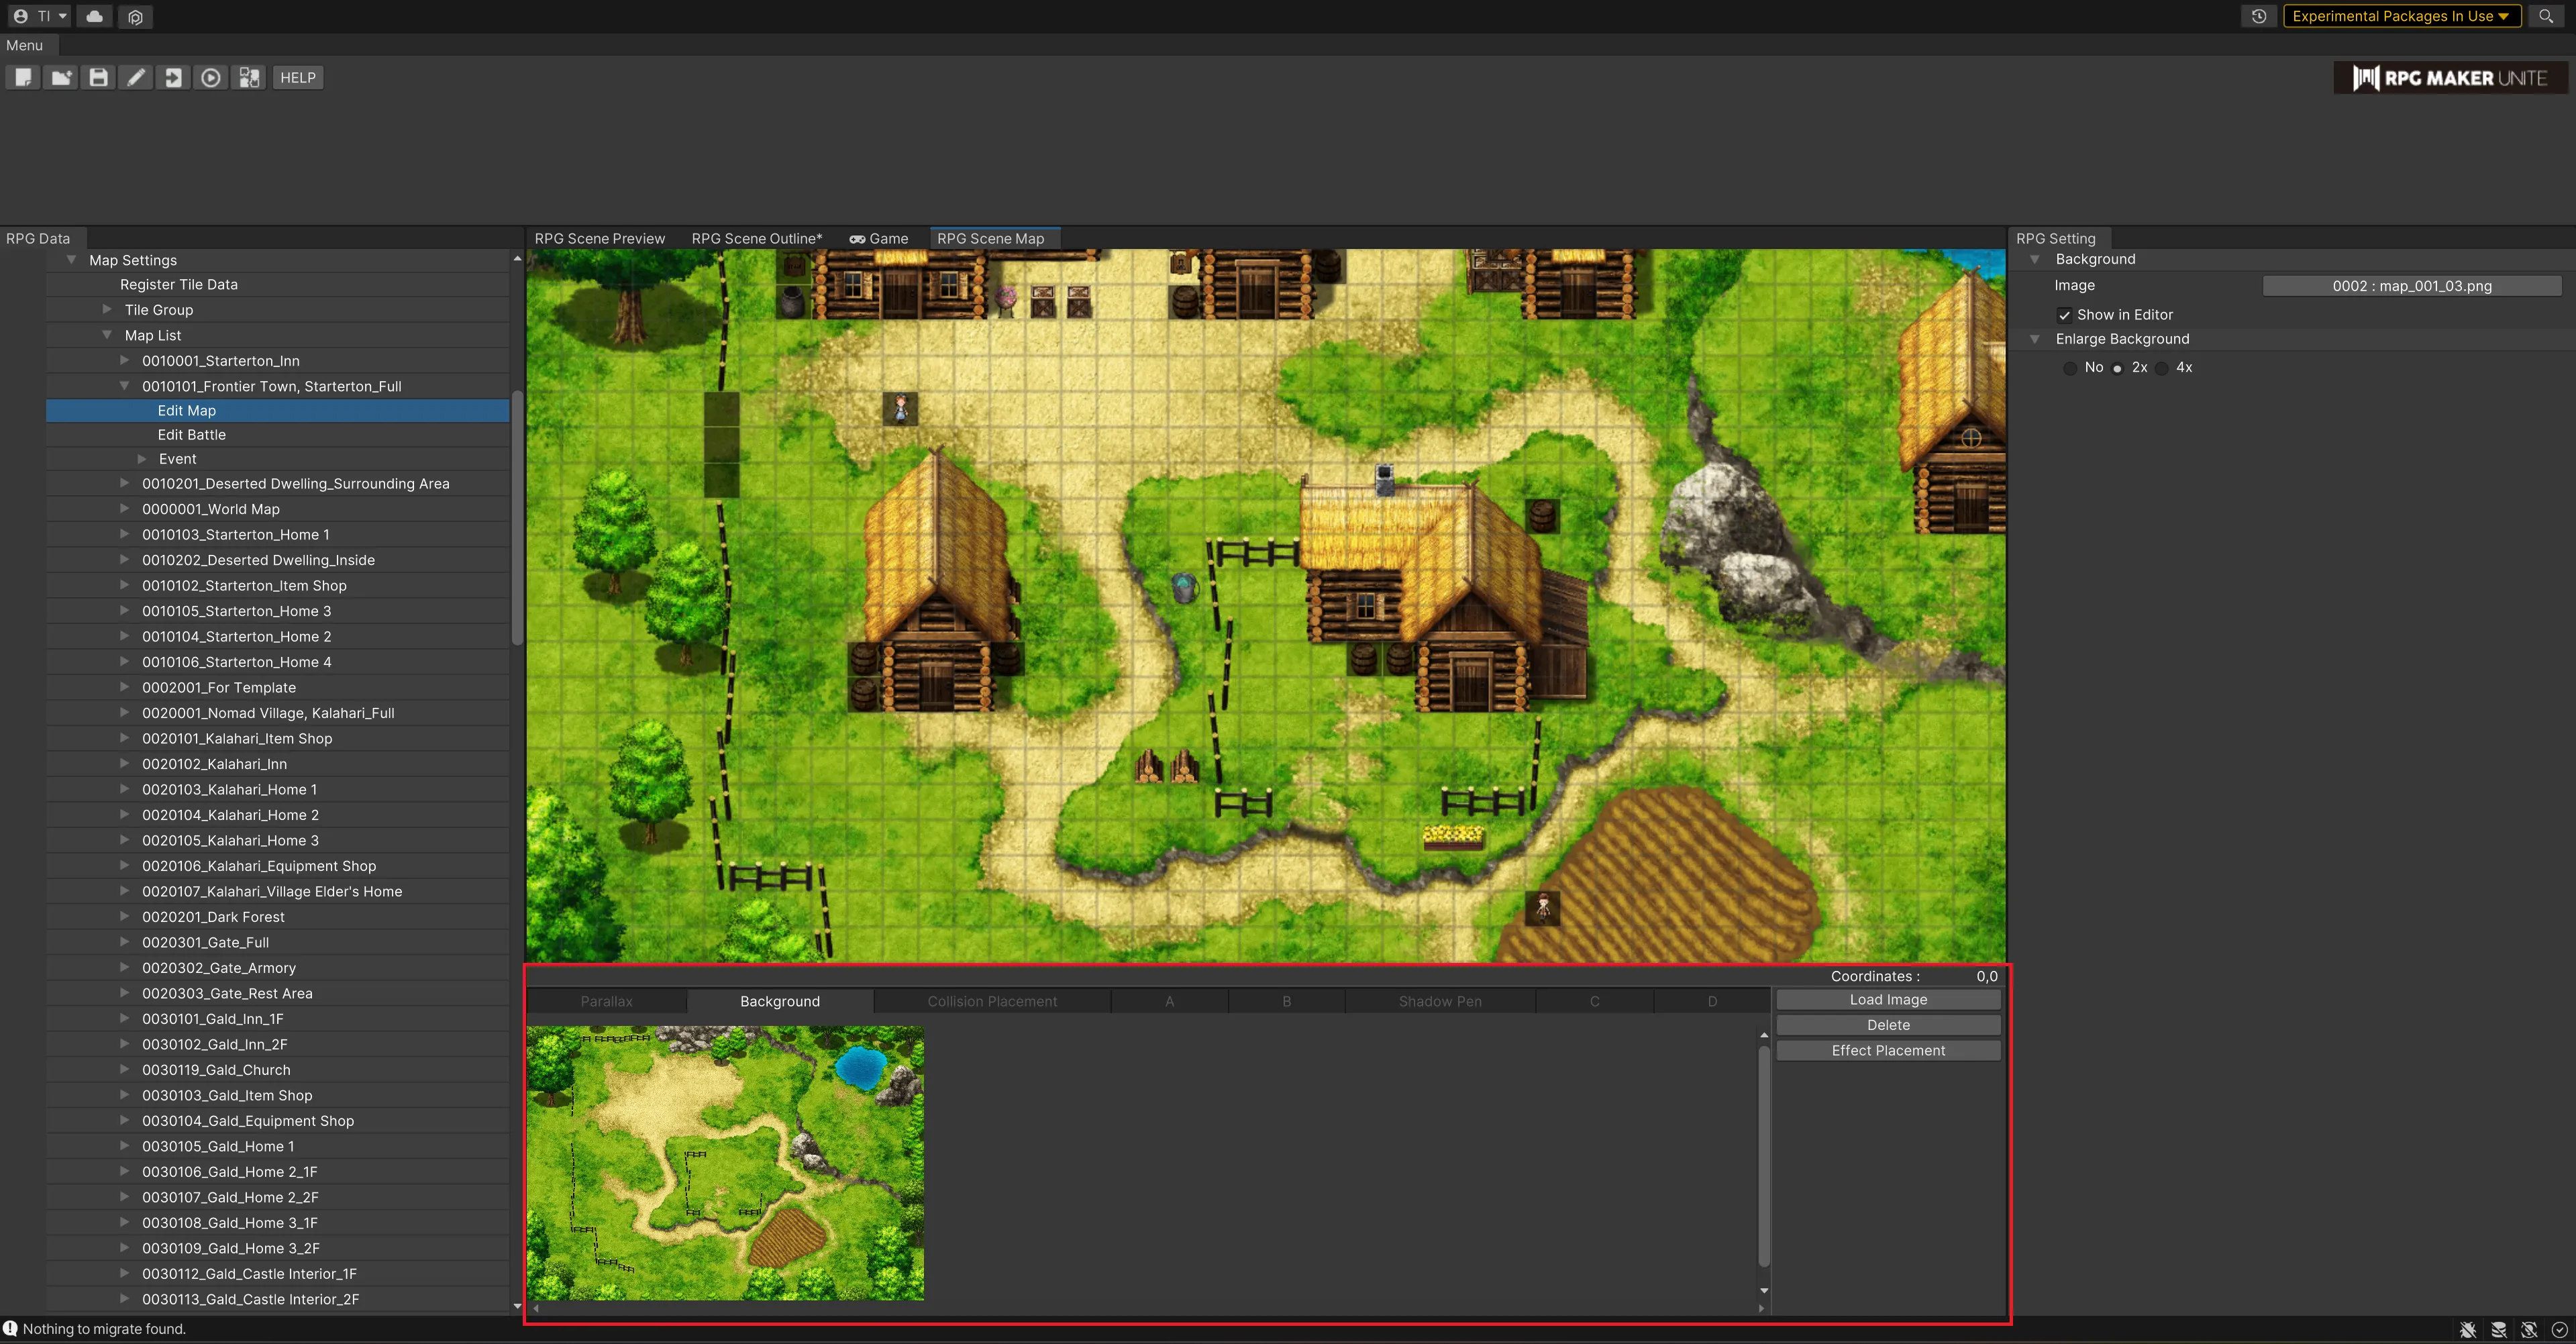
| Load Image Button | Load an image from outside RPG Maker Unite. The maximum size for a background is 2048 x 2048. |
| Delete Image Button | Click "Delete Image" to delete the background that's currently set. |
| Effect Placement Button | Click "Effect Placement" when you wish to add effects to the single background image. |
RPG Settings Window
Background
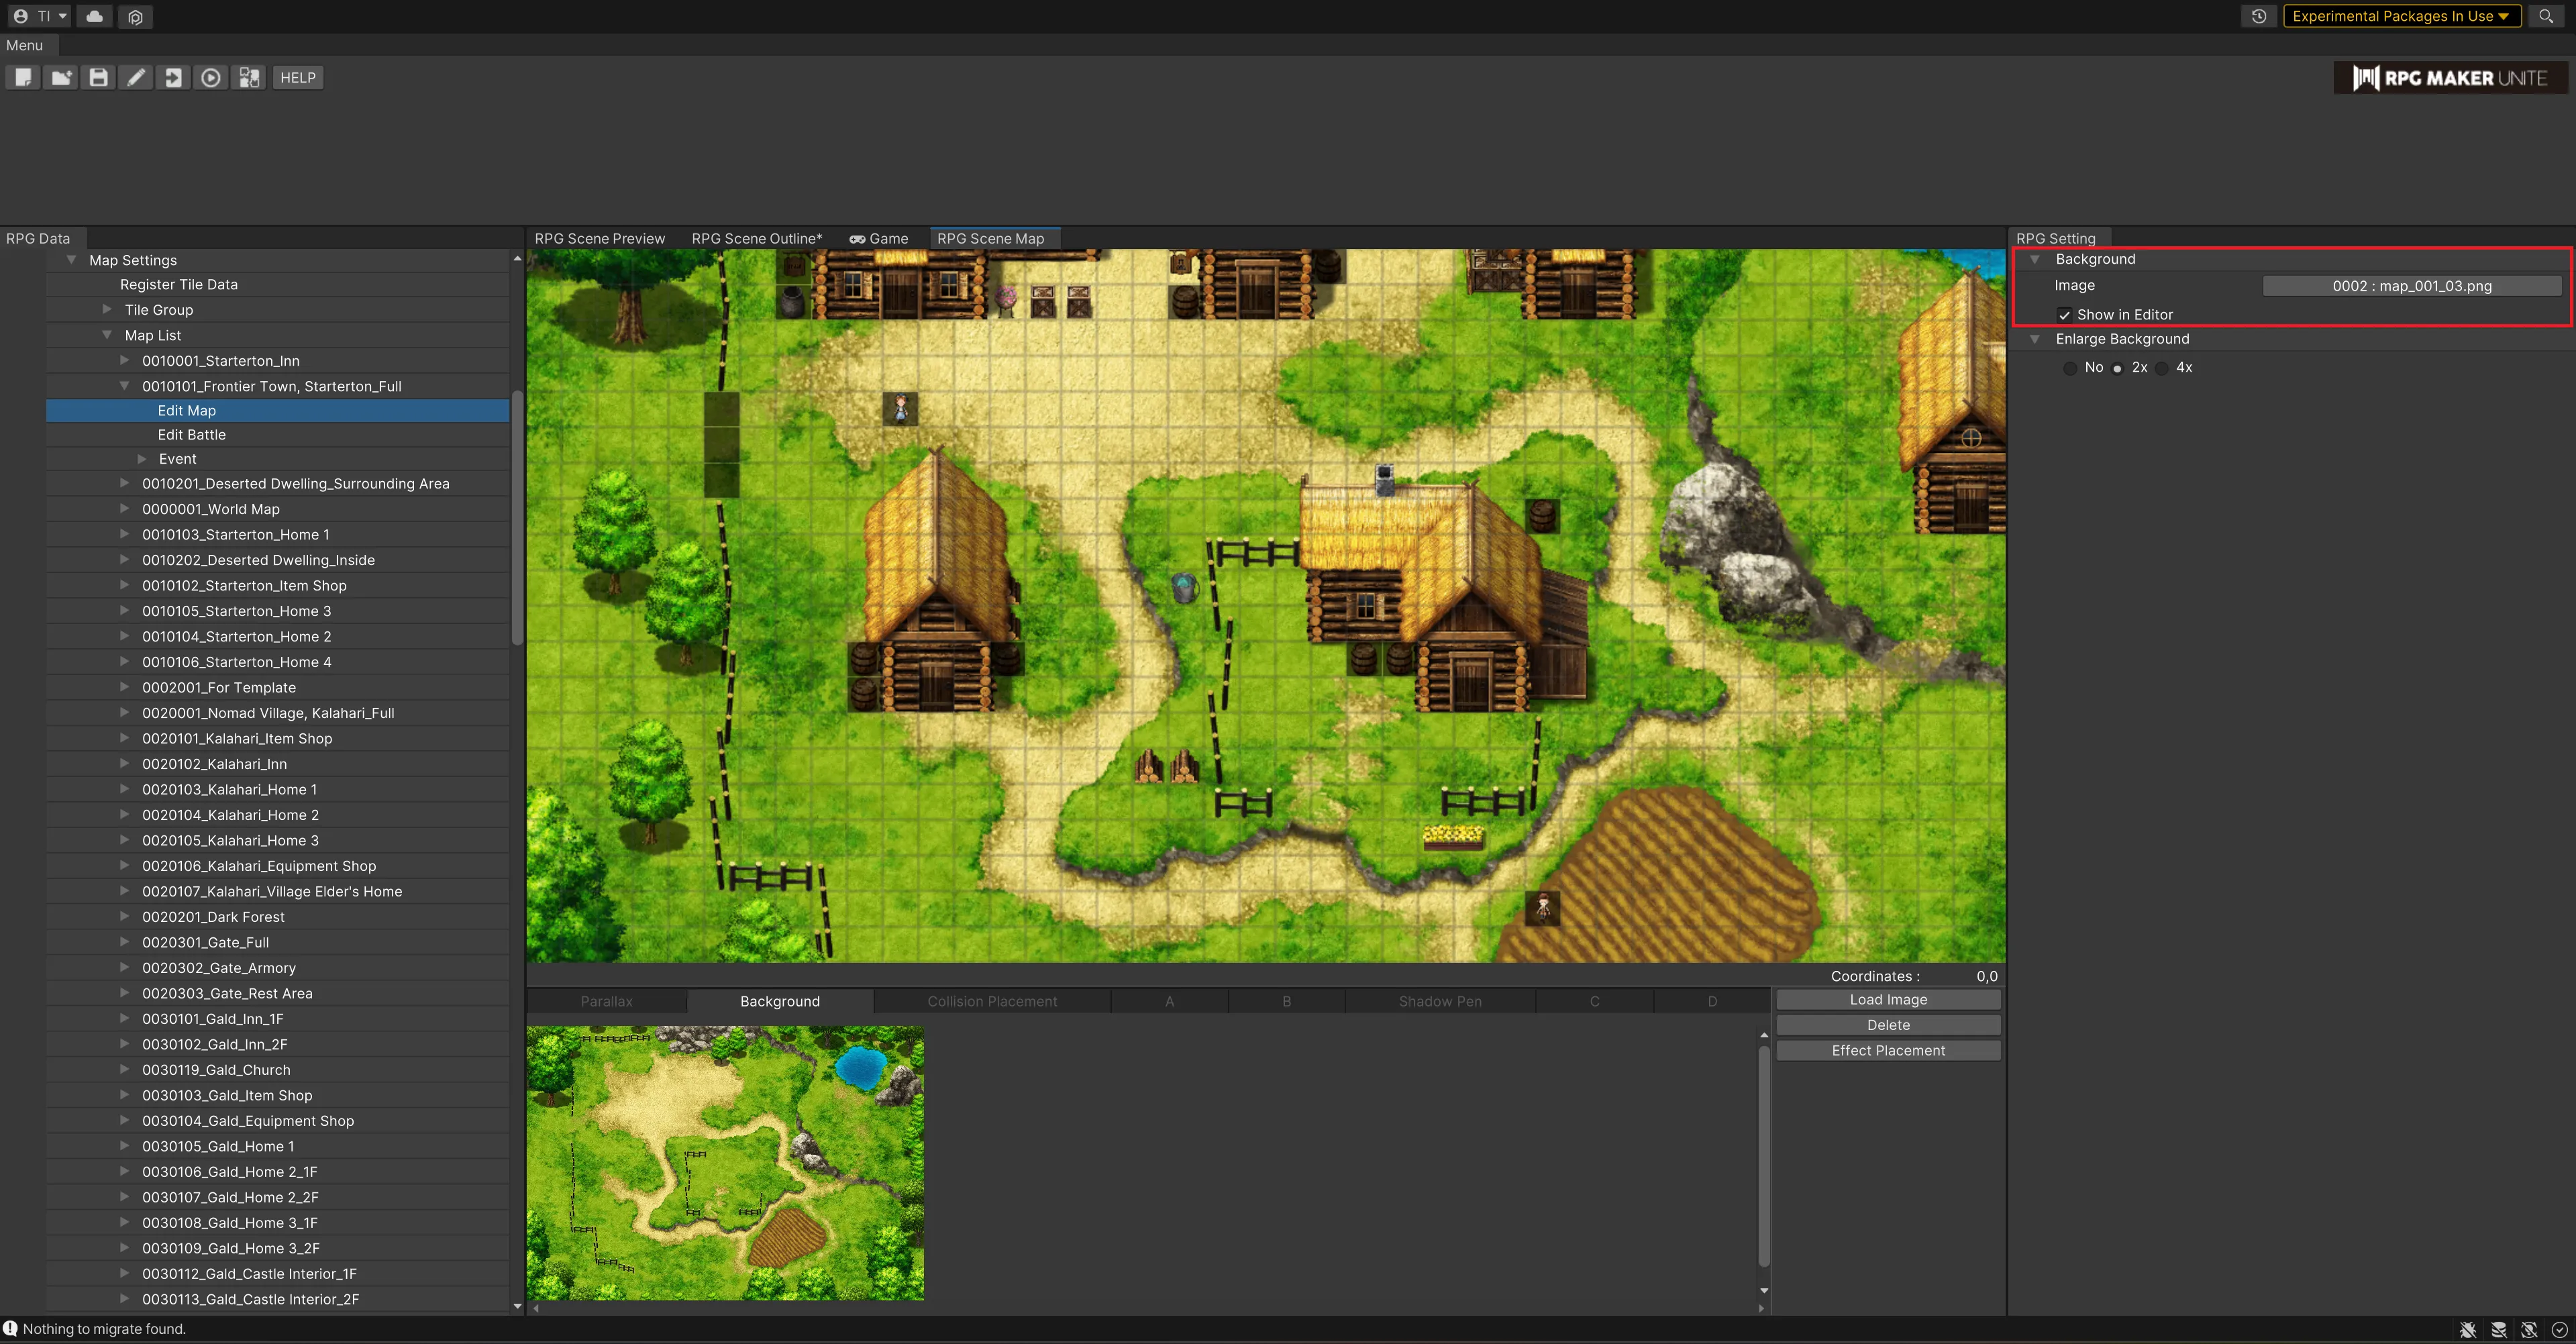
| Set Image | Choose a background from images that have already been imported into RPG Maker Unite. |
| Show in Editor | Set whether the background will be shown in the RPG Map Scene's map editor. Unchecking the box will set it to not be displayed. |
Background Enlargement
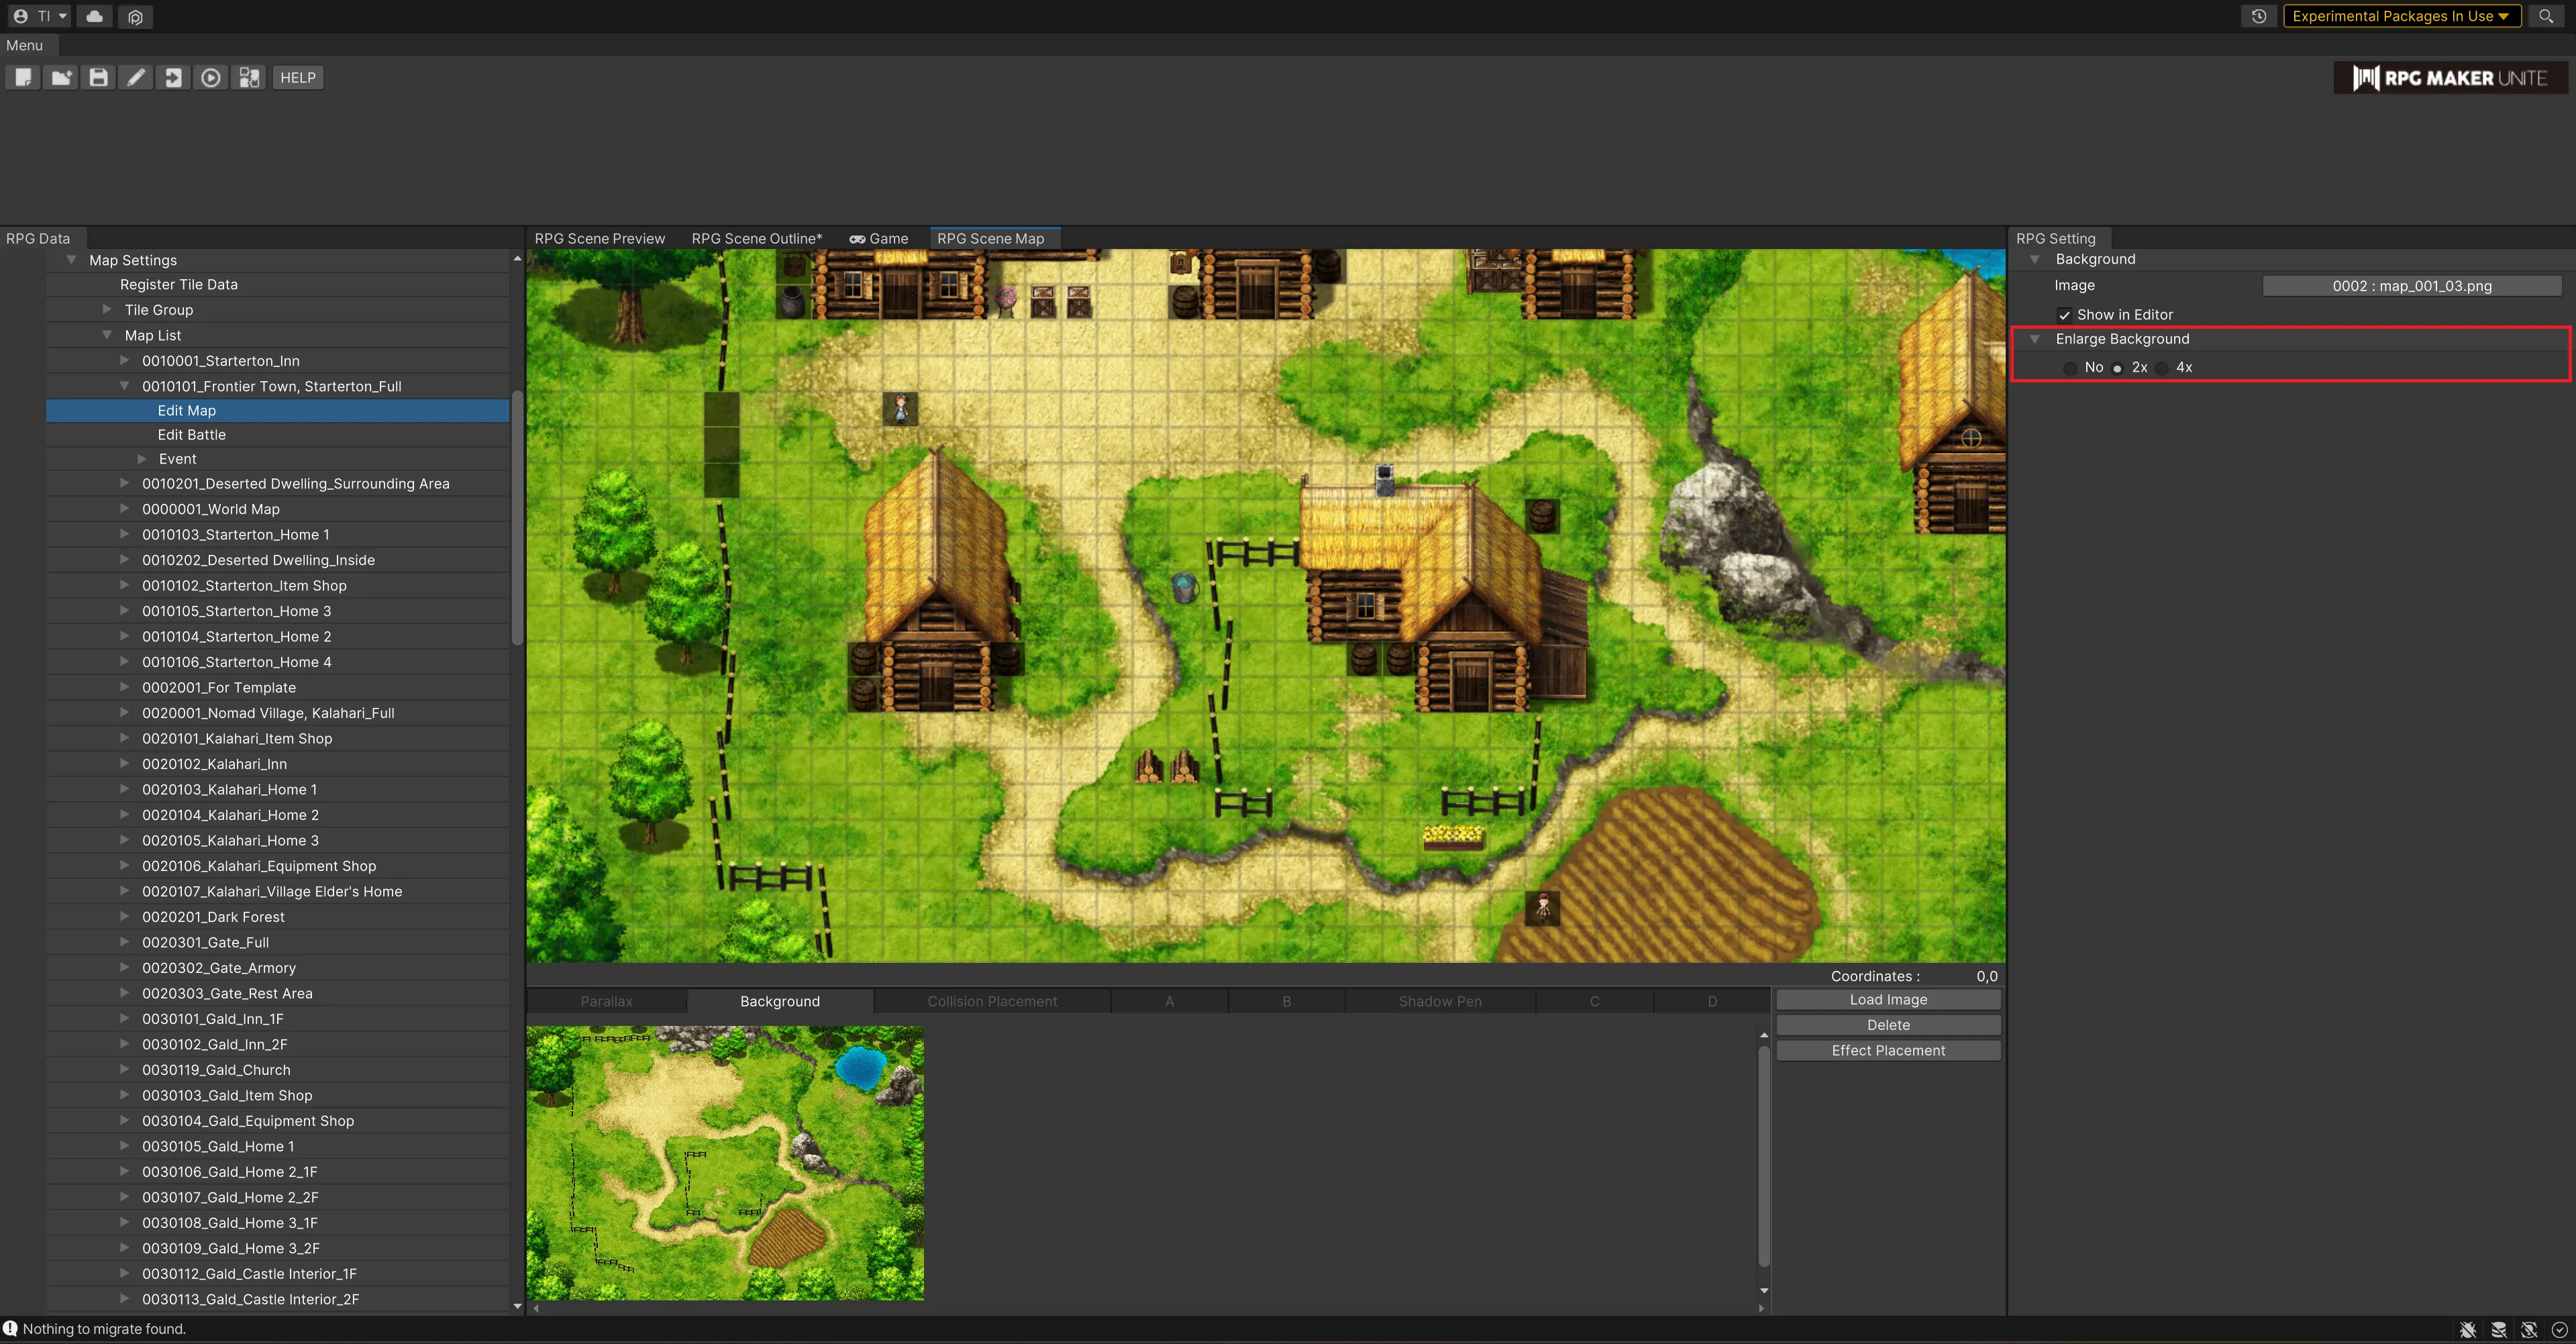
| Scale | Set whether the image for the background should be scaled up. Choose between "No", "Double", and "Four Times". |
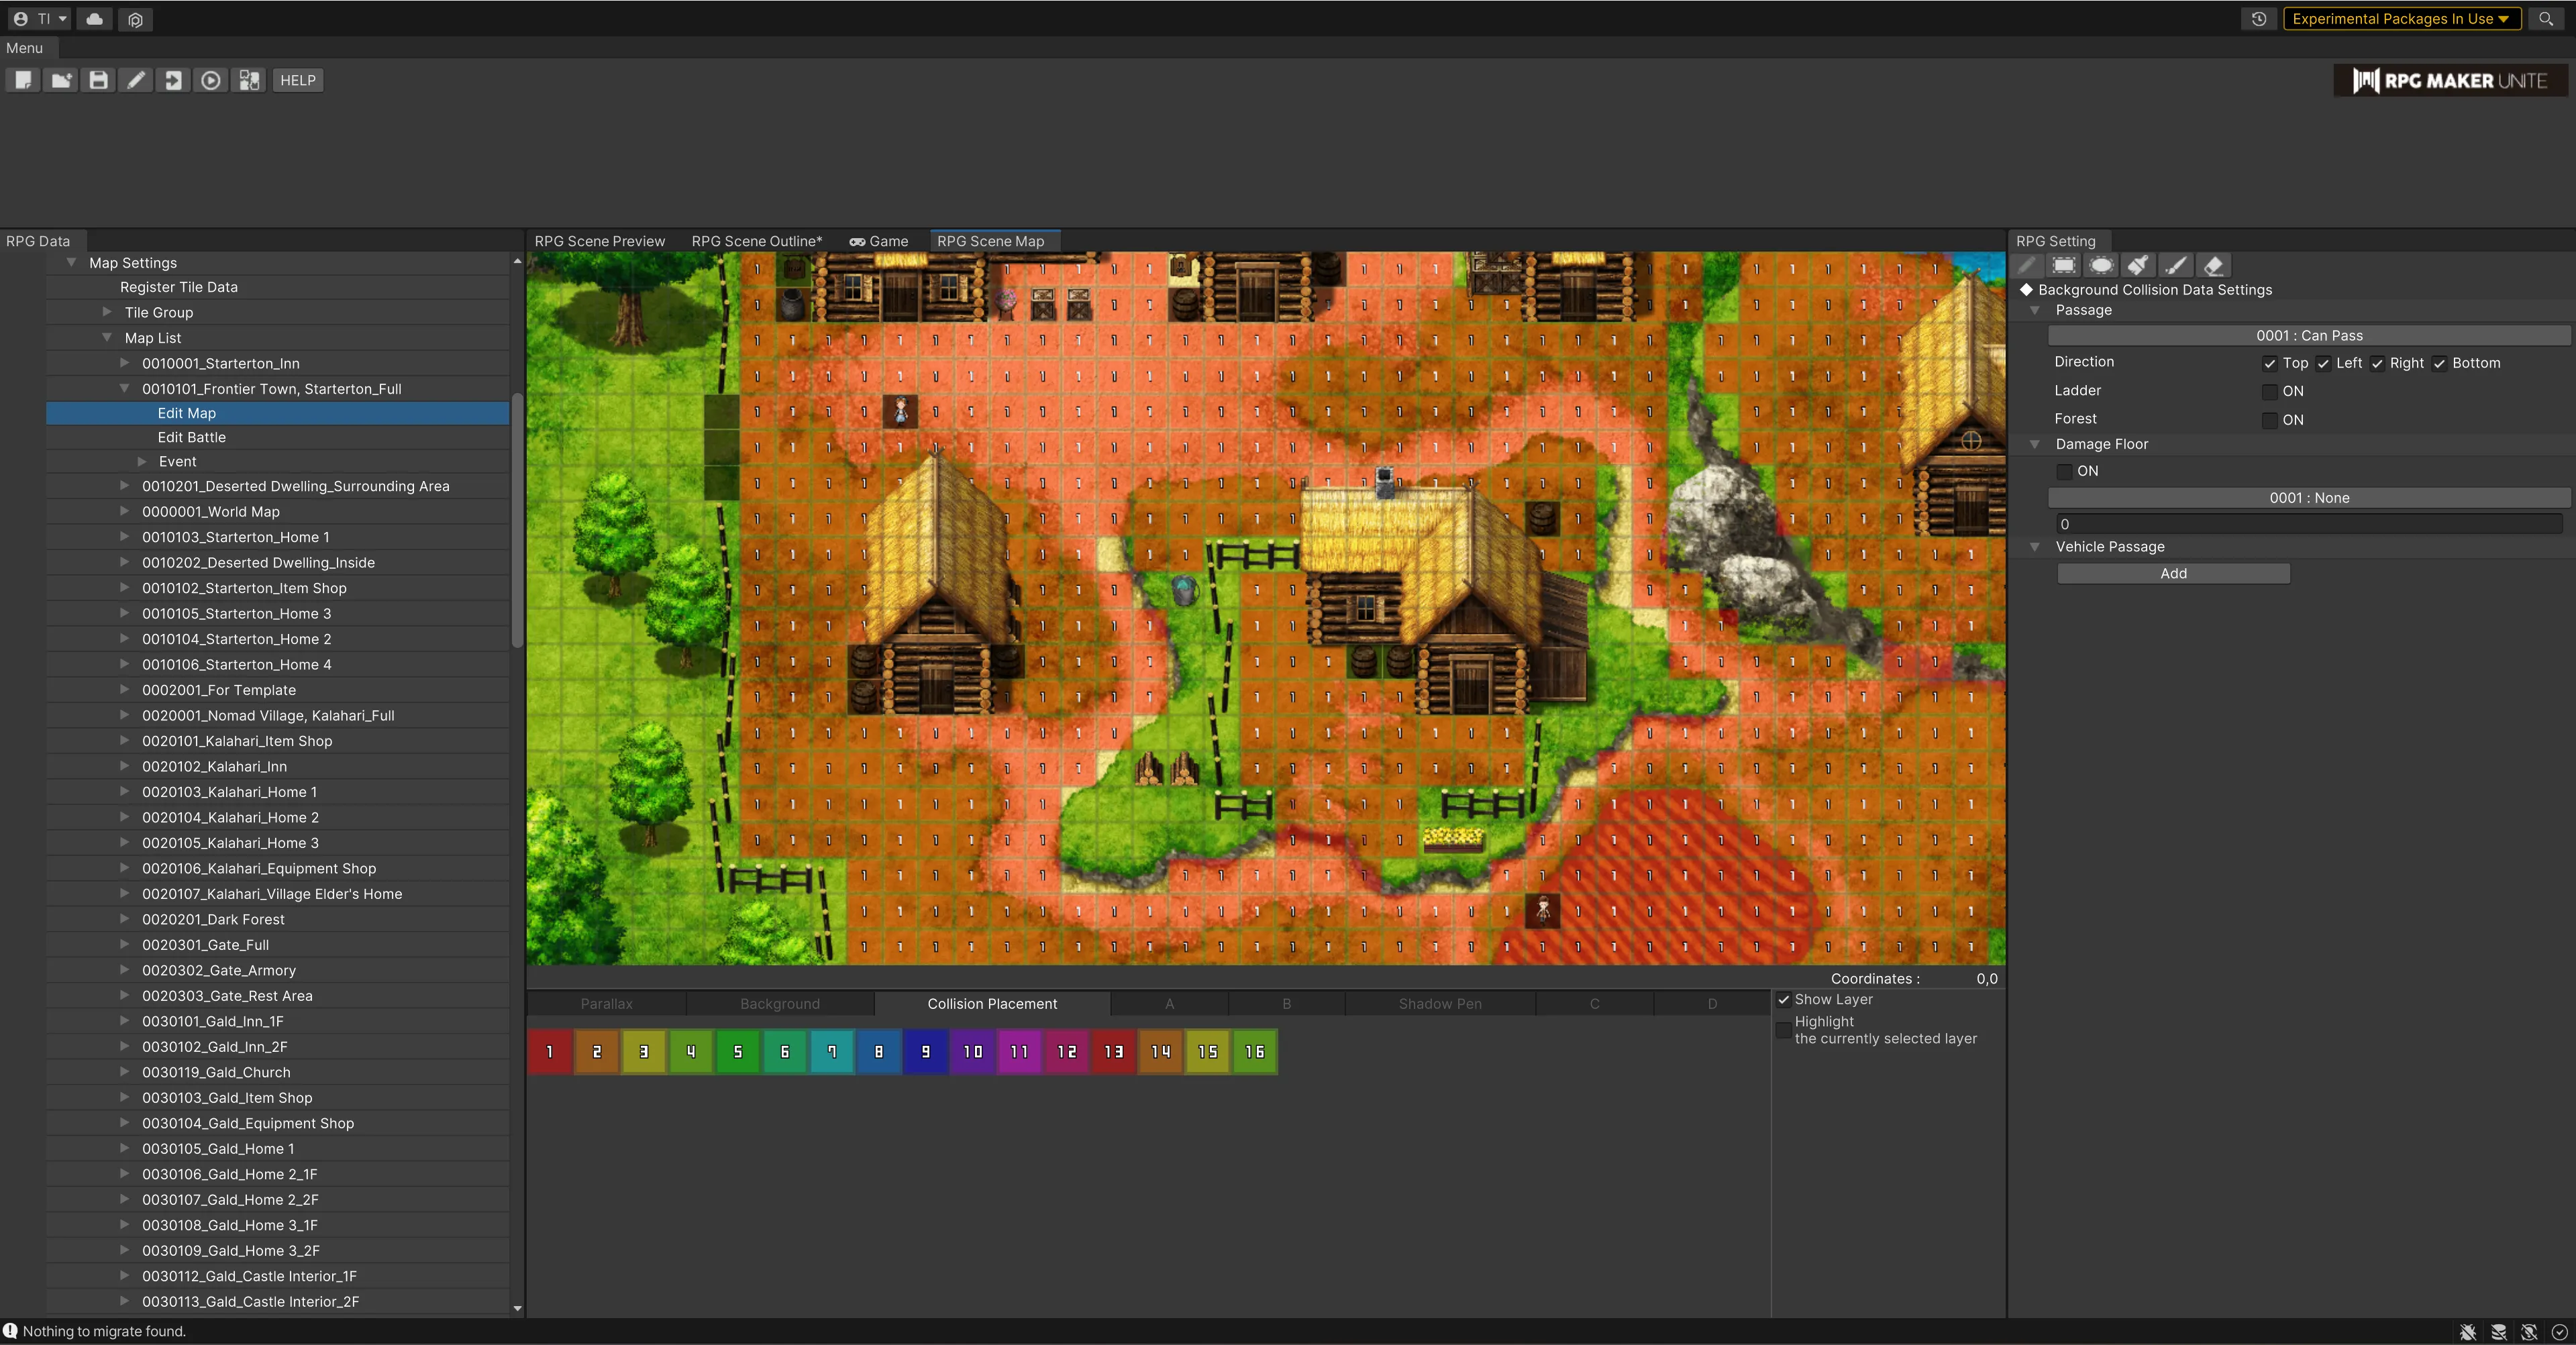
[Placing Collision]
Tile Window
This function is used to set collision settings for the background of the map displayed in the RPG scene map, instead of the A-D tile layers. Tiles for collision settings can be placed on the background, and each tile numbered 1-16 can be used to set character and vehicle traffic and other settings. When tiles are placed on layers A to D above the background, the collision settings of tiles on the upper layers take precedence over those for collision settings.
For details on setting collision data for the background, please refer to Settings after Tile Registration.