

Preparation
For a smoother installation and gameplay after purchasing RPG MAKER UNITE, please install Unity Hub and Unity Editor (2021.3.16f1) in advance.
- Install Unity Hub from the official Unity website.
- For instructions on installing Unity Editor (2021.3.16f1), please refer to this section.
Table of Contents
- Preparation
- Table of Contents
- Launching RPG MAKER UNITE
- Screen Structure
- Home Screen
- Project List Screen
- Settings Screen
- Language Settings
- Unity Hub Settings
- Unity Editor Settings
- UnityID Settings
- Creating a New Project
- Opening a Project
- Removing a Project from the List
- Adding an Existing Project
- Backing Up a Project
- Updating a Project
- Notes on Updates
- Opening the Project Folder
Launching RPG MAKER UNITE
Launch RPG MAKER UNITE. The launcher will appear. The display in the launcher will change according to the state of your machine.
If Unity tools are not installed, please refer to the following article and perform the necessary setup: Epic Store Version Unity Tools Installation Flow Note: This article is for Windows. Please adapt as needed for macOS.
Screen Structure
There are three main screens:
- Home Screen
- Project List Screen
- Settings Screen
Click the screen name to switch between screens.
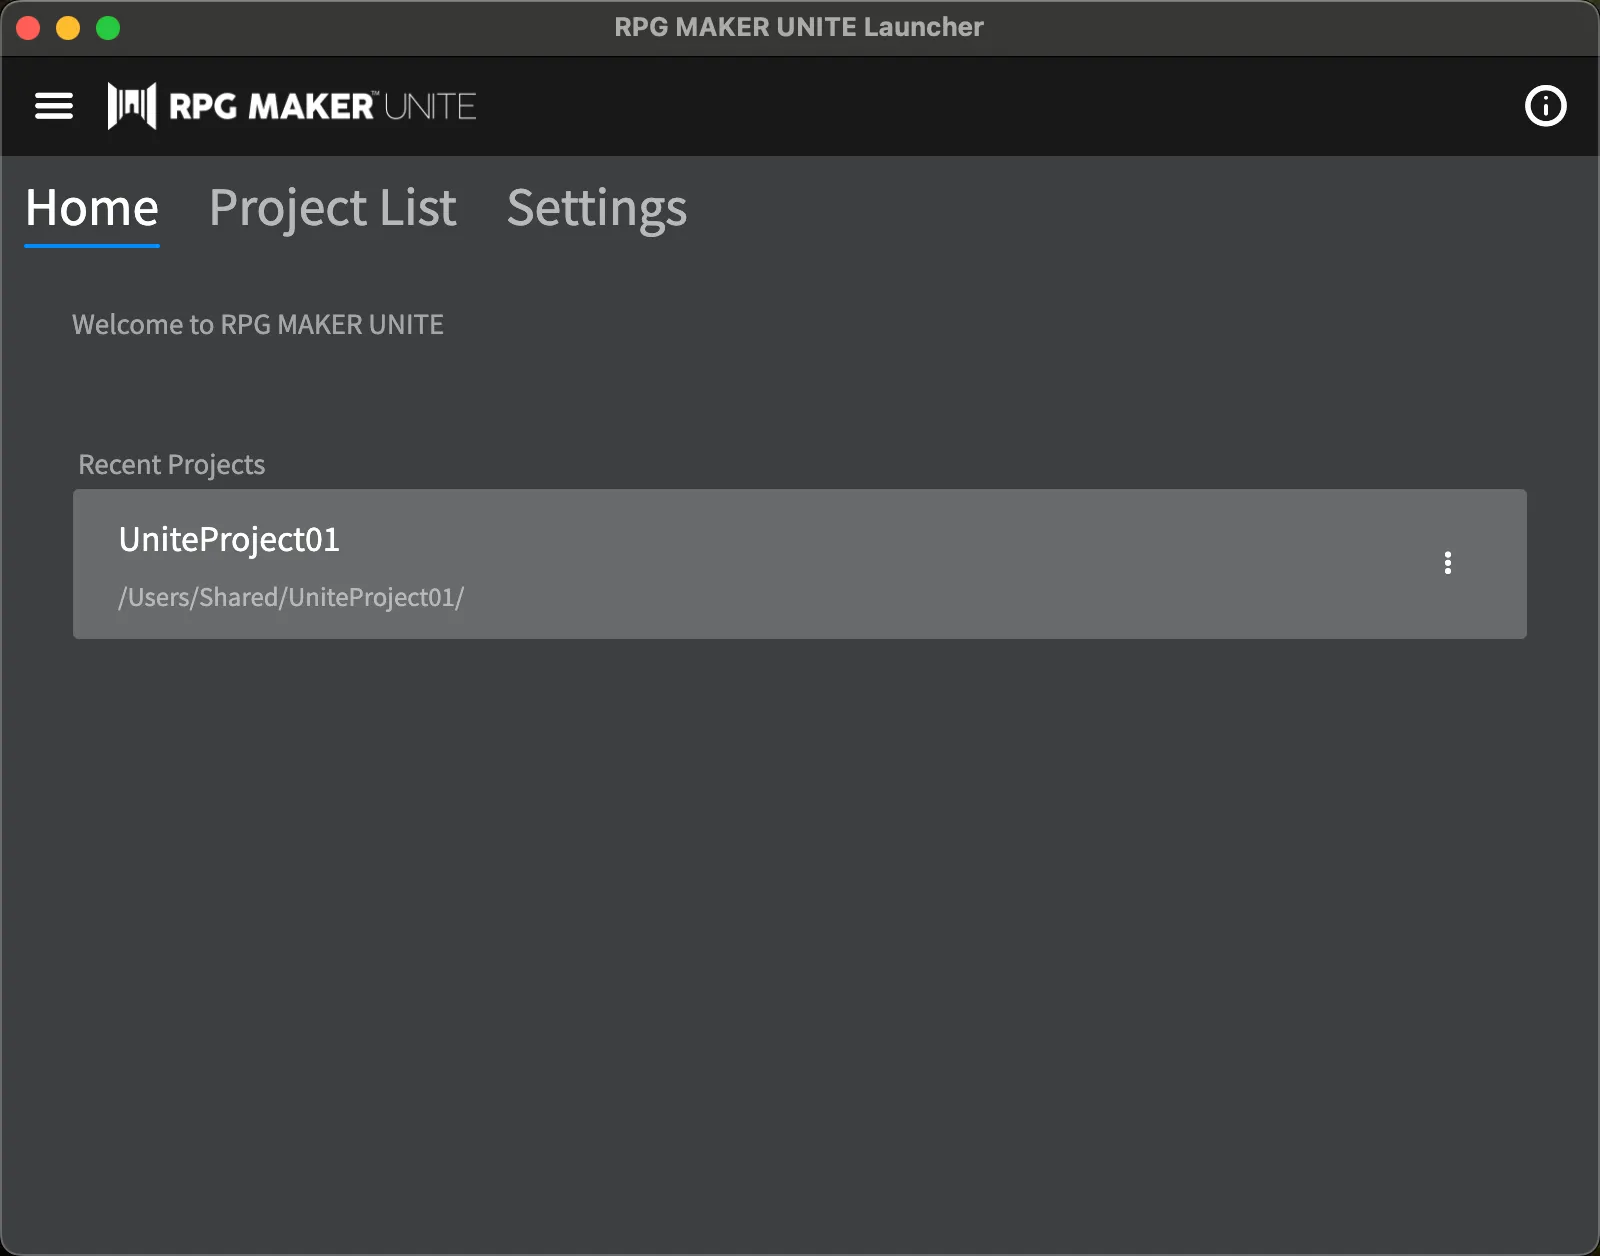
Home Screen
The Home Screen displays the most recently used project. You can open or manage projects from here.

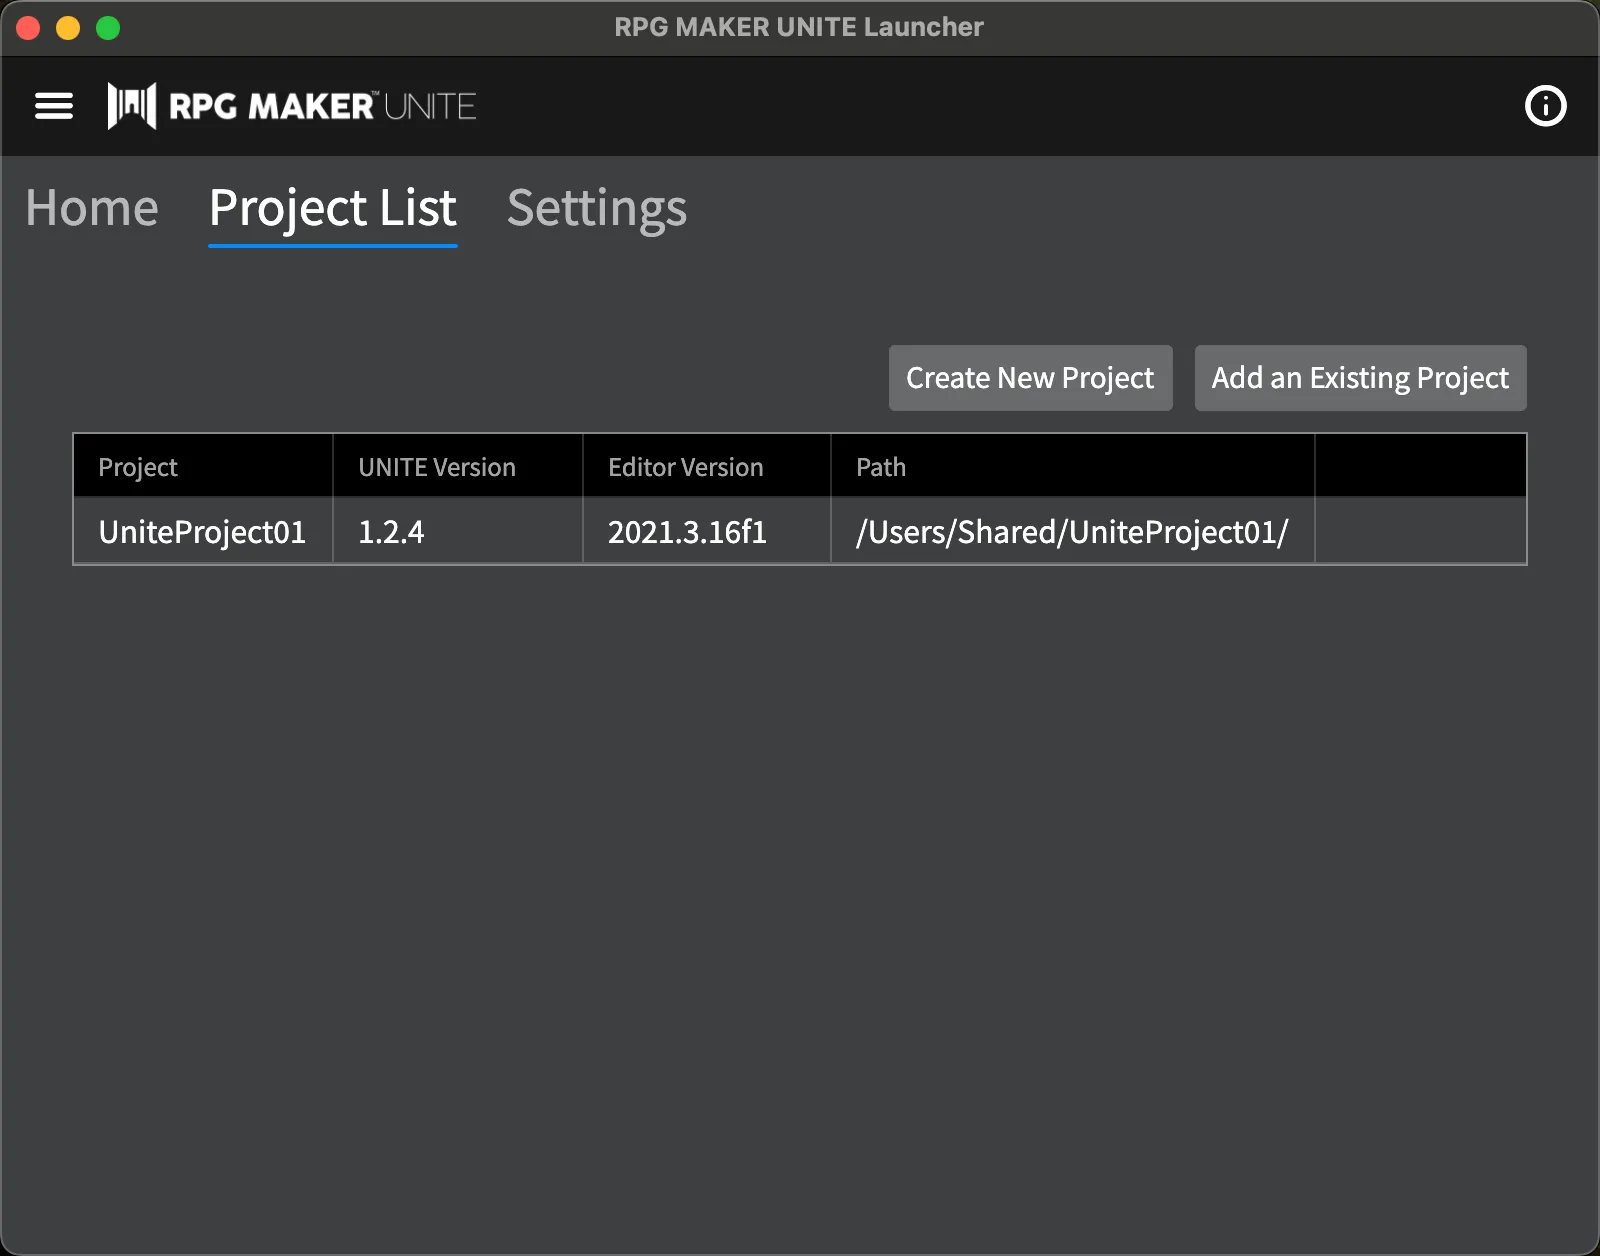
Project List Screen
The Project List Screen shows a list of previously used projects. You can create a new project or add a project copied from another PC.
Settings Screen
In the Settings Screen, you can configure language and Unity-related settings. Select the required item from the left pane.
Language Settings
Select the language for the launcher application. Note: The application must be restarted for the language setting to take effect. This does not change the in-game language of RPG Maker UNITE.

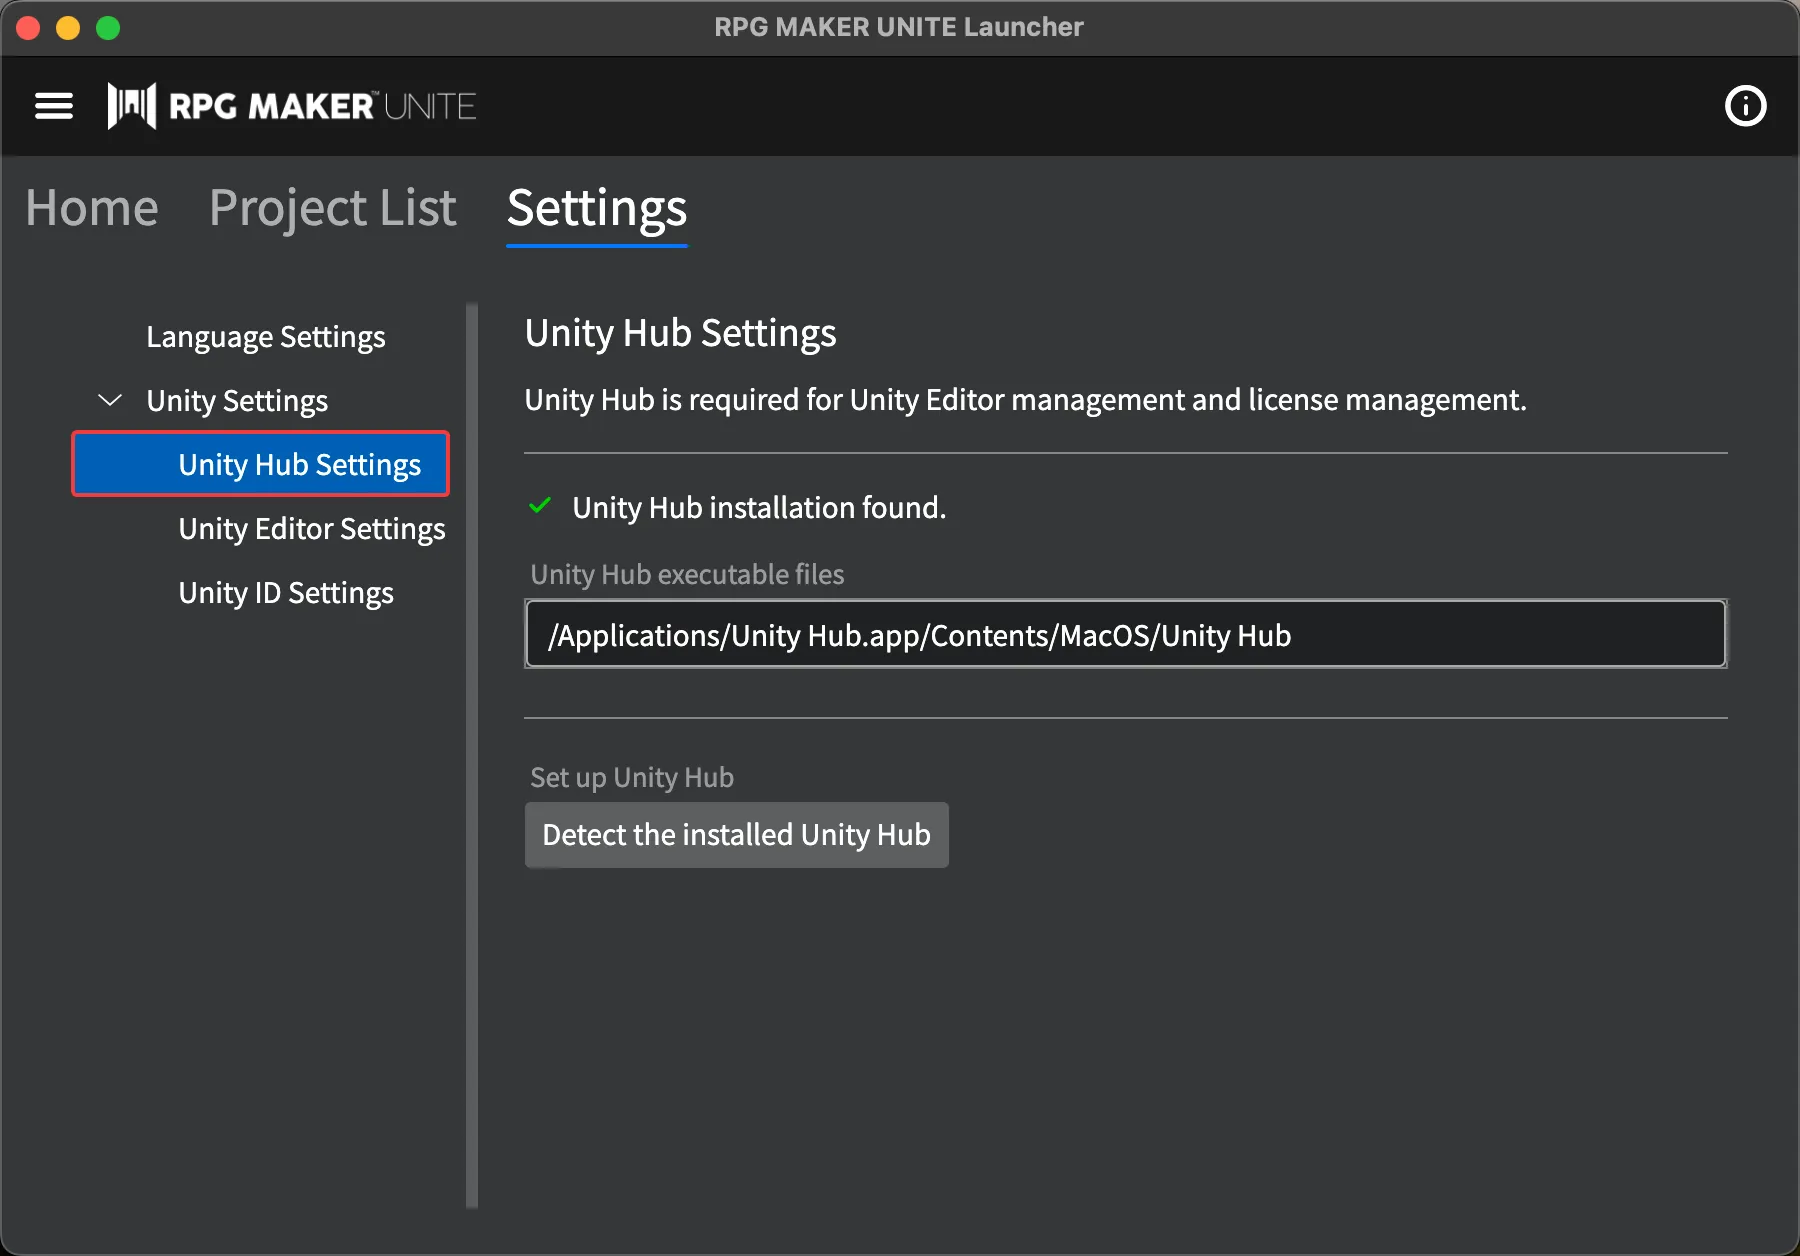
Unity Hub Settings
To use RPG MAKER UNITE, Unity Hub must be installed. If Unity Hub is already installed, it will be set automatically when the launcher starts, but you can also re-detect it.
If Unity tools are not installed, please refer to the following article and perform the necessary setup: Epic Store Version Unity Tools Installation Flow This article is for Windows. Please adapt as needed for macOS.

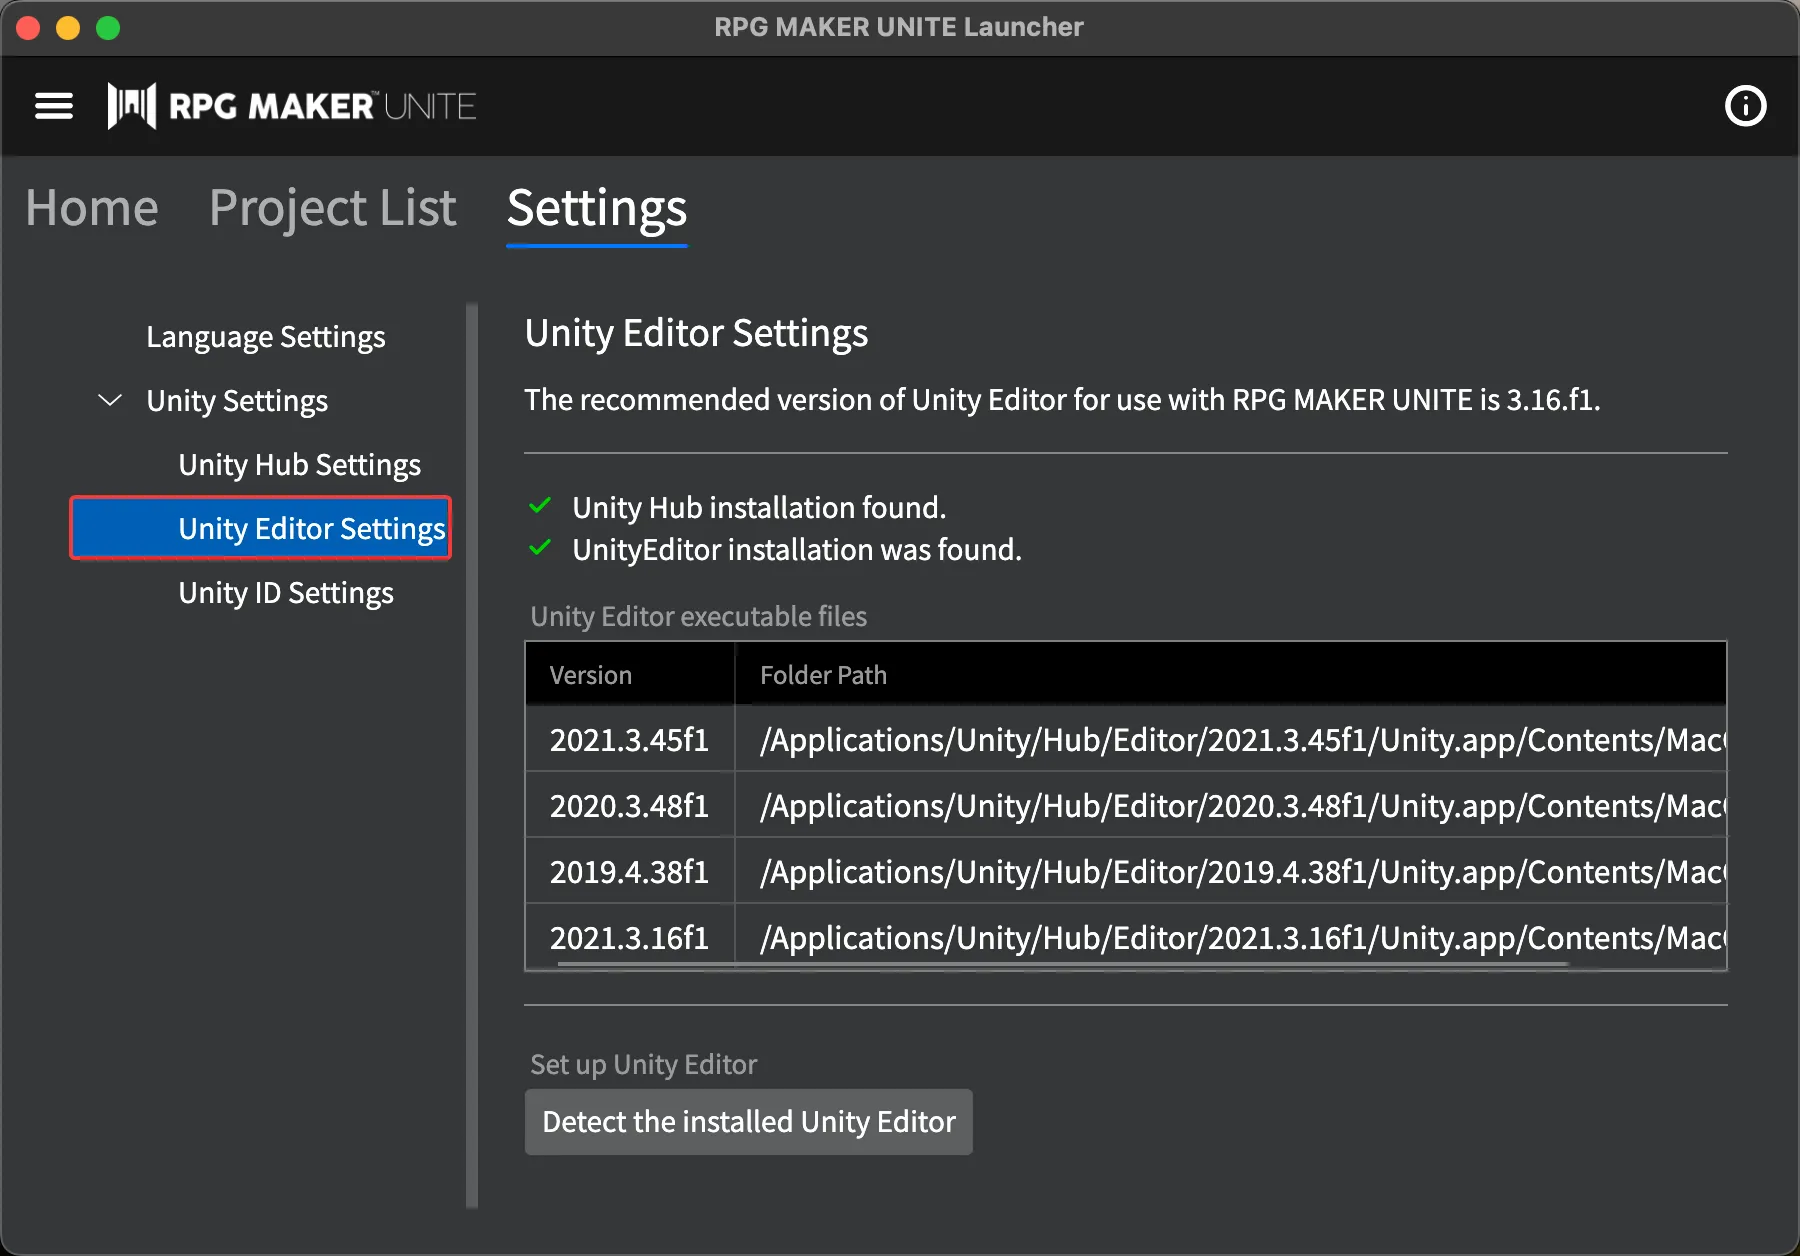
Unity Editor Settings
To use RPG MAKER UNITE, Unity Editor must be installed. If Unity Editor is already installed, it will be set automatically when the launcher starts, but you can also re-detect it.
If Unity tools are not installed, please refer to the following article and perform the necessary setup: Epic Store Version Unity Tools Installation Flow This article is for Windows. Please adapt as needed for macOS.
UnityID Settings
To use Unity Hub and Unity Editor, a UnityID is required. No settings can be configured here. If you do not have a UnityID, please obtain one from the official Unity website.
If Unity tools are not installed, please refer to the following article and perform the necessary setup: Epic Store Version Unity Tools Installation Flow This article is for Windows. Please adapt as needed for macOS.

Creating a New Project
Prepare a folder in advance where the project will be saved.
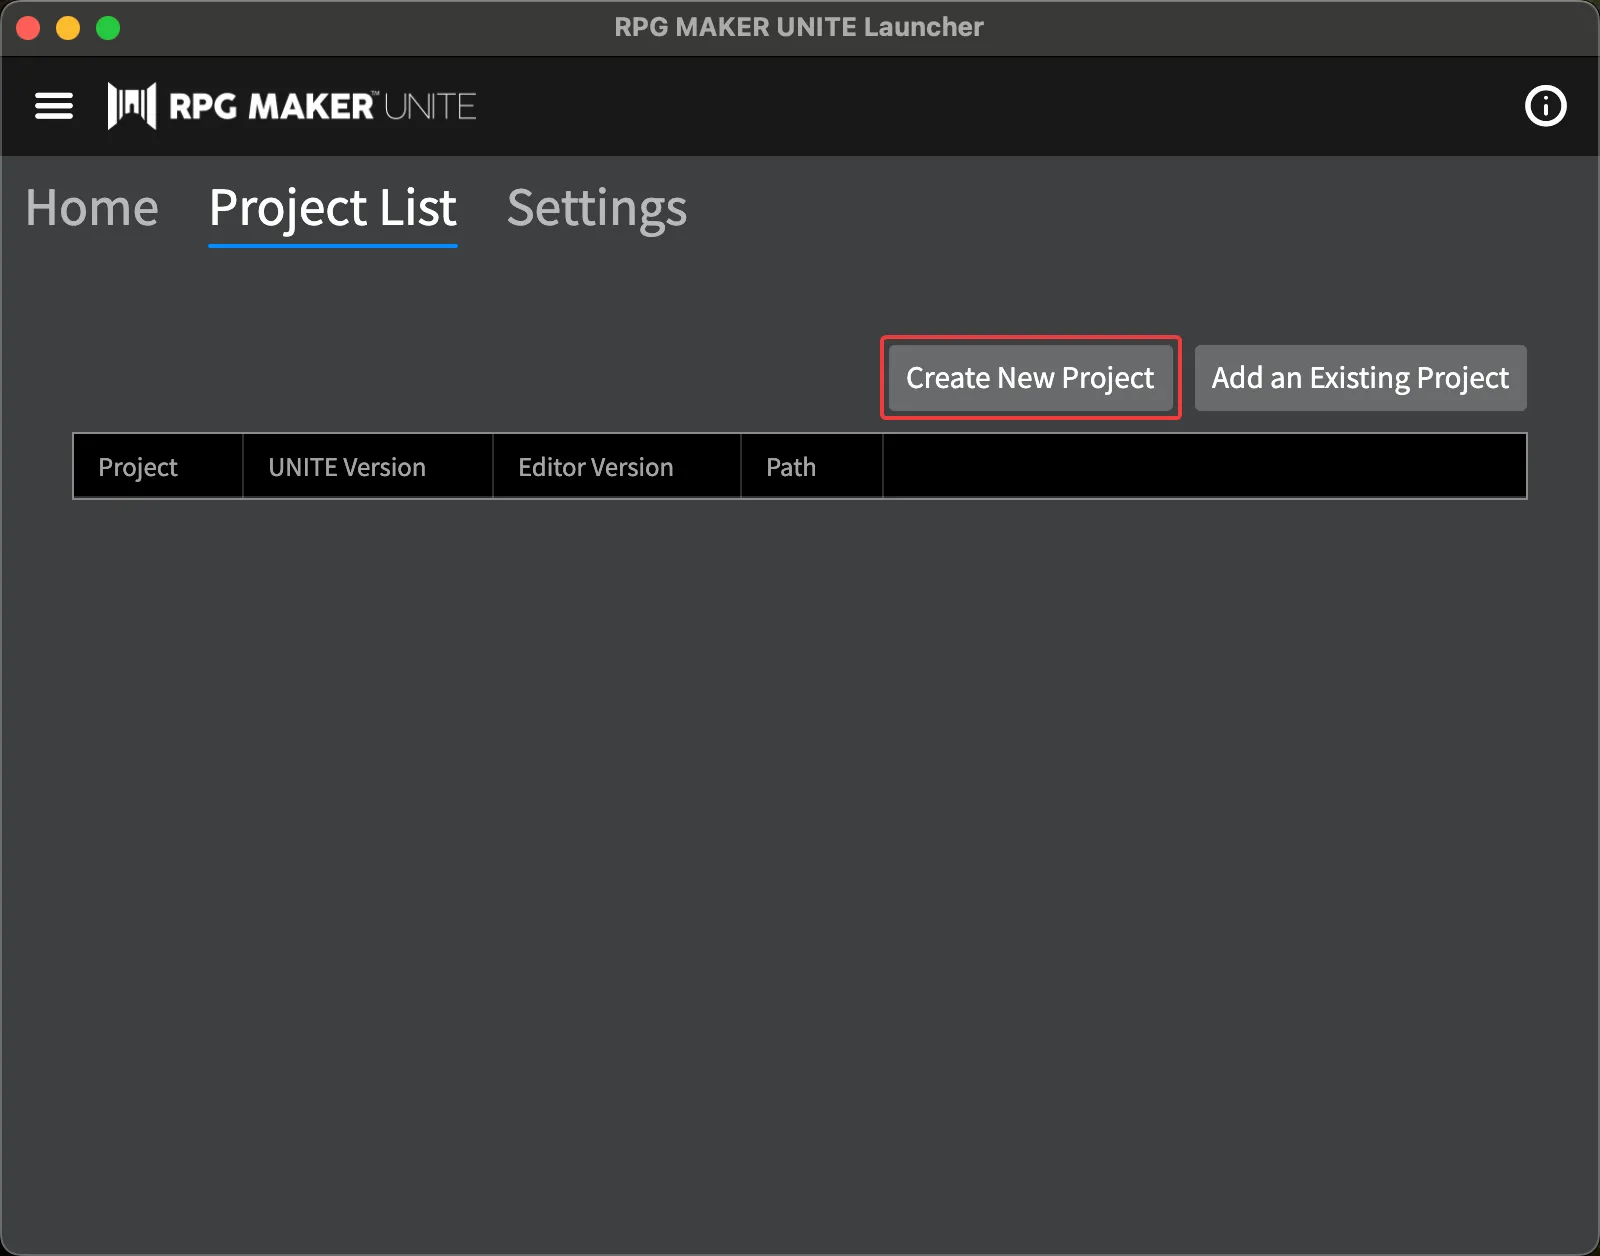
Click "Create New Project." The settings screen will appear.

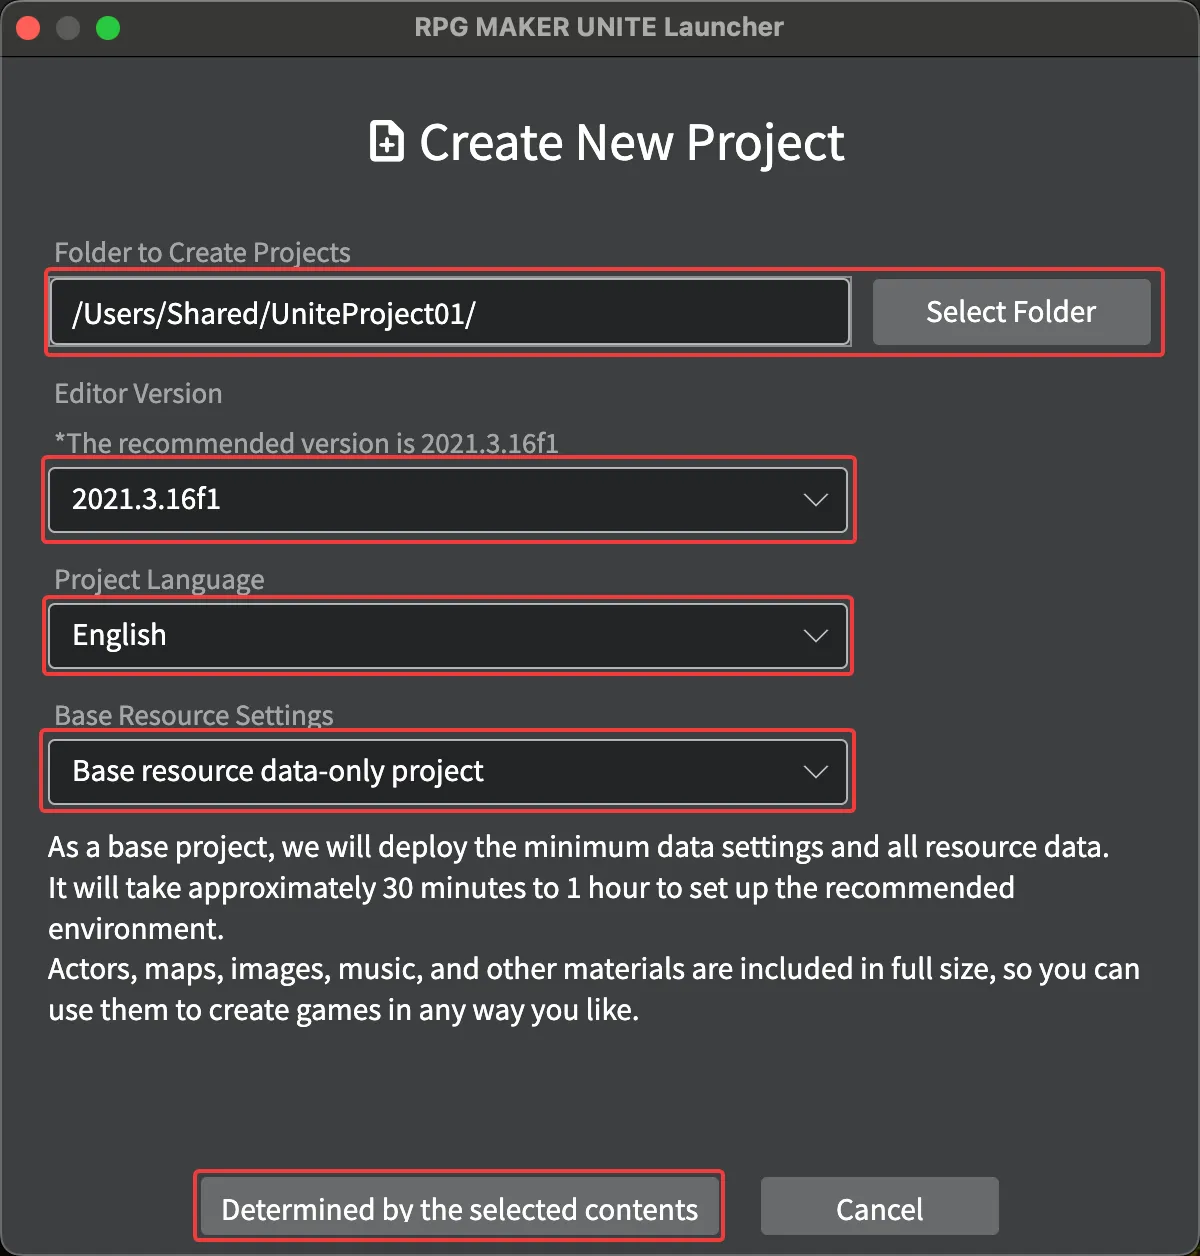
Click "Select Folder" and choose the folder you prepared earlier. Next, select the "Editor Version," "Project Language," and "Base Resource Settings," then click "Confirm with Selected Settings." A confirmation dialog will appear.

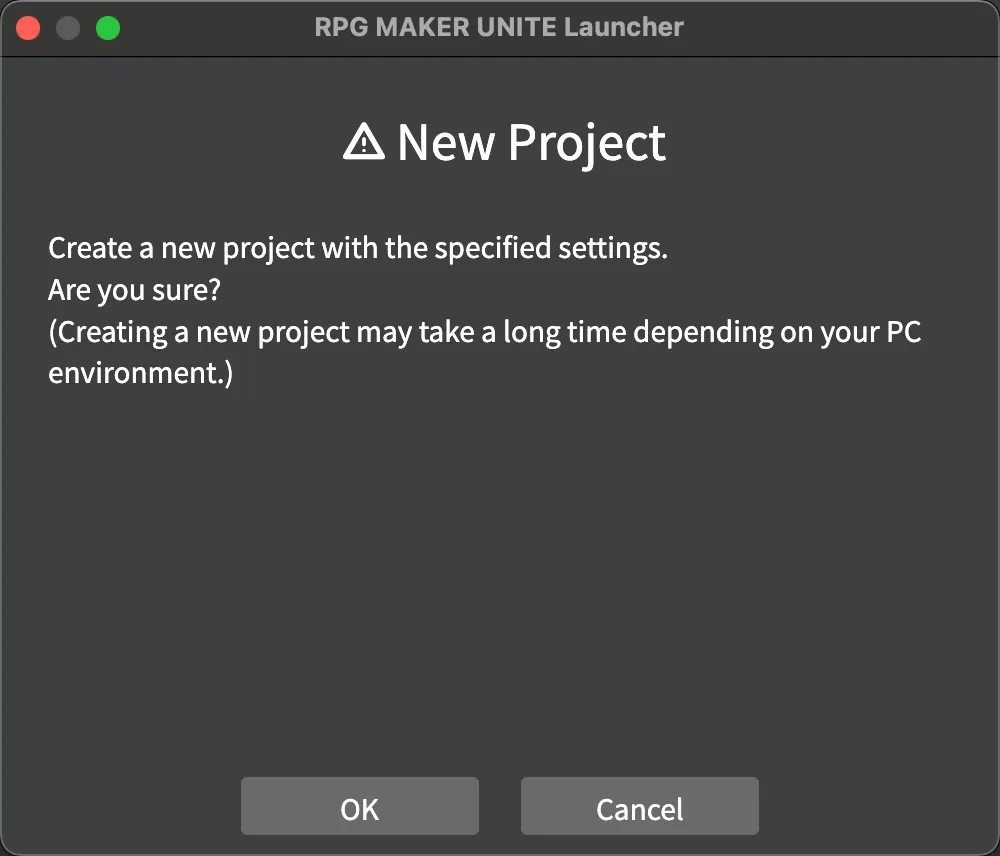
Click "Determined by the selected contents" to start creating the project.
Once the new project is added to the project list, the creation process is complete.
Opening a Project
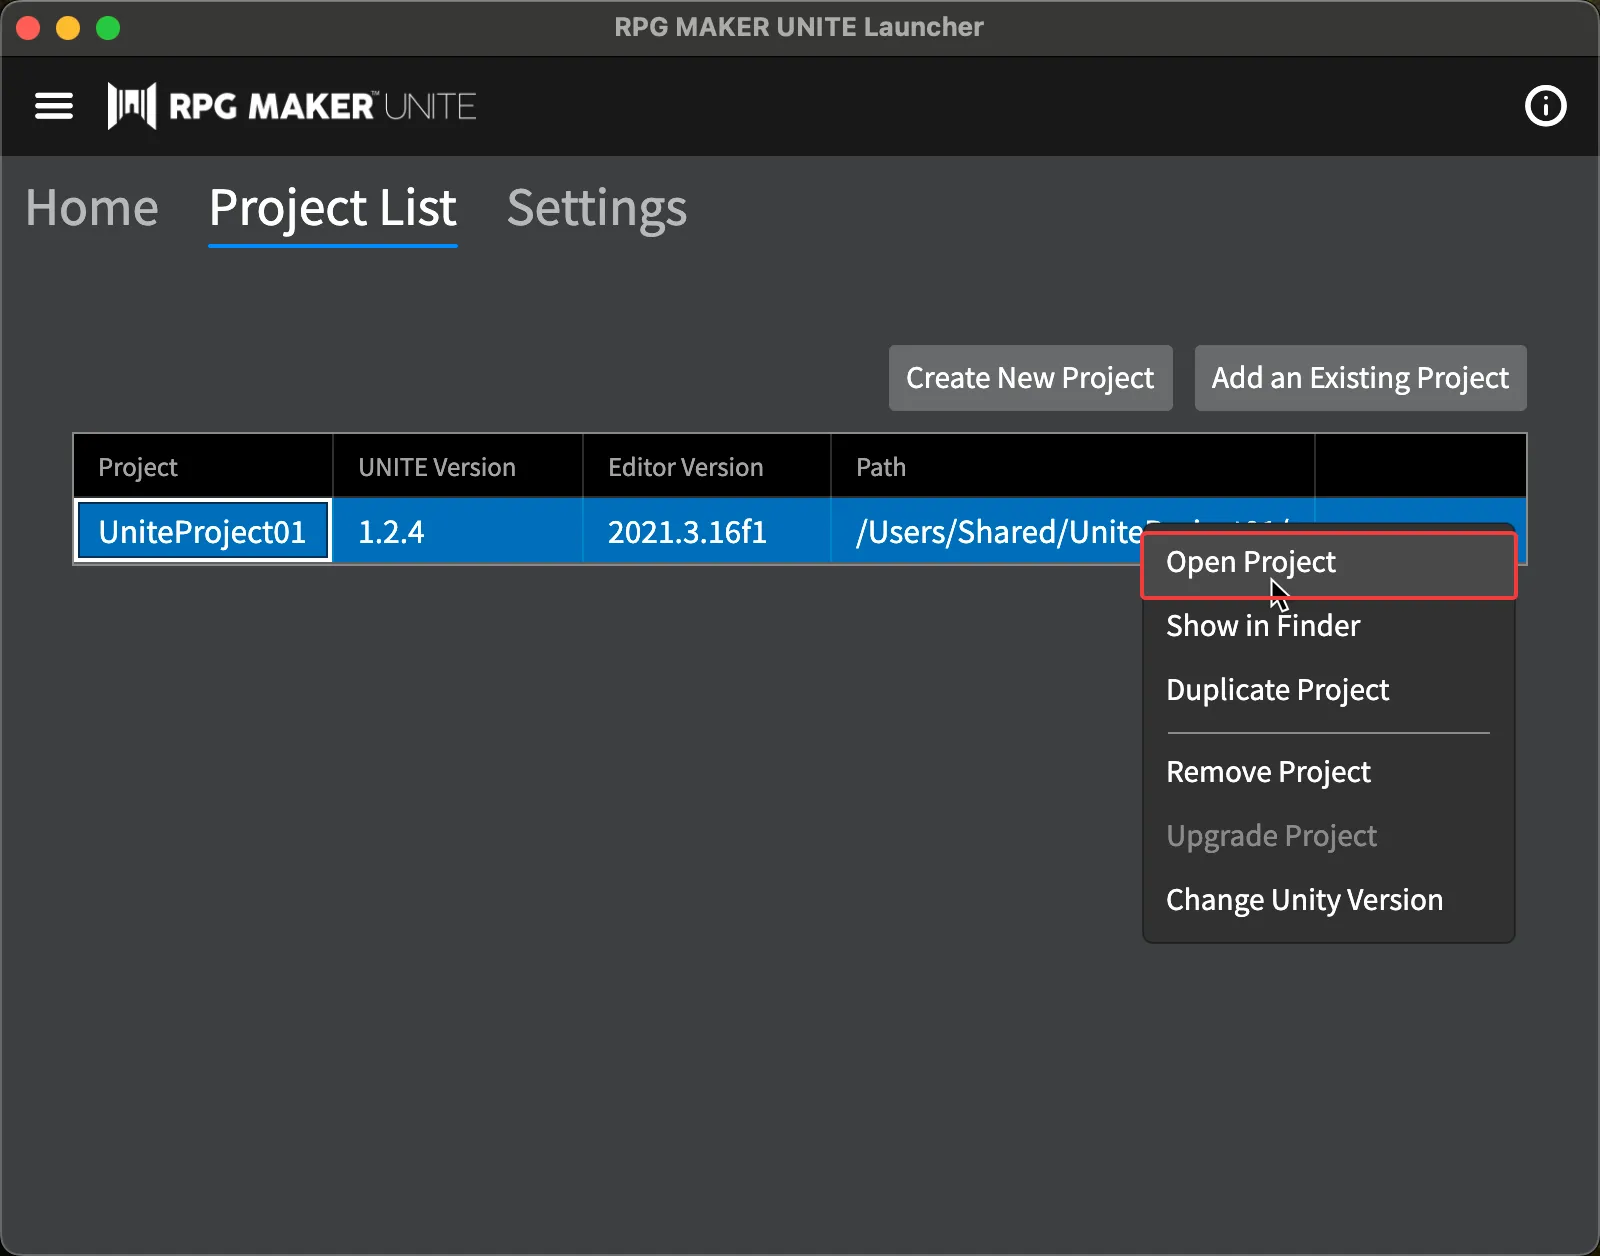
Control-click on a project from the project list and click "Open Project." The RPG MAKER UNITE editor will launch and open the project.
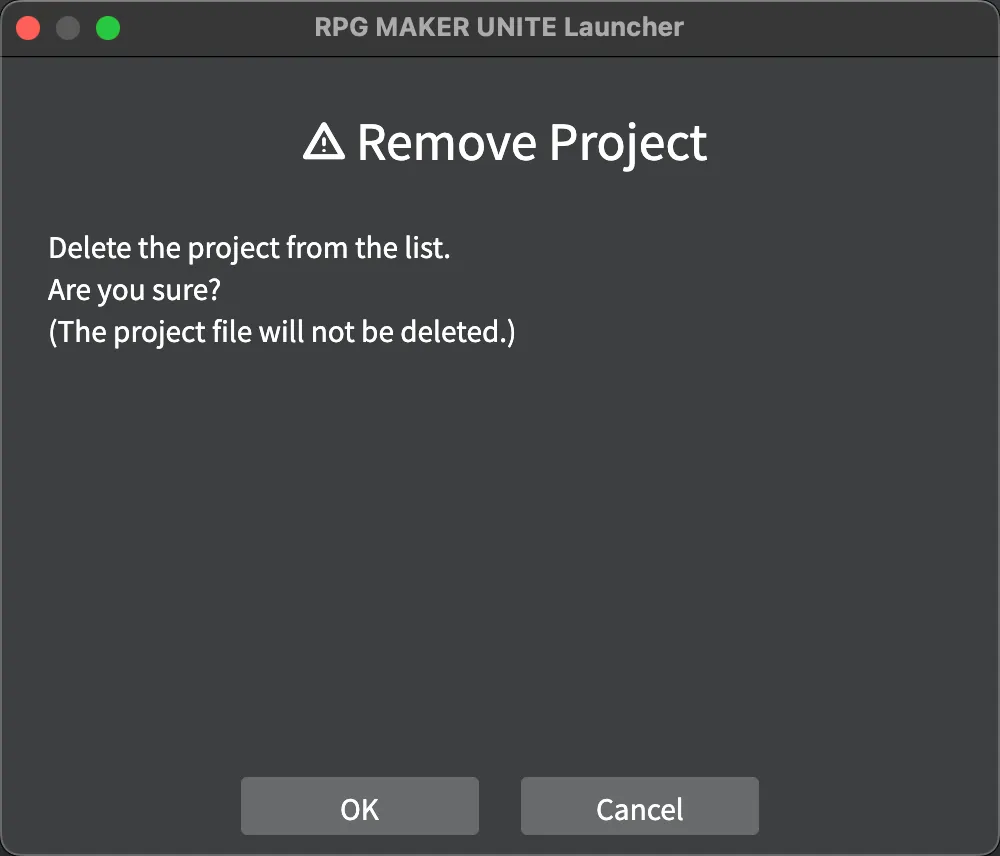
Removing a Project from the List
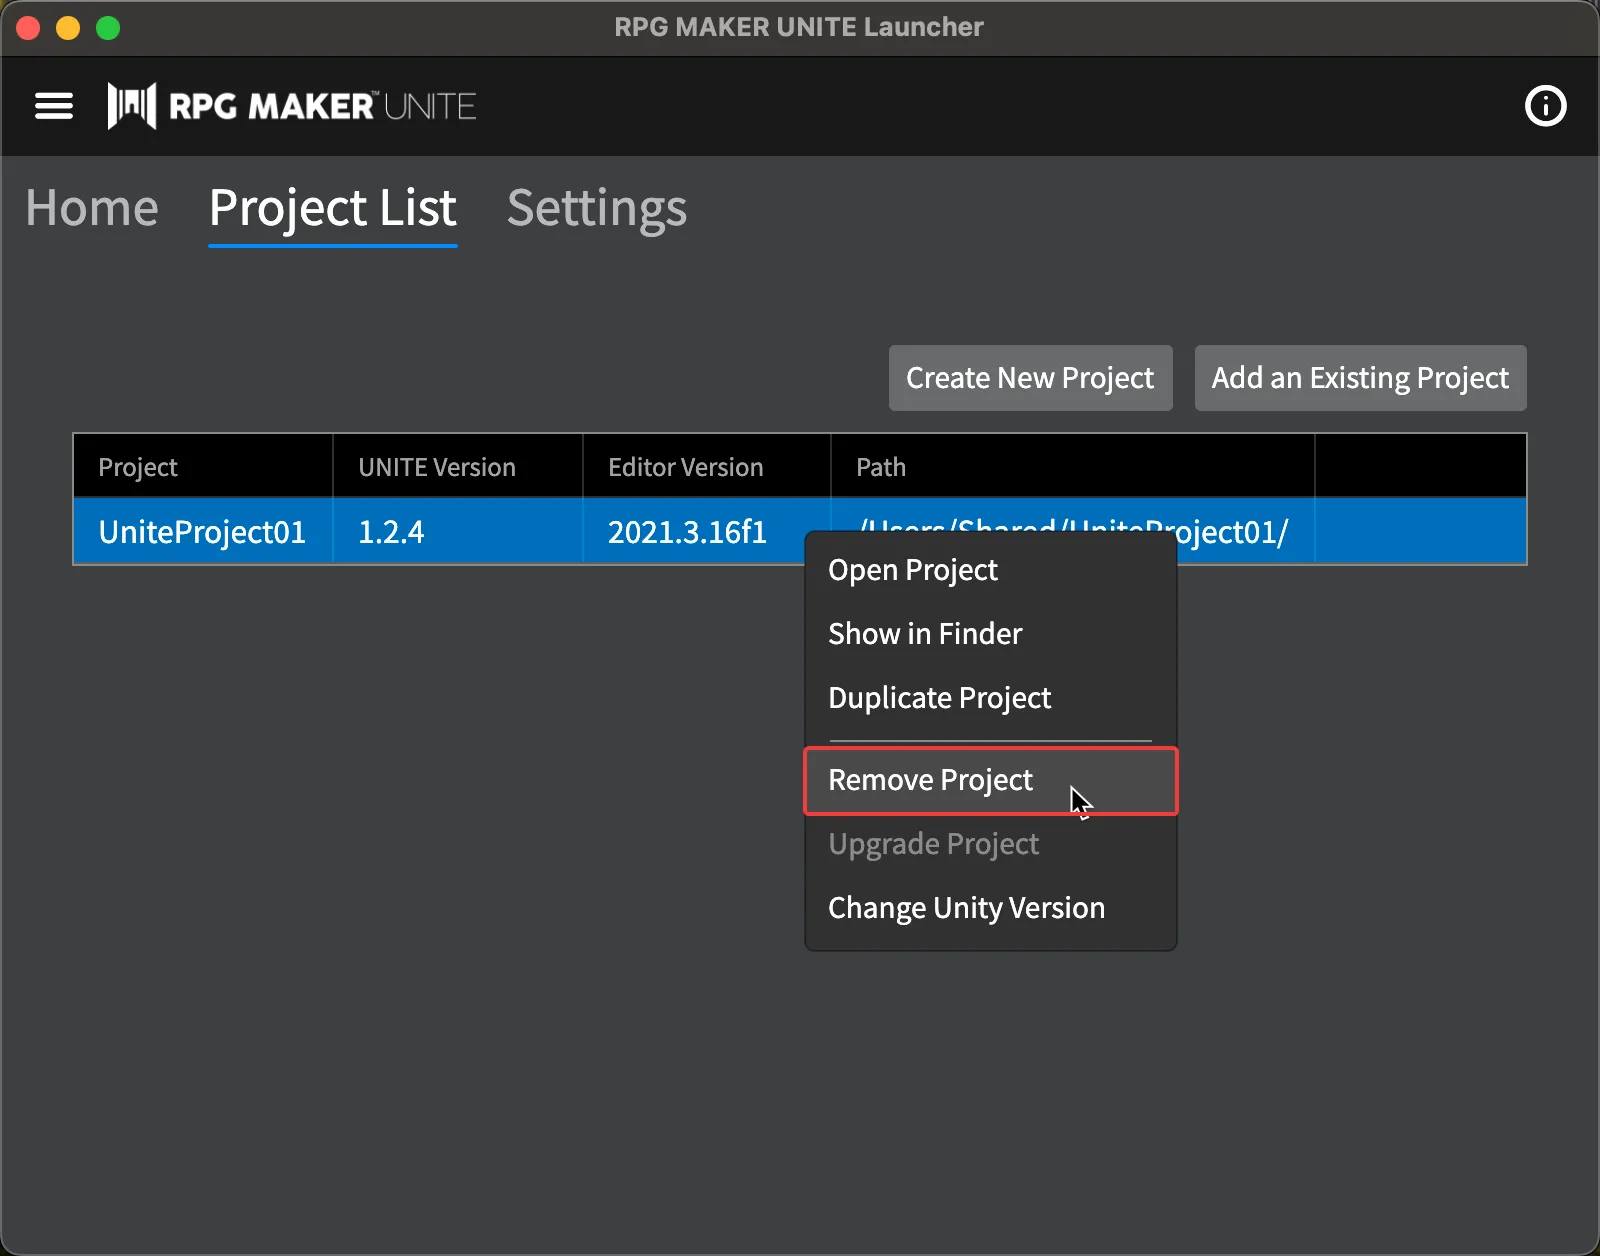
Select a project from the project list, control-click, and click "Remove Project." A dialog will appear.
Adding an Existing Project
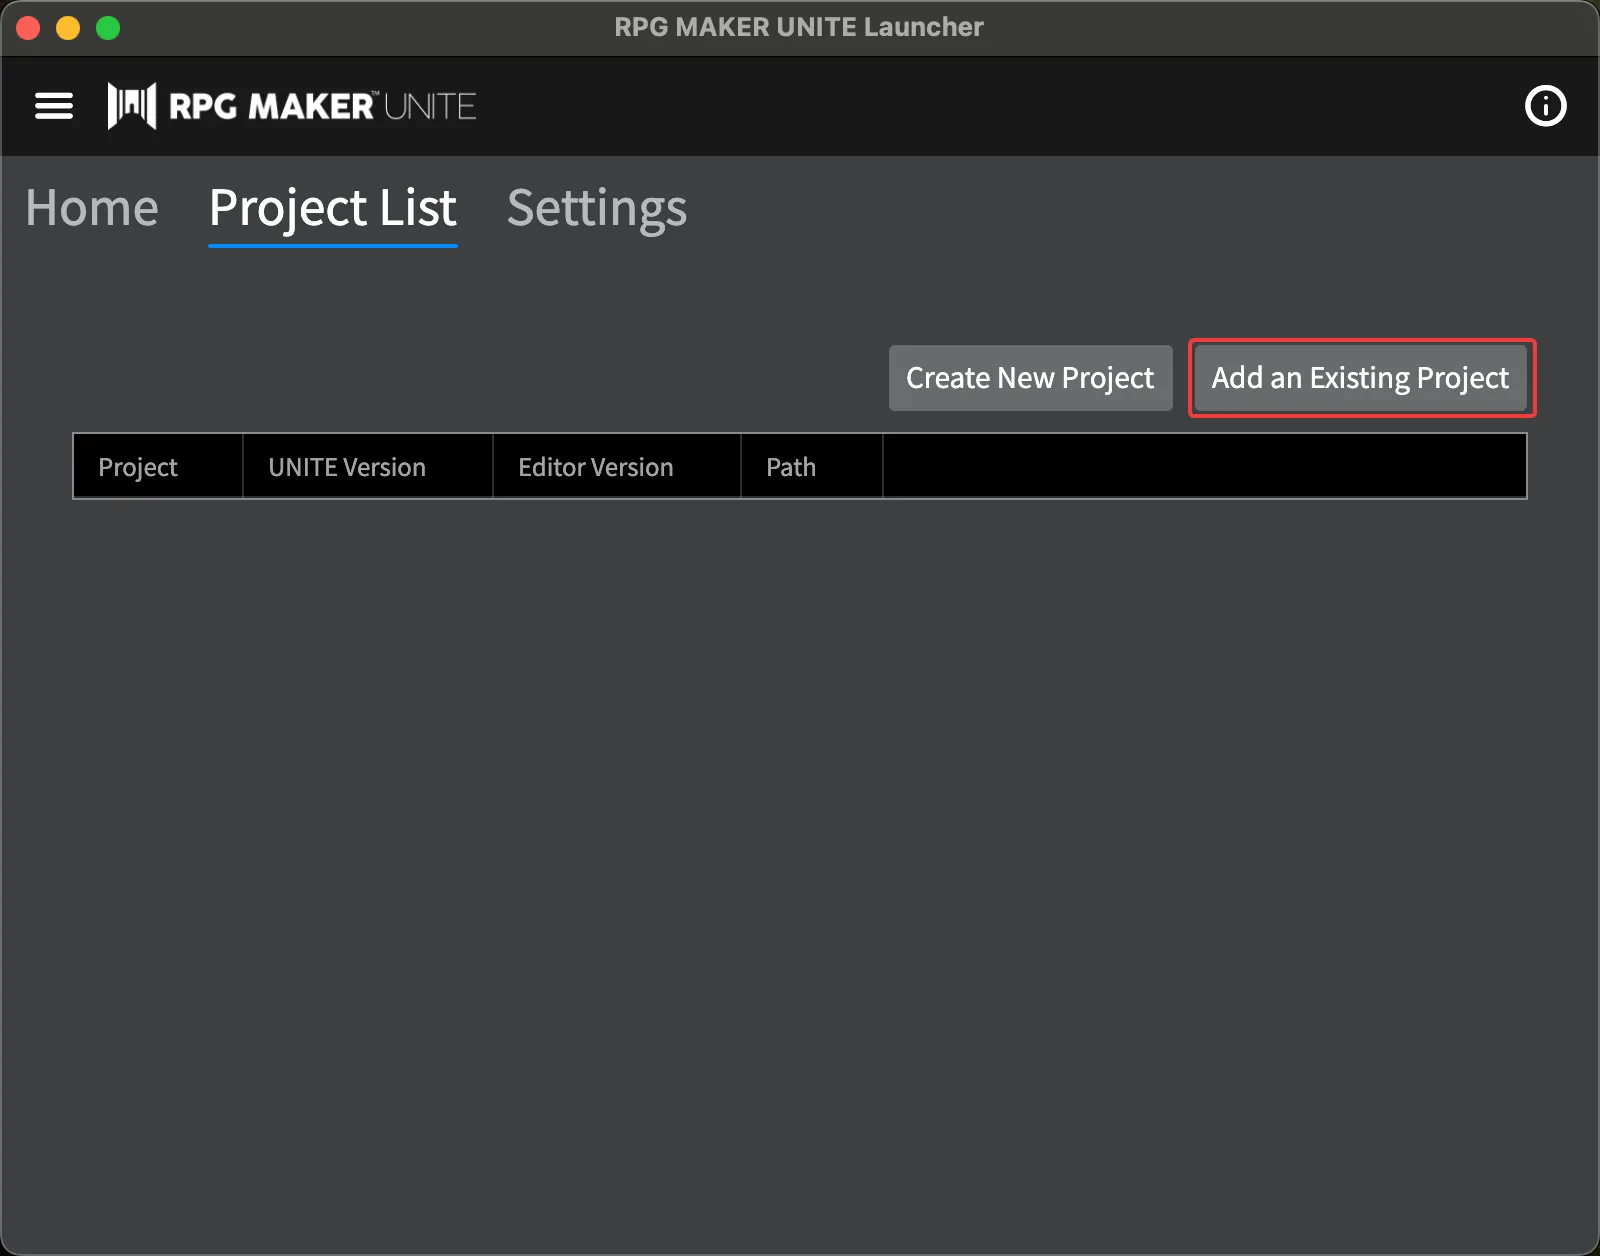
Click "Add an Existing Project." The folder selection screen will appear. Select the project folder.
Backing Up a Project
You can create a backup copy of a project. Ensure sufficient storage space is available when creating a backup.
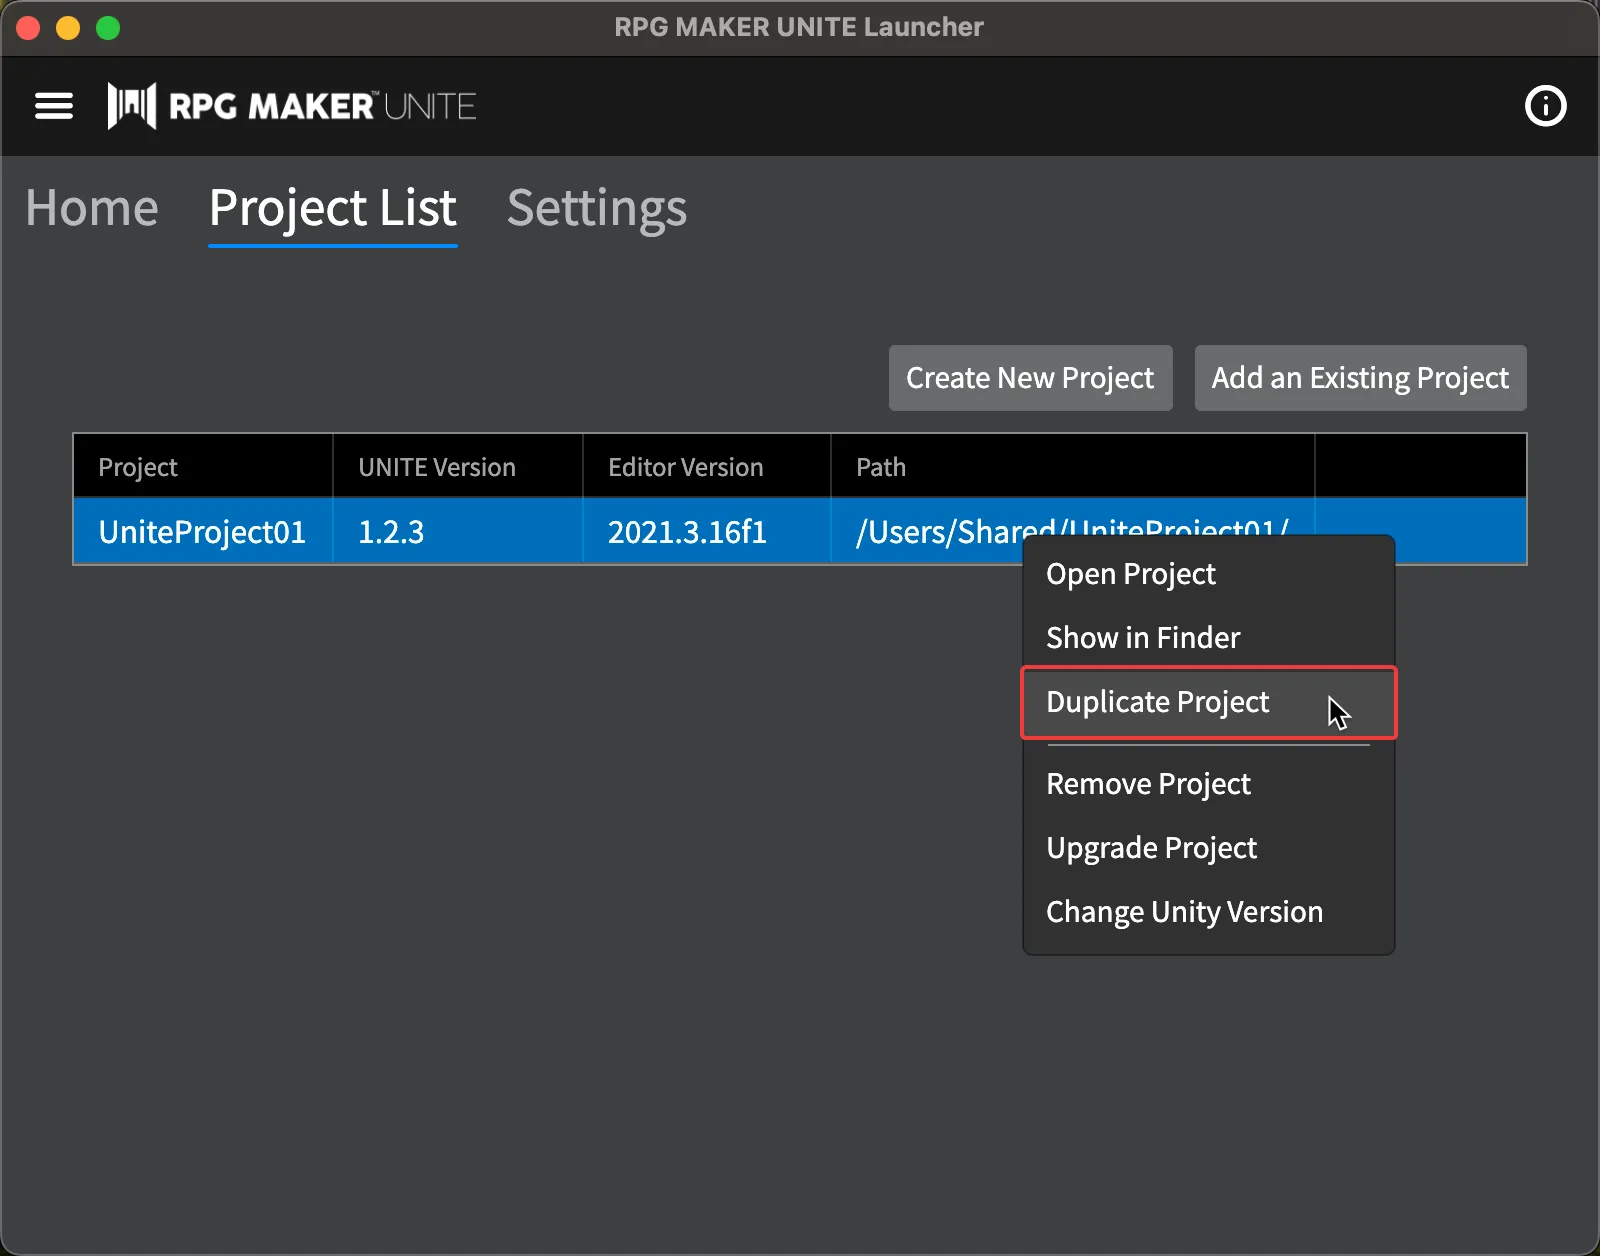
Select a project from the project list, control-click, and click "Duplicate Project." The folder selection screen will appear. Select the destination folder for the backup. A dialog will appear.

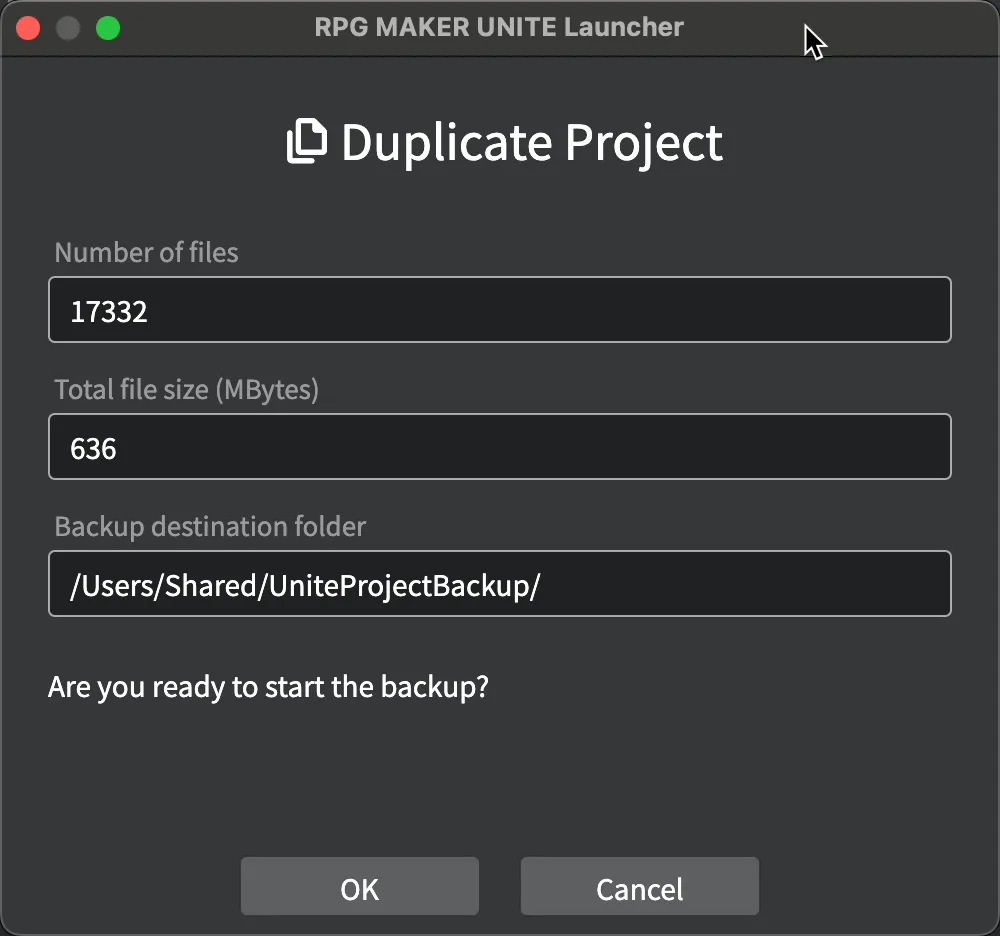
Click "OK" to start the backup process. Once the backup is complete, the backup project will be added to the project list.
Updating a Project
If a new version of UNITE is available, you can apply updates to an existing project.
Notes on Updates
When updating a project, please keep the following in mind:
- Updates fix bugs and add features to UNITE.
- Changes in UNITE may alter the behavior of your completed game.
- If the Unite Launcher is closed during the update, the project may become corrupted.
- If you have made direct modifications to UNITE, those changes may be overwritten during the update. Please be especially careful.
- It is recommended to create a backup or use version control to ensure recoverability before updating.
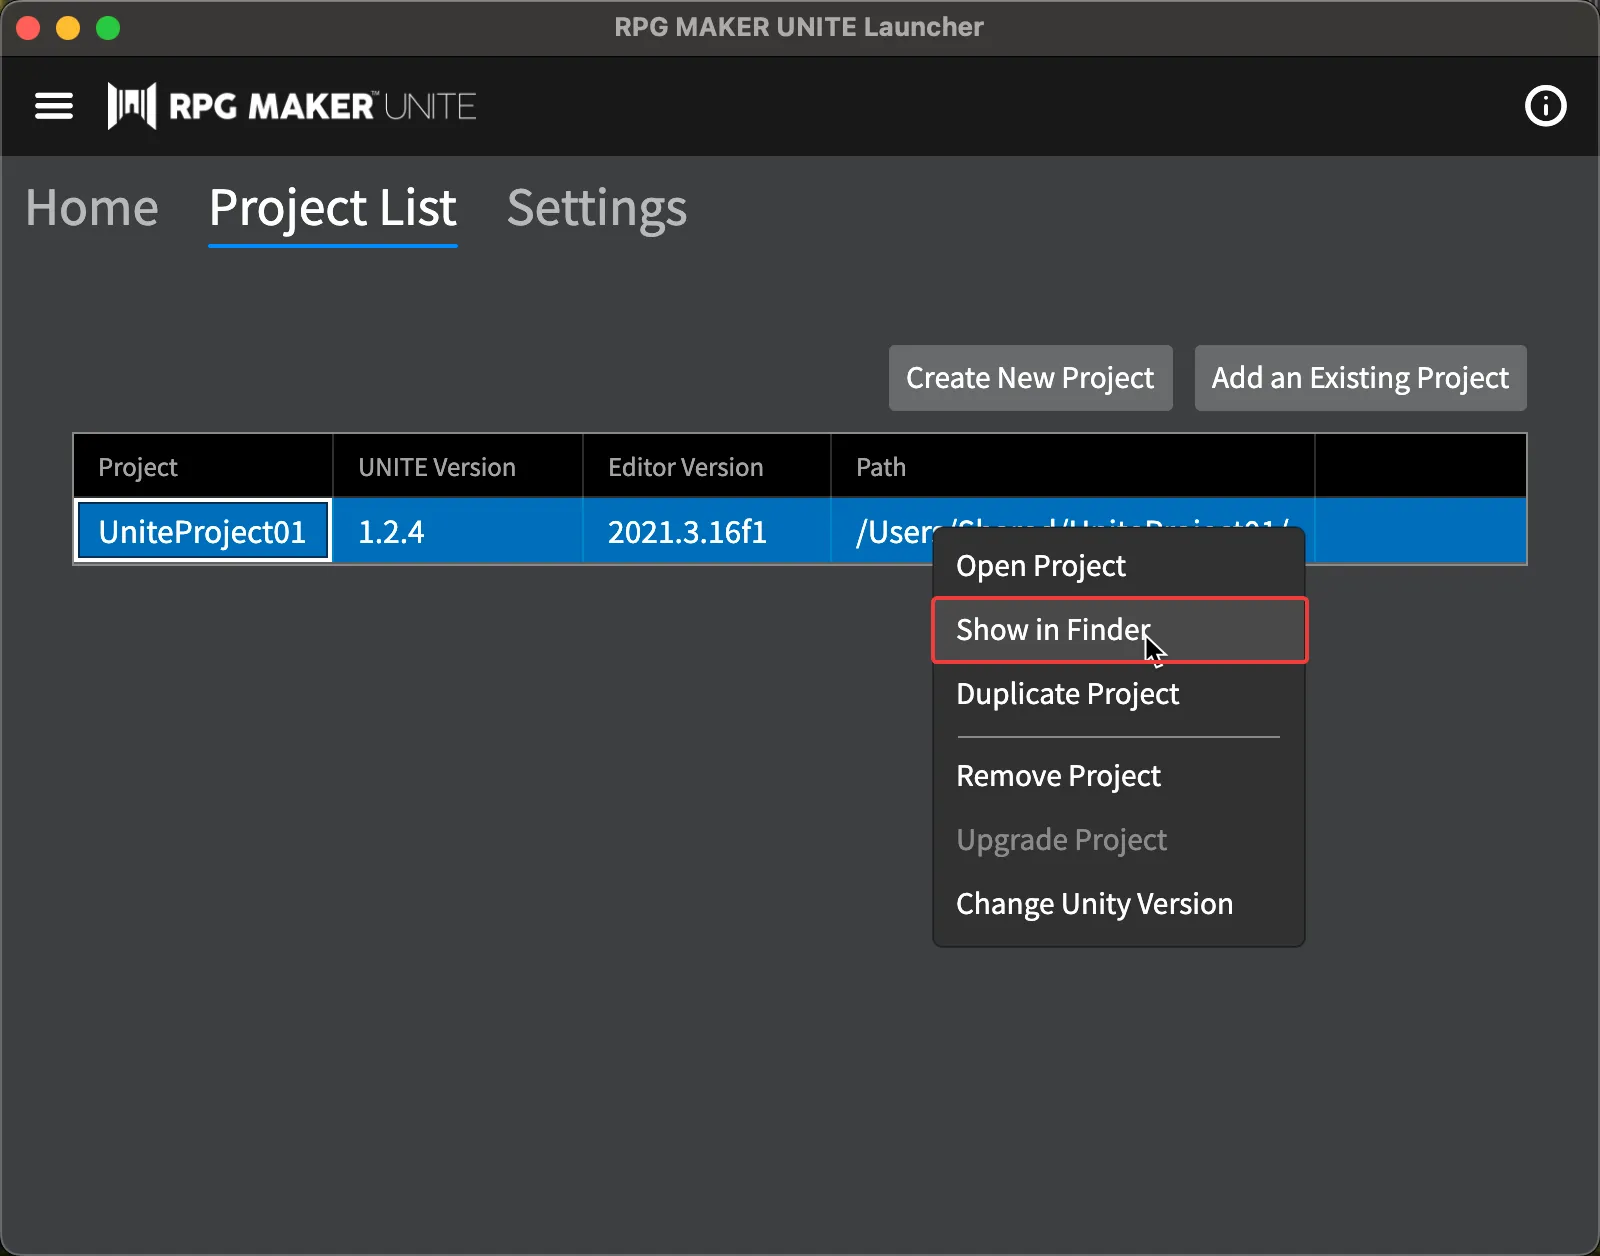
Once you are ready, control-click on the project and select "Upgrade Project"
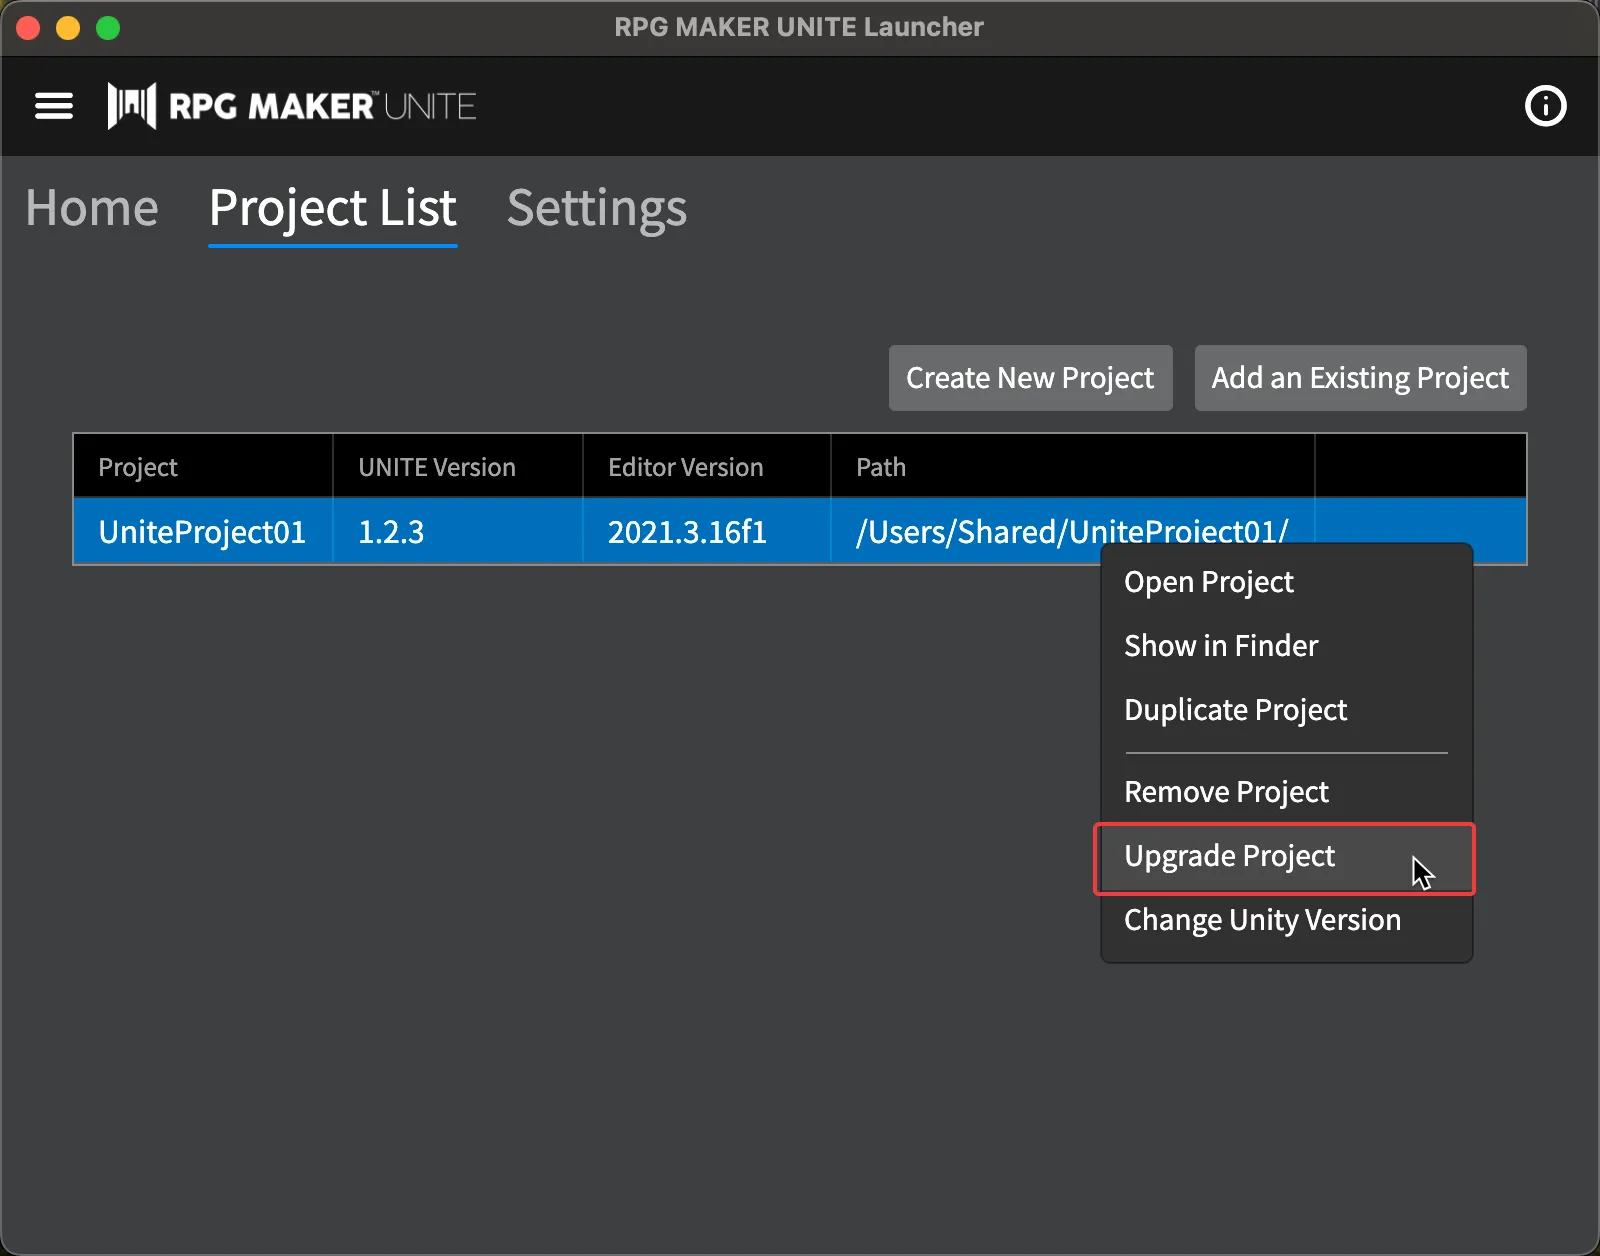
If the project is already using the latest version of UNITE, the "Upgrade Project" option will not be available. For projects that can be updated, the following screen will appear:

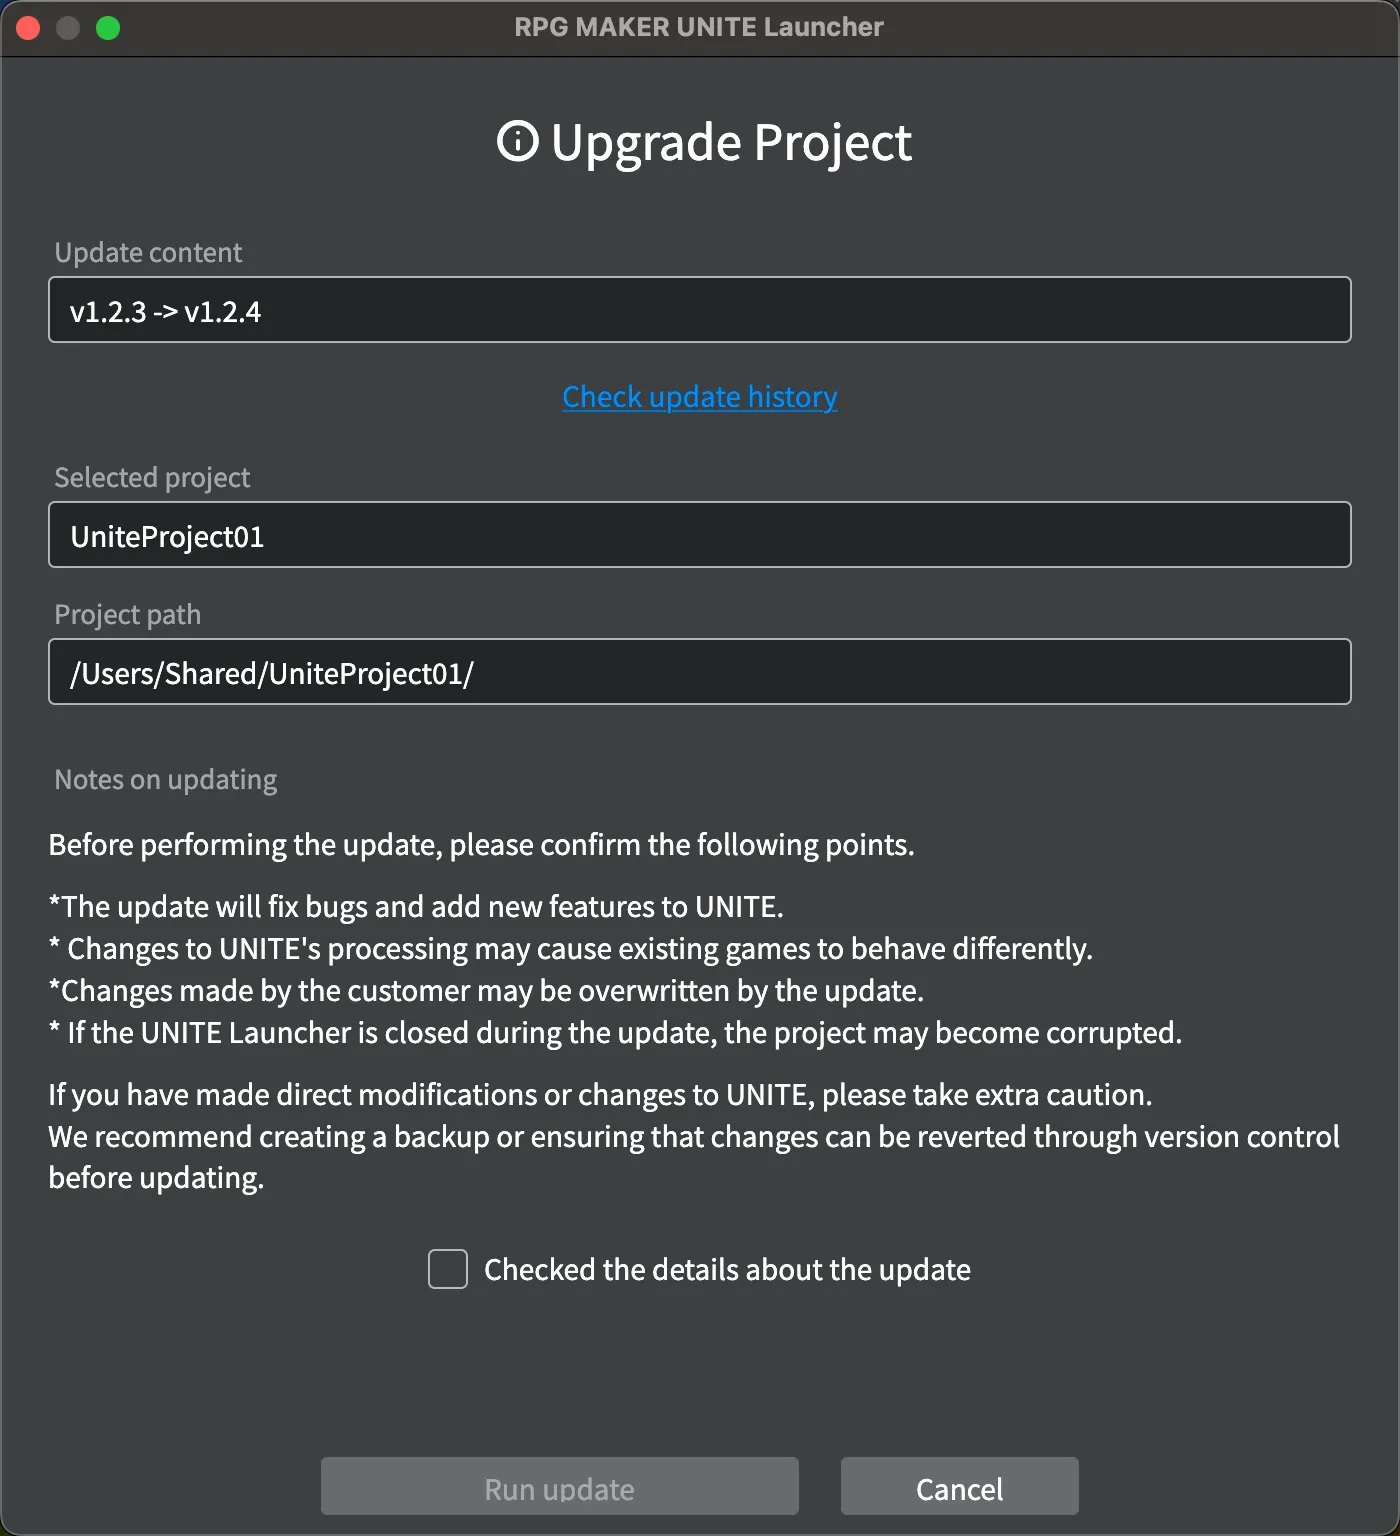
Review the notes carefully, check the box if there are no issues, and select "Execute Update." The update process will begin, and the version of UNITE included in the project will be updated.
Opening the Project Folder
Use this feature if you want to directly check the project. You can open the folder containing the project's Assets folder directly in Finder.
This feature does not make any changes to the project.